

Odoo Google Tag Manager розширене відстеження конверсій
| Ціна: Платно |
Опис
На веб-сайтах Odoo це рішення надає зручні інструменти, дає змогу використовувати події електронної комерції (view_item, add_to_cart, begin_checkout, purchase тощо) та надсилати дані про товари й хешовані дані користувачів для розширених конверсій і динамічних значень. Модуль дозволяє налаштовувати події відстеження через інтерфейс Odoo без додаткової розробки та мінімізує ручне налаштування на стороні GTM.
| Встановлення |
Odoo Online
Odoo.sh
On Premise
|
|---|---|
| Сумісність |
Community
Enterprise
|
| Технічна назва | website_sale_google_tag |
| Версія | 19.0.1.0.2 |
| Ліцензія | OPL-1 |
| Категорія | |
| Підтримка | Допомога з встановленням та підтримка впродовж 60 днів, гарантований багфіксинг впродовж року |
Use Case
Jorem ipsum dolor sit amet, consectetur adipiscing elit. Nunc vulputate libero et velit interdum, ac aliquet odio mattis. Class aptent taciti sociosqu ad litora torquent per conubia nostra, per inceptos himenaeos.
Forem ipsum dolor sit amet, consectetur adipiscing elit. Nunc vulputate libero et velit interdum, ac aliquet odio mattis. Class aptent taciti sociosqu ad litora torquent per conubia nostra, per inceptos himenaeos.
Dorem ipsum dolor sit amet, consectetur adipiscing elit. Nunc vulputate libero et velit interdum, ac aliquet odio mattis.
It is a long established fact that a reader will be distracted by the readable content of a page
Korem ipsum dolor sit amet, consectetur adipiscing elit. Nunc vulputate libero et velit interdum, ac aliquet odio mattis. Class aptent taciti sociosqu ad litora torquent per conubia nostra, per inceptos himenaeos.
Korem ipsum dolor sit amet, consectetur adipiscing elit. Nunc vulputate libero et velit interdum, ac aliquet odio mattis.
Встановлення модуля Odoo
Завантаження модулів
Завантажте модулі з ZIP архіву на ваш сервер, де встановлена Odoo, або в GitHub репозиторій підключений до нього.
Розмістить розархівовані модулі у директорії з кастомними модулями та перезапустить системний сервіс Odoo.
Оновить список модулів
Після перезавантаження активуйте Режим розробника, та перейдіть до меню Додатки.

Натисніть на Оновити список додатків, щоб підтягнути нові модулі до списку.
Інсталяція модуля
Знайдіть модуль за його іменем та натисніть на Активувати, щоб інсталювати його.
* Якщо ви не бачите модуль, спробуйте видалити типовий фільтр Додатки у рядку пошуку.
Налаштування
Дотримуйтесь інструкцій в описі модуля, щоб завершити процес встановлення та почати користуватися застосунком.


Інструкція

Отримання ідентифікатора
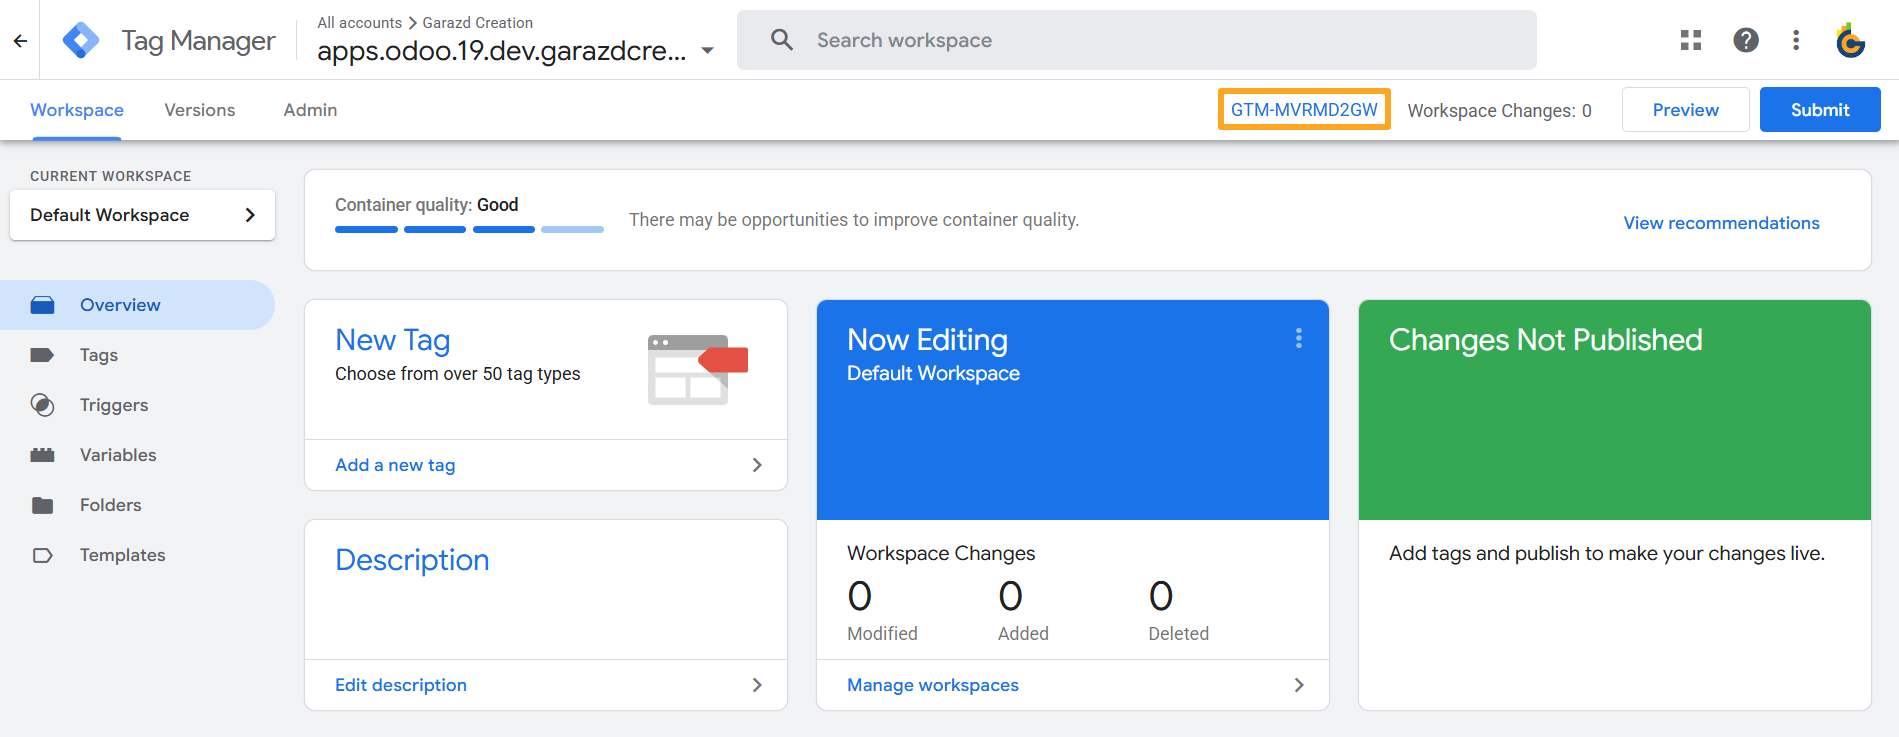
Перед додаванням JS-скрипта на ваш сайт спочатку отримайте ідентифікатор. Для цього авторизуйтесь у акаунт Менеджера тегів Google та скопіюйте Ідентифікатор контейнера:

Активація
Після встановлення модуля перейдіть до налаштувань веб-сайту та в розділі Enhanced Website Tracking увімкніть опцію Activate Tracking. Щоб перевірити відстеження веб-сайту та переглянути події відстеження в консолі браузера, також тимчасово активуйте функцію Debug Logging:


Згода на використання файлів cookie
Модуль сумісний з рішенням Odoo Google Consent Mode, яке дозволяє керувати згодою на використання файлів cookie та оновлювати стан згоди, надсилаючи їх до Google.


Налаштування сервісу відстеження
Модуль дозволяє відстежувати події електронної комерції на вашому сайті та відправляти їх до Google разом із інформацією про товари і наданими користувачами даними. Додатково, ці дані ви можете зберігати у внутрішніх журналах Odoo для аналізу та моніторингу сайту. Ці можливості реалізовані на рівні сервісу відстеження. Додайте та налаштуйте сервіс відстеження для вашого веб-сайту Odoo.
Додавання сервісу відстеження
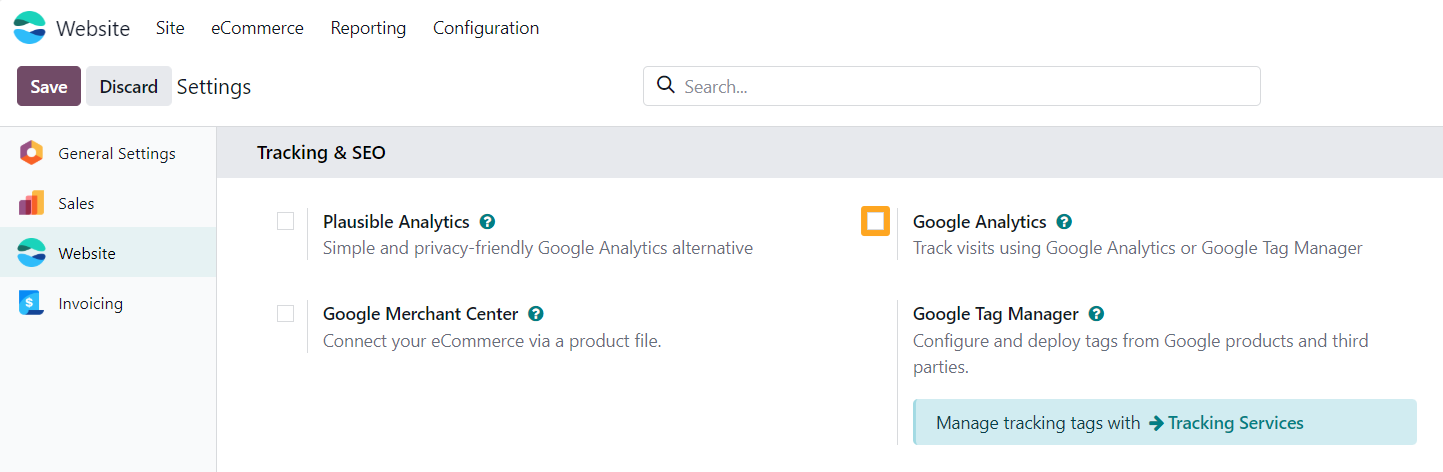
Перейдіть до меню Веб-сайт – Налаштування – Відстеження – Сервіси та натисніть Новий, щоб додати новий сервіс відстеження подій.
Спочатку заповніть наступні поля в новому сервісі відстеження:
- Вкажіть Веб-сайт (якщо використовується кілька веб-сайтів)
- Виберіть Тип сервісу Google Tag Manager
- Вставте ваш Container ID в поле Ключ
Потім вкажіть тип ідентифікатора для товарів та категорію товарів, які надсилаються до Менеджера тегів Google.
Якщо товари мають характеристики та варіанти, виберіть Product Variant ID у полі Item Type, якщо ні, виберіть Product Template ID.
Виберіть бажаний тип категорії: публічну категорію електронної комерції (Public Category) або внутрішню категорію товарів (Product Category).
Наступна опція – Lead Value на вкладці Options.
Це грошова вартість генерації потенційного клієнта, яку слід встановити відповідно до ваших оцінок.
Журнал відстеження
Модуль має функціонал внутрішнього логування подій відстеження. Для активації увімкніть опцію Internal Logs.
Щоб переглянути внутрішні події відстеження, перейдіть до меню Веб-сайт – Налаштування – Tracking – Logs або натисніть кнопку Logs у верхній частині форми.
Список внутрішніх подій відстеження.
Відстеження власних подій в Odoo
Ще однією функцією, пов’язаною з GTM, є можливість налаштовувати власні події в Odoo. В розділі Custom Events сервісу відстеження ви можете додати власну подію та пов’язати її з однією з подій відстеження Odoo.

Розширені конверсії
Розширені конверсії оптимізують ваші рекламні оголошення, надаючи Google дані про користувачів. Відкрийте вкладку Advanced Matching та натисніть кнопку Allow Enhanced Conversions, яка дозволяє увімкнути всі доступні опції для цього сервісу відстеження.

Використовуйте значення Sale Order Partner для джерела даних клієнта, оскільки воно надає більше інформації про користувача у випадку, якщо відвідувачам сайта дозволяється здійснювати покупки без реєстрації:

Розширені налаштування
Рішення містить додаткові налаштування, які доступні в режимі розробника.
Ідентифікатор товару
Модуль використовує поле Product ID як унікальний ідентифікатор товару. Якщо потрібно використовувати інше значення, то на вкладці Technical вкажіть інше поле товару, яке містить бажаний ідентифікатор:

Покупка на порталі
Для відстеження покупок на порталі увімкніть опцію Track Purchase on Portal:
Виключити доставку
Наступним параметром, доступним для сервісів відстеження, є Exclude Delivery. Коли ця опція увімкнена, рядки доставки з замовлень на продаж не включаються до даних відстеження і не надсилаються через сервіс:
Виключити винагороди
Щоб виключити рядки замовлення з винагородою з даних відстеження увімкніть опцію Exclude Reward:
Додавання в кошик
За замовчуванням відстежується фактичне додавання товару до кошика. Якщо бажано відстежувати подію під час натискання кнопки, не чекаючи фактичного додавання товару до кошика, то виконайте такі дії:
- Перейдіть до меню Веб-сайт — Налаштування — Веб-сайти
- Відкрийте сайт на вкладці Enhanced Tracking
- Увімкніть опцію Add to Cart on Click

Покупка
Для відстеження покупки лише після успішної платіжної операції, увімкніть опцію Track Confirmed Purchases only:

Якщо за вашою бізнес-логікою покупкою можна вважати замовлення зі статусом оплати В очікуванні, то увімкніть також опцію Track Pending Purchases too.

Тестування
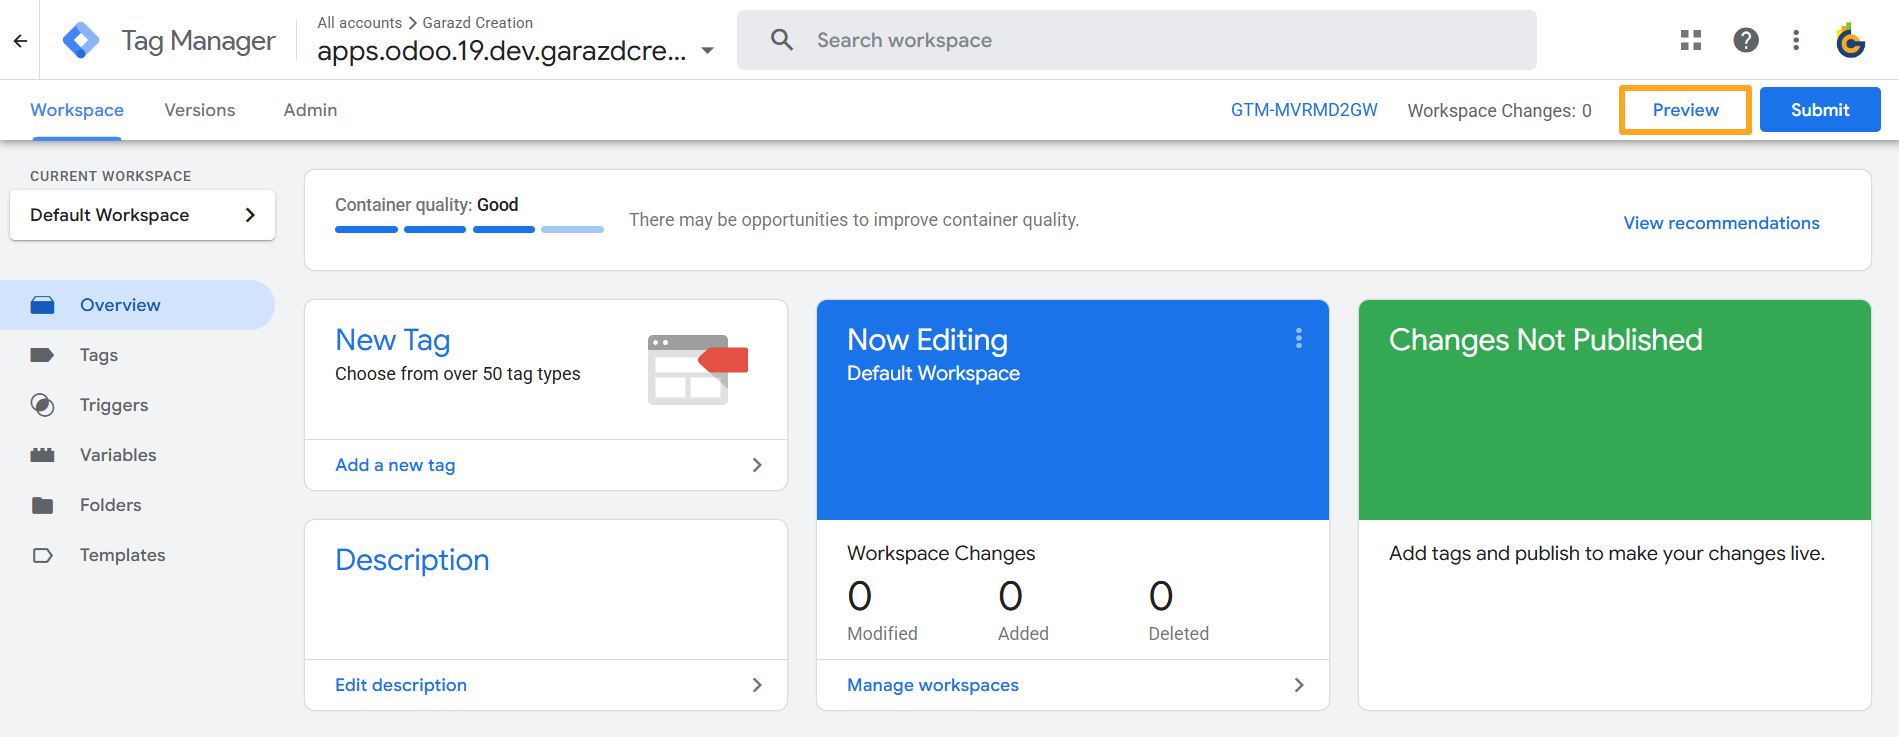
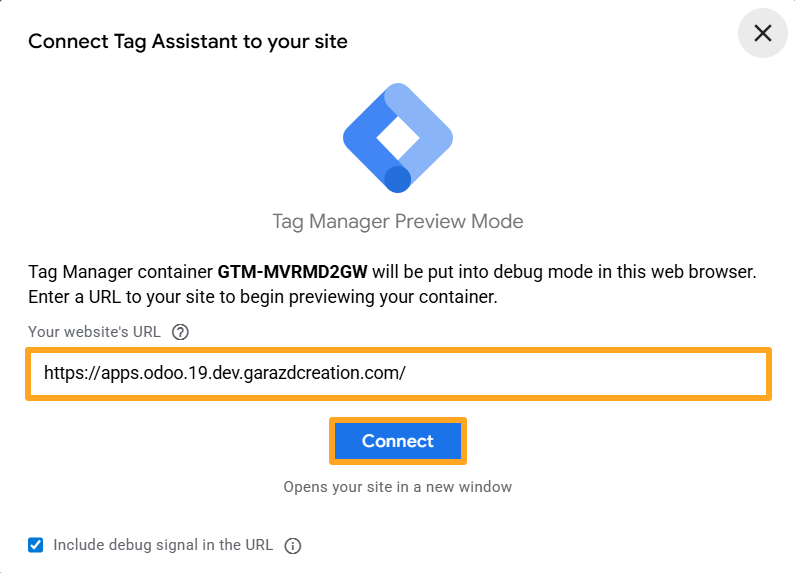
Для перевірки GTM скрипта відстеження вебсайта використовуйте Google Tag Assistant. Для цього натисніть Попередній перегляд:
Далі введіть URL вашого веб-сайту Odoo та натисніть Підключити.

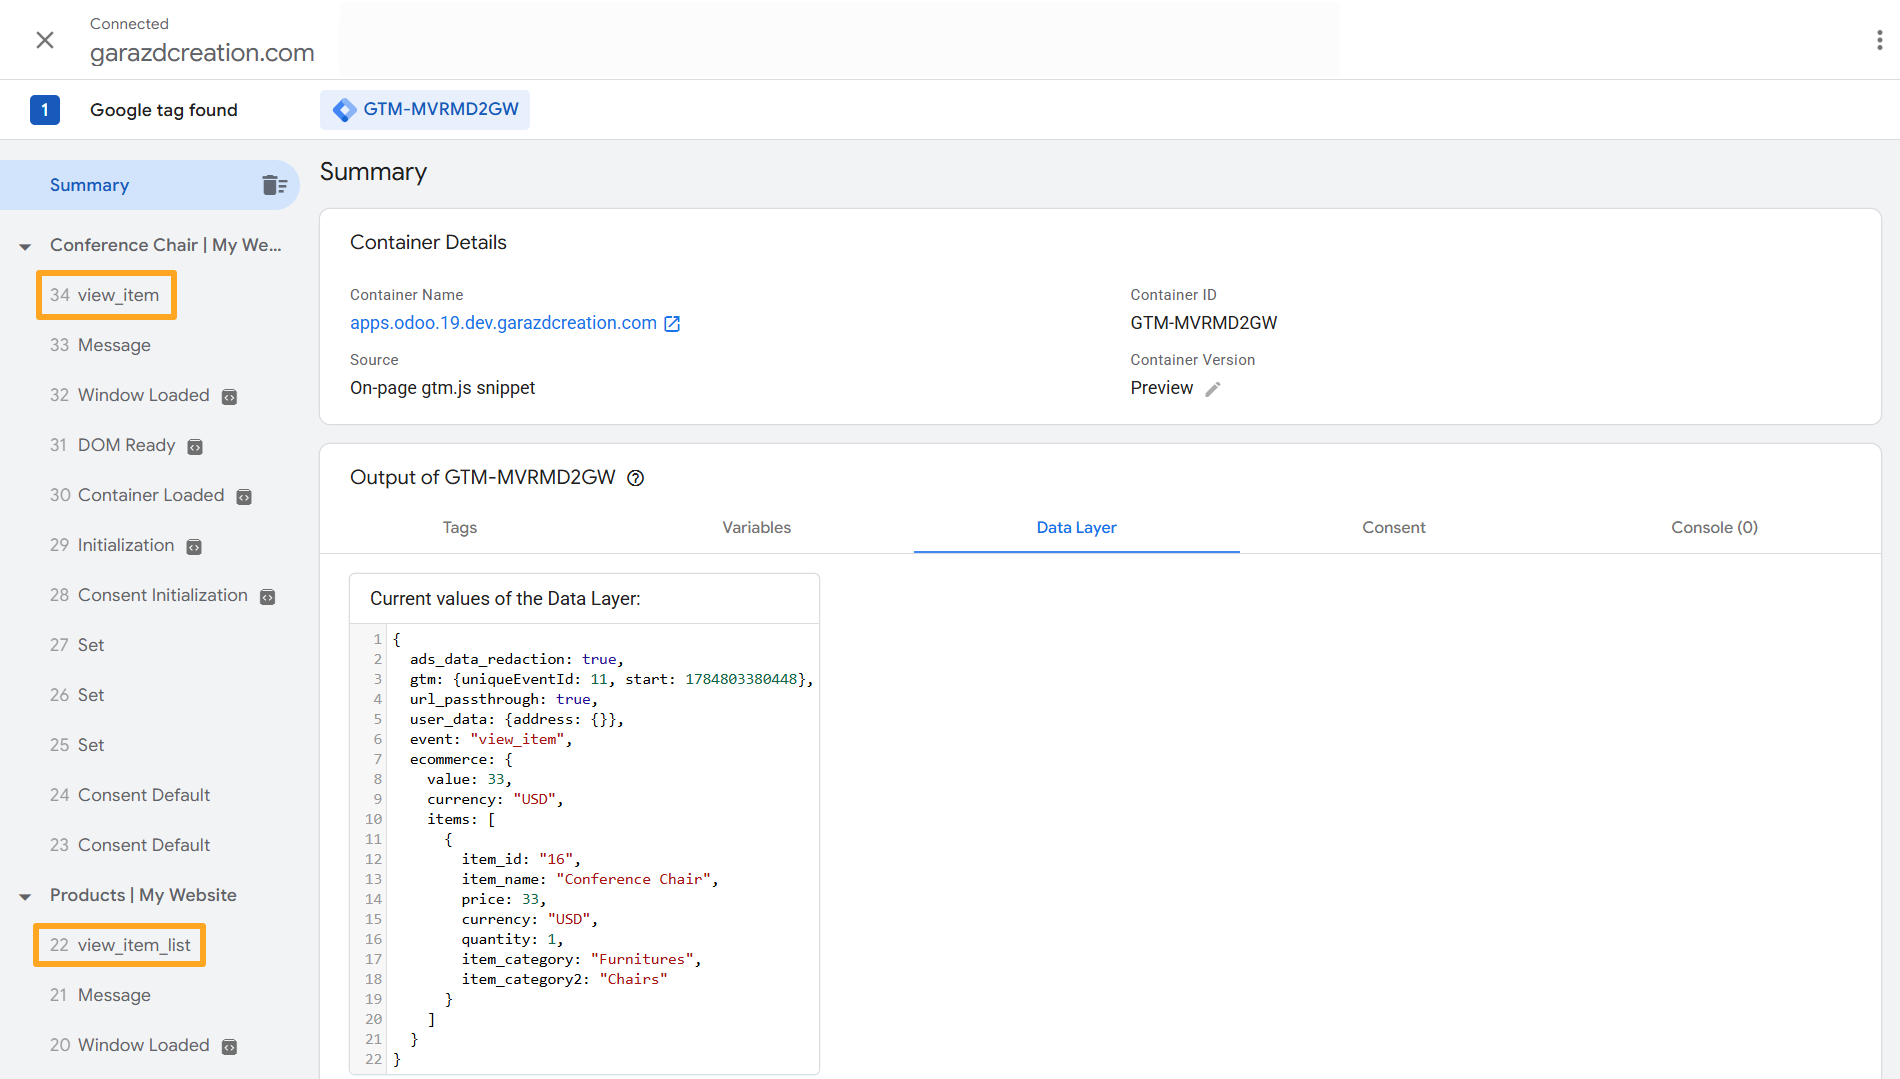
Виконайте кілька дій, пов’язаних з електронною комерцією, на своєму веб-сайті Odoo та перегляньте звіт у Google Tag Assistant.

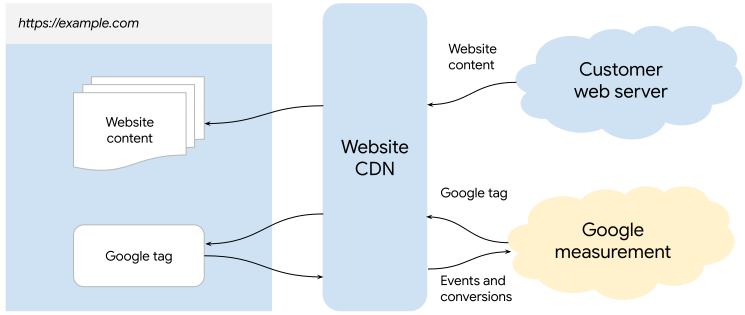
Режим First-party від Google
Режим Google First-party дозволяє налаштувати теги Google на вашому веб-сайті Odoo, завдяки чому скрипти Google завантажуватимуться з ваших серверів тегування або CDN замість серверів Google:
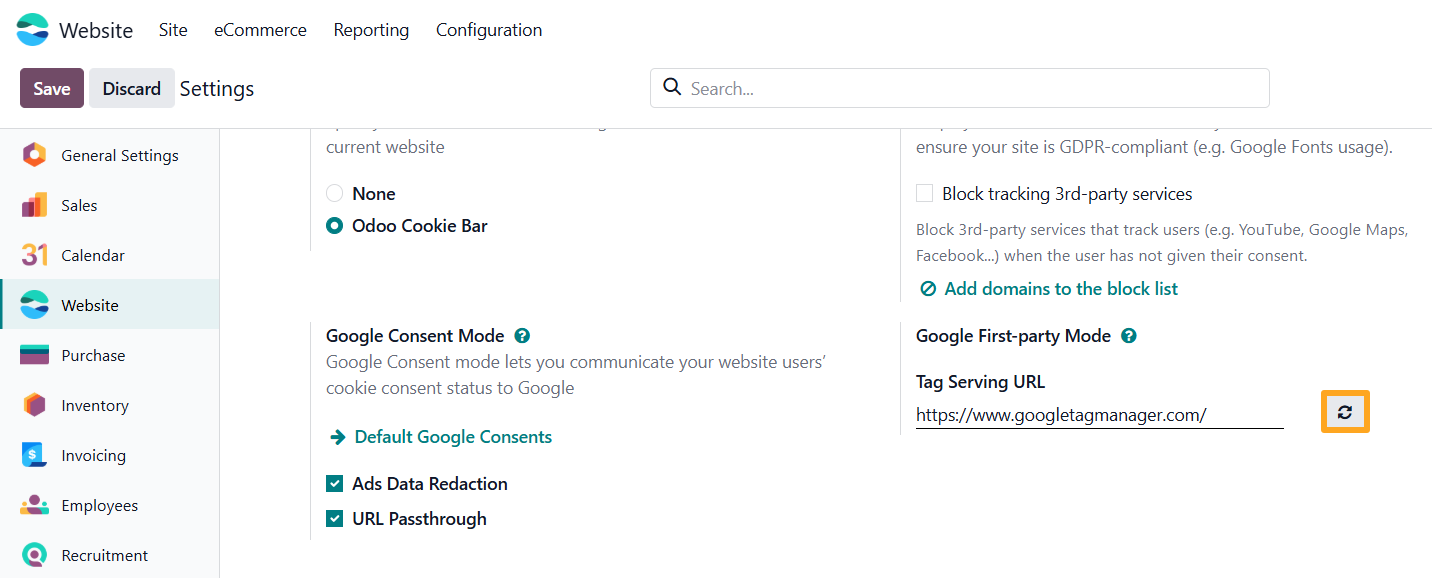
Модуль дозволяє вказати власну URL-адресу для розміщення тегів Google. Перейдіть в налаштування веб-сайту і в розділі Tracking and SEO змініть URL-адресу розміщення тегів:
Після збереження налаштувань вийдіть з Odoo та відкрийте вихідний код сторінки вашого веб-сайту, щоб переглянути результат:

Щоб відновити URL-адресу тегів Google за замовчуванням, натисніть кнопку праворуч:

Список змін
16.0.1.0.1 2025-01-14
- Change the dataLayer calling.
16.0.1.0.0 2024-03-12
- Init version.
17.0.1.0.2 2026-05-25
- Improve getting of the list of allowed settings for user data.
17.0.1.0.1 2024-09-17
- Change the dataLayer calling.
17.0.1.0.0 2024-04-13
- Migration from 16.0.
18.0.1.0.1 2026-05-25
- Improve getting of the list of allowed settings for user data.
18.0.1.0.0 2024-10-11
- Migration from 17.0.
19.0.1.0.2 2025-12-29
- Improve getting of the list of allowed settings for user data.
19.0.1.0.1 2025-12-25
- Add a list of allowed user data settings.
19.0.1.0.0 2025-10-11
- Міграція з версії 18.0.
Додаткова інформація


Як налаштувати режим Google First-party в Odoo за допомогою Cloudflare
