

Advanced conversion tracking for Odoo websites via Google Tag Manager
For Odoo websites, this solution provides intuitive tools to capture e-commerce events (view_item, add_to_cart, begin_checkout, purchase, etc.) and to send product details, along with hashed user-provided data for enhanced conversions and dynamic values. The module enables tracking event configuration directly in the Odoo backend, eliminating the need for custom development and minimizing manual setup in GTM.
| Availability |
Odoo Online
Odoo.sh
On Premise
|
|---|---|
| Compatibility |
Community
Enterprise
|
| Technical Name | website_sale_google_tag |
| Version | 20.0.1.0.0 |
| License | OPL-1 |
| Category | |
| Support | Free 60 days support and 360 days bug-fixing |
Use Case

Jorem ipsum dolor sit amet, consectetur adipiscing elit. Nunc vulputate libero et velit interdum, ac aliquet odio mattis. Class aptent taciti sociosqu ad litora torquent per conubia nostra, per inceptos himenaeos.
Forem ipsum dolor sit amet, consectetur adipiscing elit. Nunc vulputate libero et velit interdum, ac aliquet odio mattis. Class aptent taciti sociosqu ad litora torquent per conubia nostra, per inceptos himenaeos.
Dorem ipsum dolor sit amet, consectetur adipiscing elit. Nunc vulputate libero et velit interdum, ac aliquet odio mattis.
It is a long established fact that a reader will be distracted by the readable content of a page
Korem ipsum dolor sit amet, consectetur adipiscing elit. Nunc vulputate libero et velit interdum, ac aliquet odio mattis. Class aptent taciti sociosqu ad litora torquent per conubia nostra, per inceptos himenaeos.
Korem ipsum dolor sit amet, consectetur adipiscing elit. Nunc vulputate libero et velit interdum, ac aliquet odio mattis.
Odoo App Installation
Upload modules
Upload modules from the ZIP archive to your Odoo hosting, or a GitHub repository connected there.
Place the unzipped modules in your custom add-on directory and restart the Odoo system service.
Update App List
After restarting, activate the Developer Mode, and go to the Apps menu.

Click on Update Apps List to fetch the new modules in the list.
Activate the App
Install the new module, finding it by name and clicking on the Activate button.
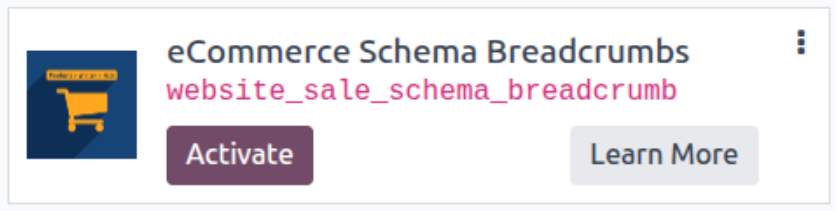
* If you don't see the module, try to remove the default Apps filter from the search bar.
Configuration
Follow the instructions in the module description to complete the installation process and start using the app.
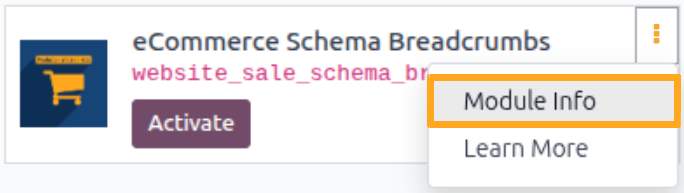

Manual

Obtaining the Identifier
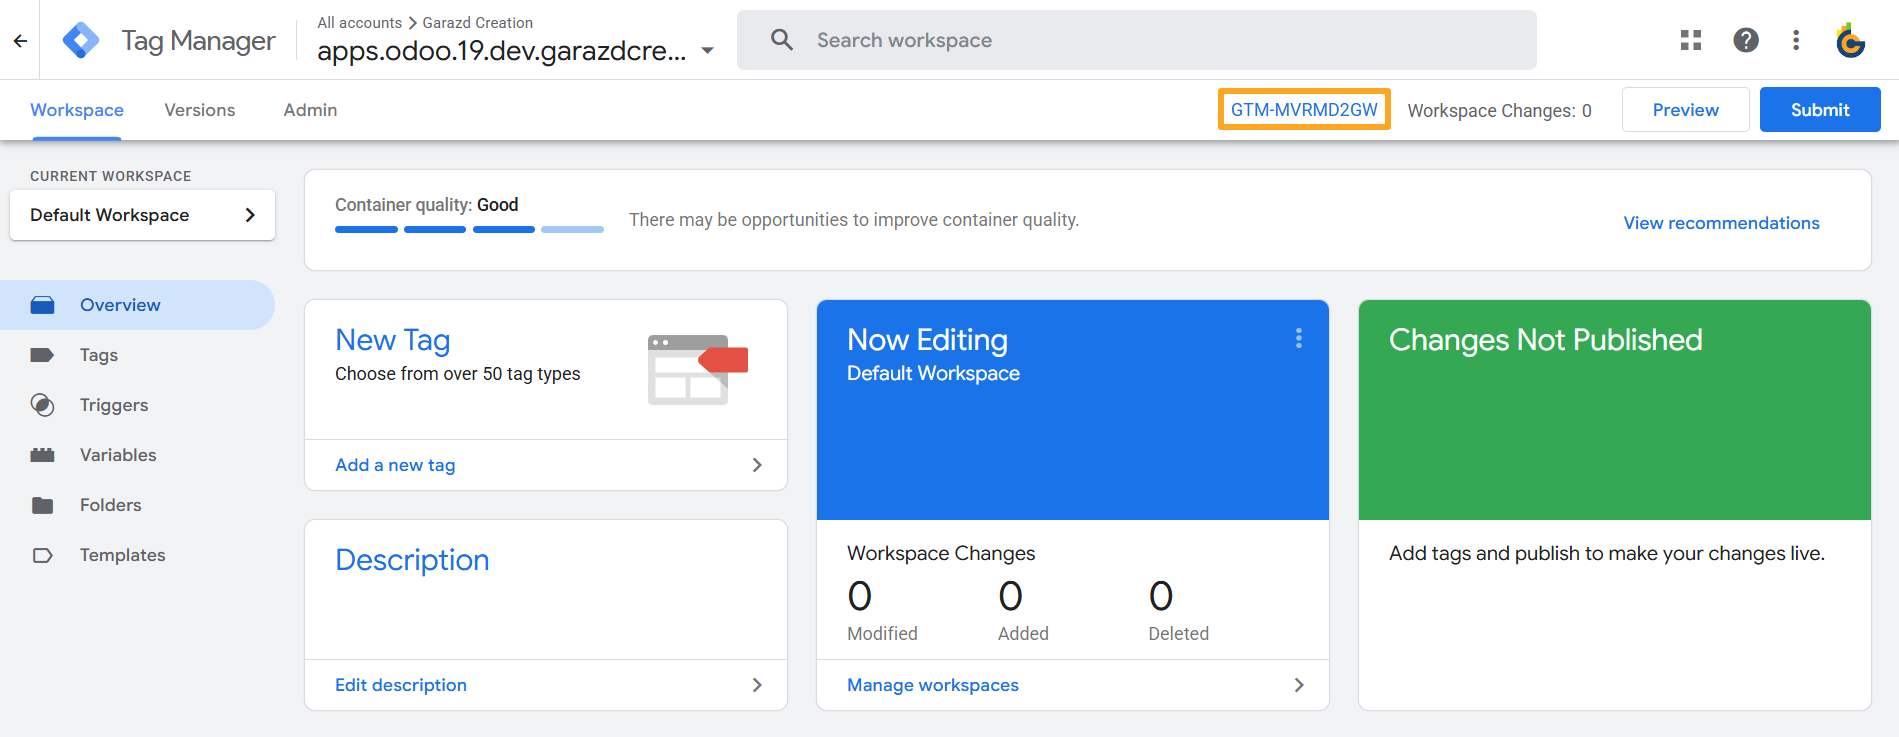
Before adding the JS script to your website, first obtain the identifier. To do this, log in to your Google Tag Manager account and copy the Container ID:

Activation
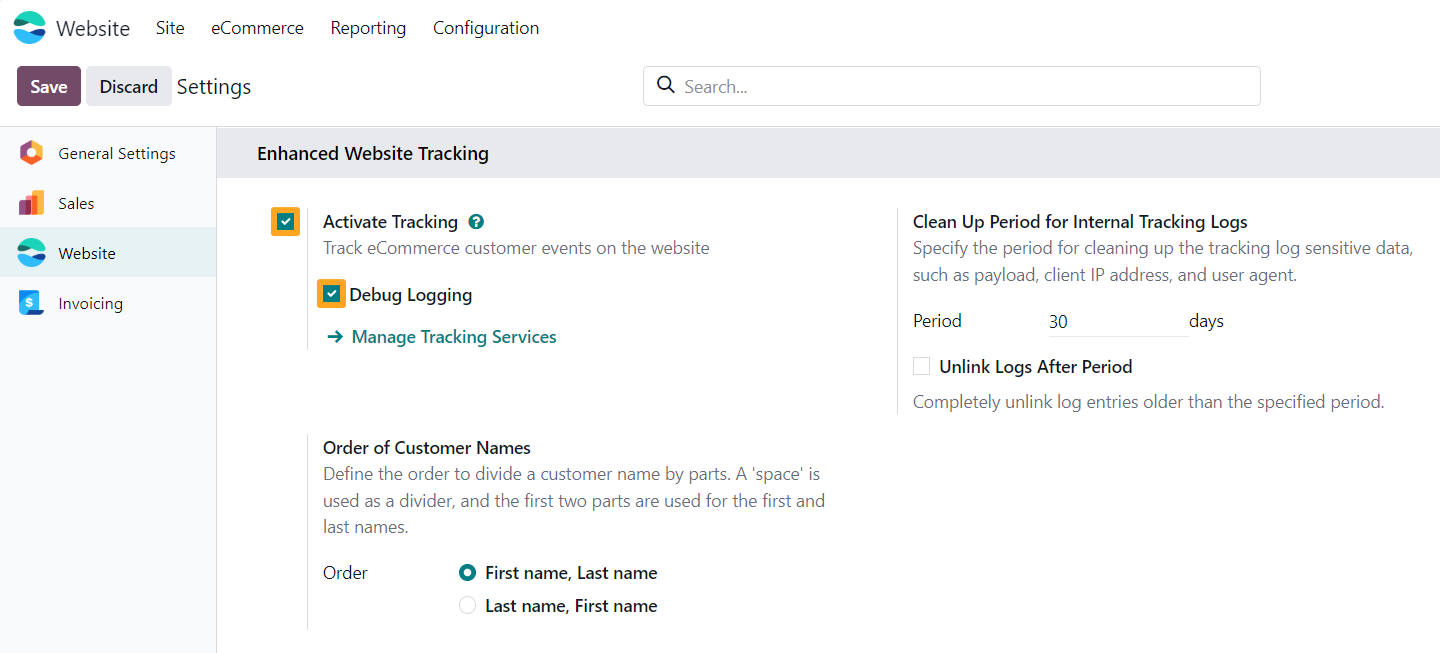
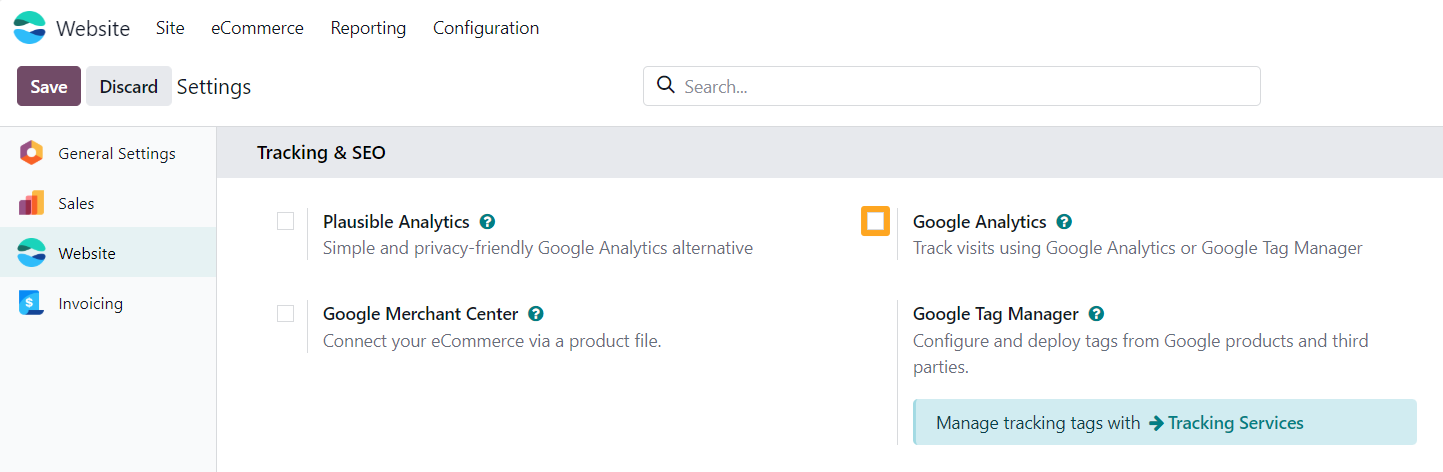
After installing the app, go to the website settings and, in the Enhanced Website Tracking section, enable the Activate Tracking option. To test your website tracking and view tracked events in the browser console, also temporarily activate the Debug Logging feature:


Cookie Consent
The module is compatible with the Odoo Google Consent Mode solution, which allows managing cookie consent and updating consent states by sending them to Google.


Configuration
The module allows you to track e-commerce events on your website and send them to Google along with product information and user-provided data. Additionally, you can store this data in internal Odoo logs for website analysis and monitoring. These features are implemented at the tracking service level. Add and configure a tracking service for your Odoo website.
Adding a Tracking Service
Go to the Website — Configuration — Tracking — Services menu and click New to add a new tracking service for your Odoo website.
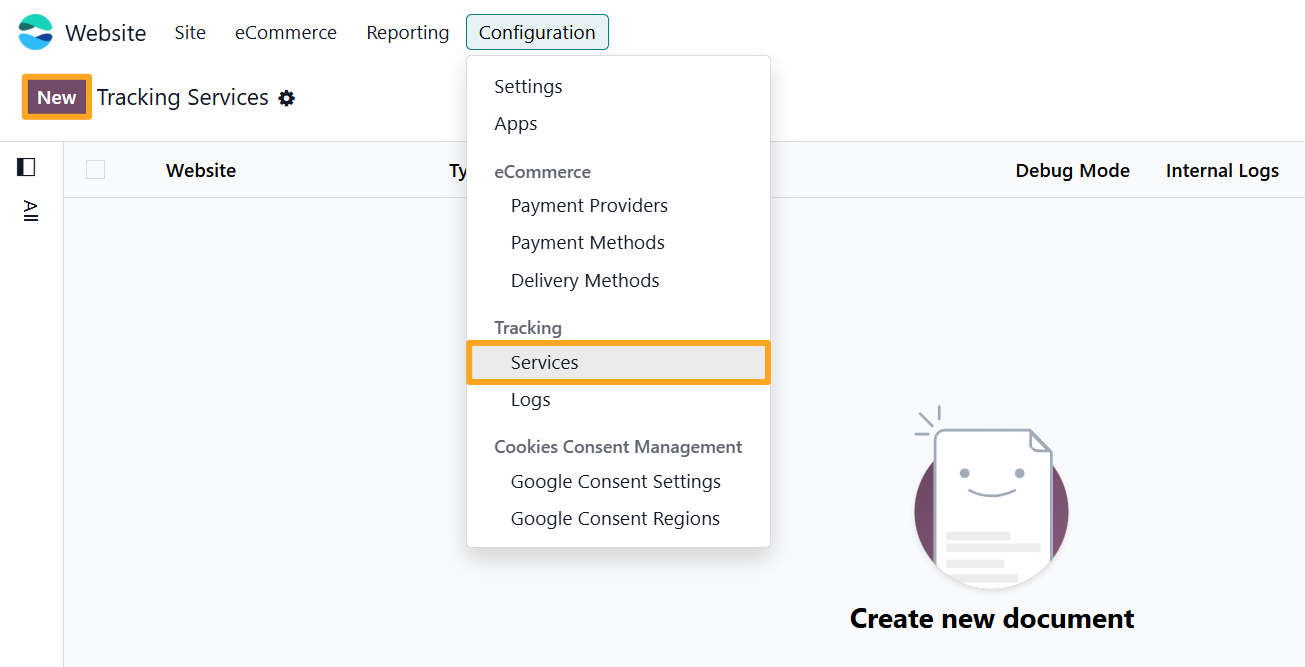
Firstly, fill in the following fields in the new tracking service:
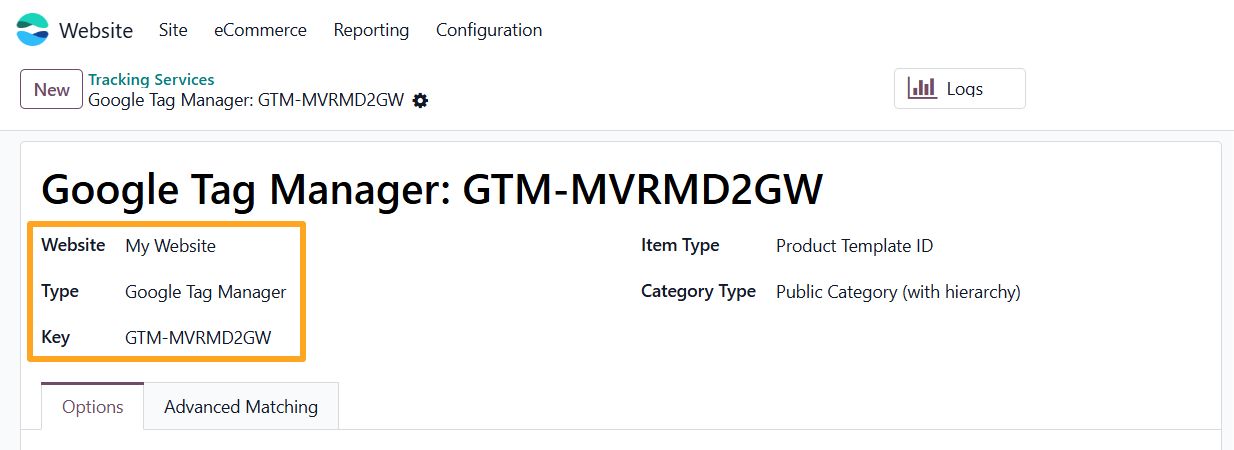
- Specify a Website (if using multiple websites)
- Select Google Tag Manager as the service Type
- Paste your Container ID into the Key field
Then, specify the type of product identifier and product category sent to Google Tag Manager.

If products have attributes and variants, choose Product Variant ID in the Item Type field; otherwise, select Product Template ID.
Select the desired Category Type: an eCommerce Public Category or an internal Product Category.
The next option is the Lead Value on the Options tab.
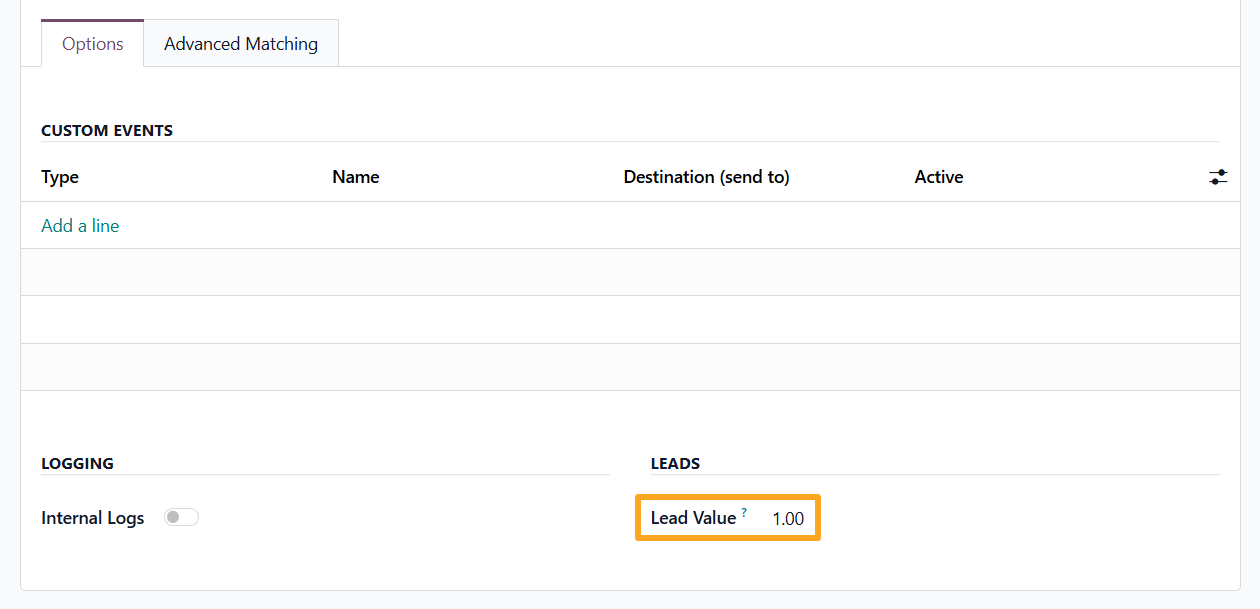
This field represents the monetary value of a lead generation, based on estimated evaluations.
Tracking Logs
The module includes an internal logging feature. To activate it, enable the Internal Logs option.
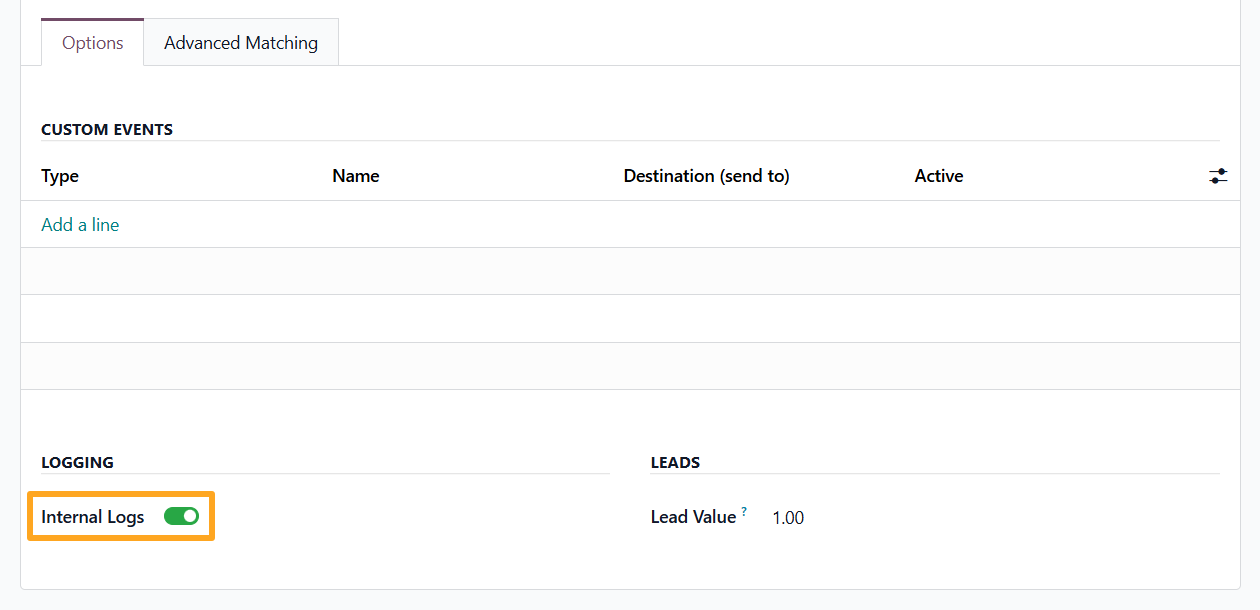
To view logs, go to the Website – Configuration – Tracking – Logs menu or click the Logs button at the top of the form.

The list of internal tracking events is below.
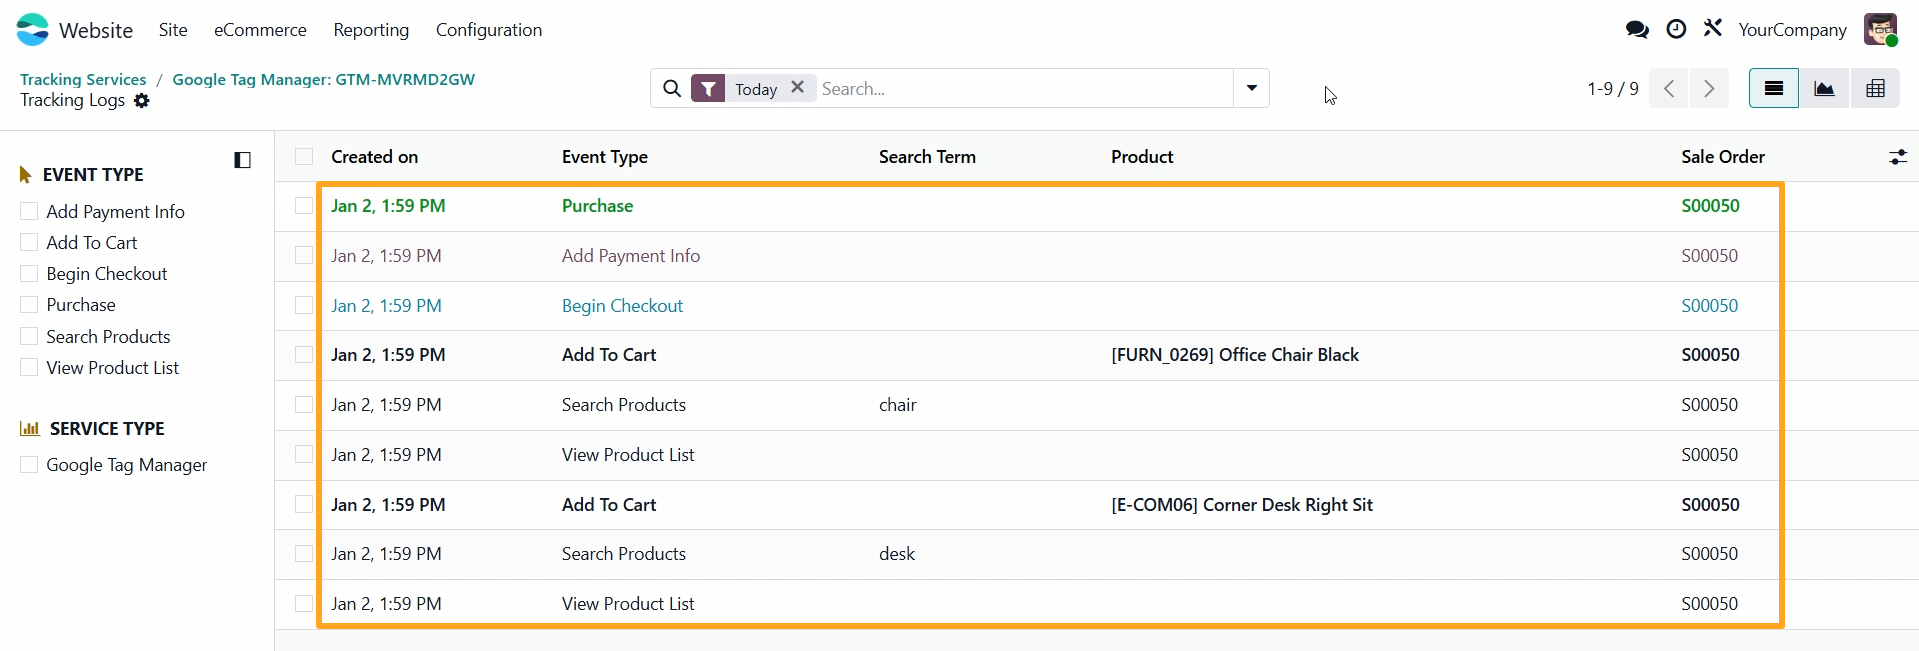
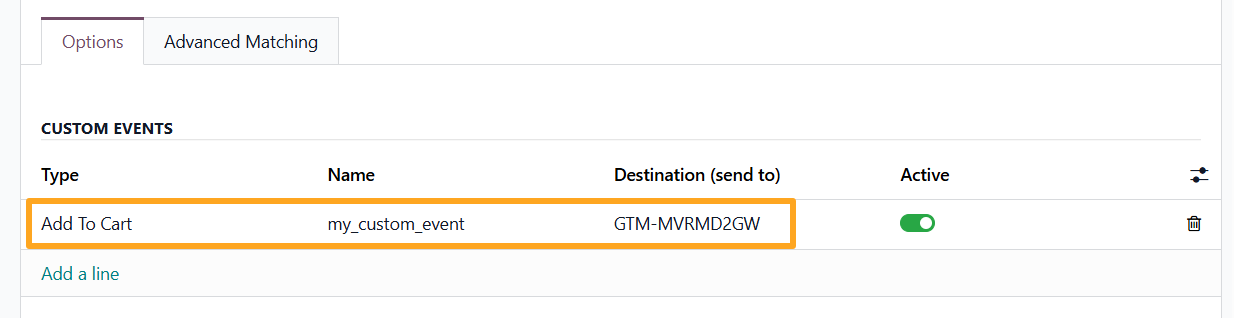
Custom Event Tracking in Odoo
Another GTM-related feature is the ability to configure custom events in Odoo. In the Custom Events section of the tracking service, you can add a custom event and link it to one of the Odoo tracking events.

Enhanced Conversions
Enhanced conversions help optimize your advertisements by providing Google with additional user data. Open the Advanced Matching tab and click Allow Enhanced Conversions, which enables all available options for this tracking service.
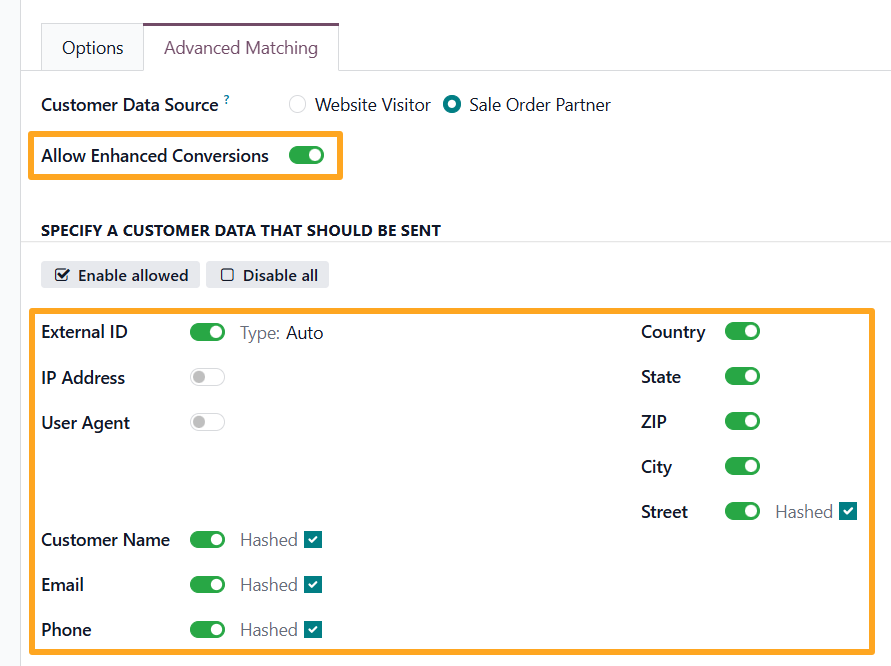

Use the Sale Order Partner value as the Customer Data Source because it provides more user details when guest checkouts are allowed without registration.


Advanced Settings
The module includes additional settings available in Developer Mode.
Product Identifier
The module uses the Product ID field as a unique product identifier. To use a different value, specify another product field containing the desired identifier on the Technical tab:


Purchase on Portal
To track portal purchases, enable the Track Purchase on Portal option:

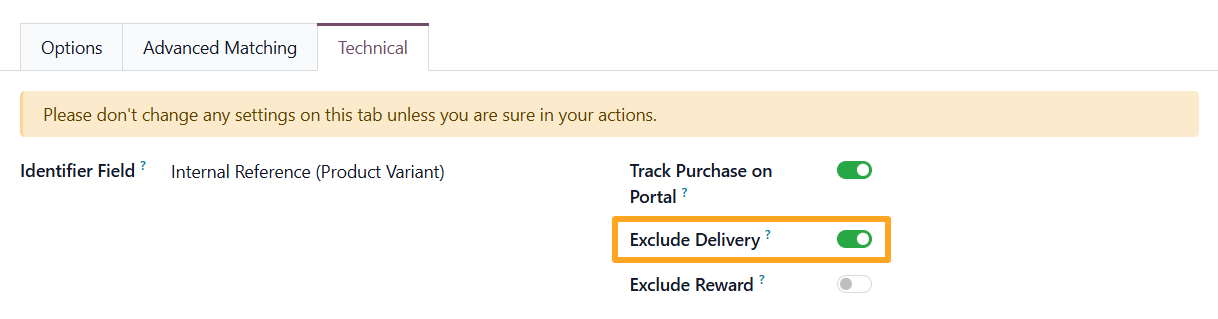
Exclude Delivery
The next available setting for tracking services is Exclude Delivery. When enabled, the service excludes delivery lines from sales orders in tracking data transmissions:
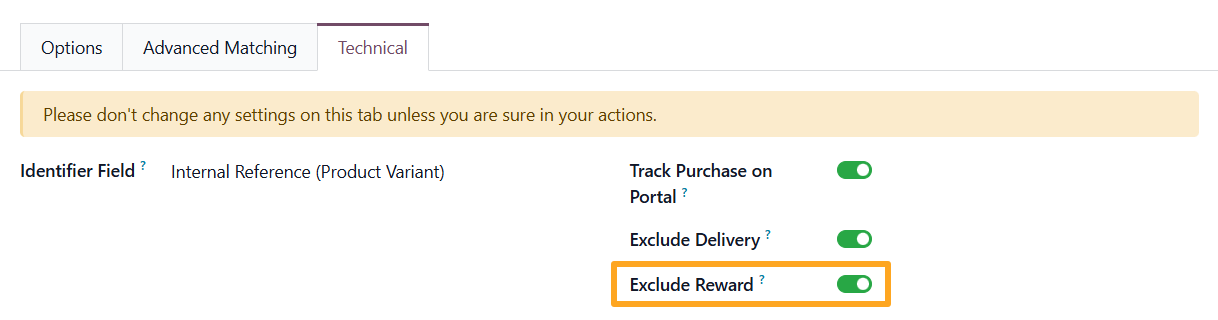
Exclude Rewards
To exclude reward order lines from tracking data, enable the Exclude Reward option:
Add to Cart
By default, the module tracks the actual addition of a product to the cart. To track the event upon clicking the button without waiting for the actual addition to the cart, perform the following steps:
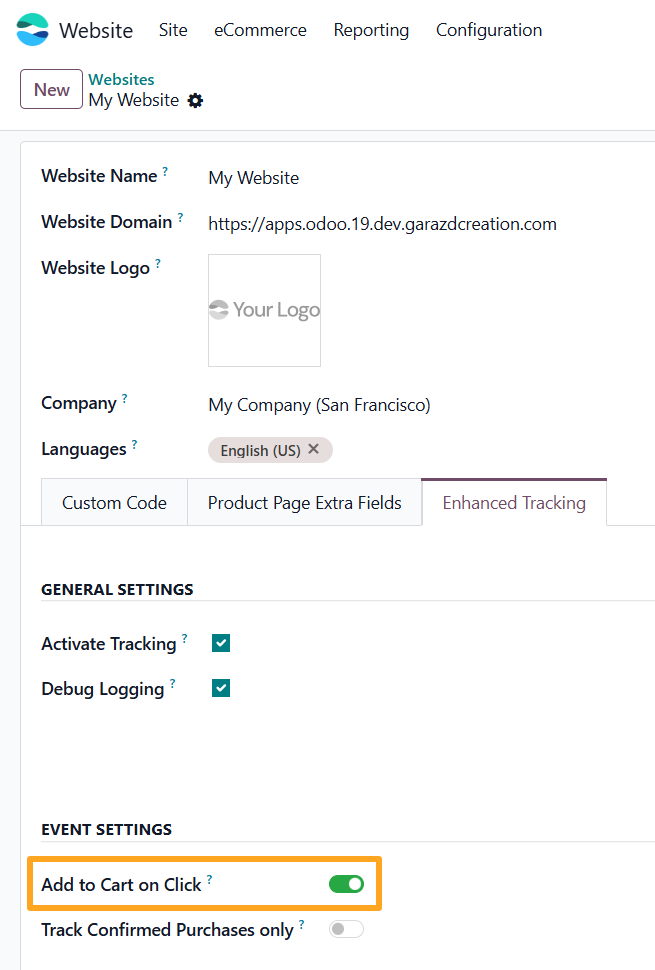
- Navigate to Website — Configuration — Websites
- Open the website on the Enhanced Tracking tab
- Enable the Add to Cart on Click option

Purchase
To track purchases only after a successful payment transaction, enable the Track Confirmed Purchases only option:
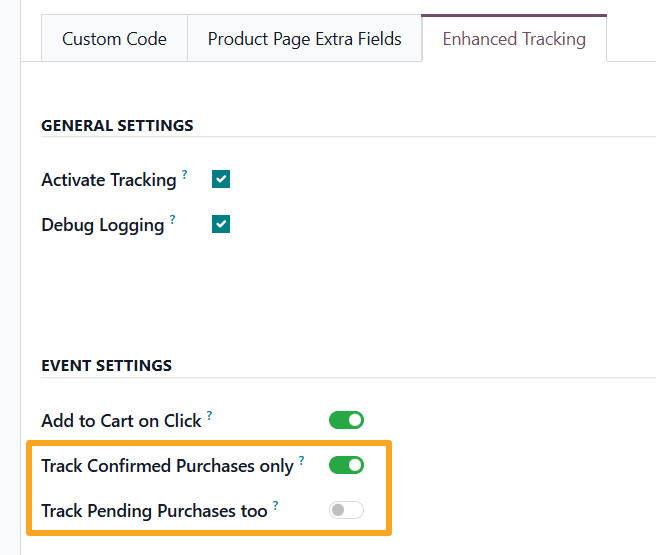

If business logic considers an order with a Pending payment status as a purchase, enable the Track Pending Purchases too option as well.

Testing
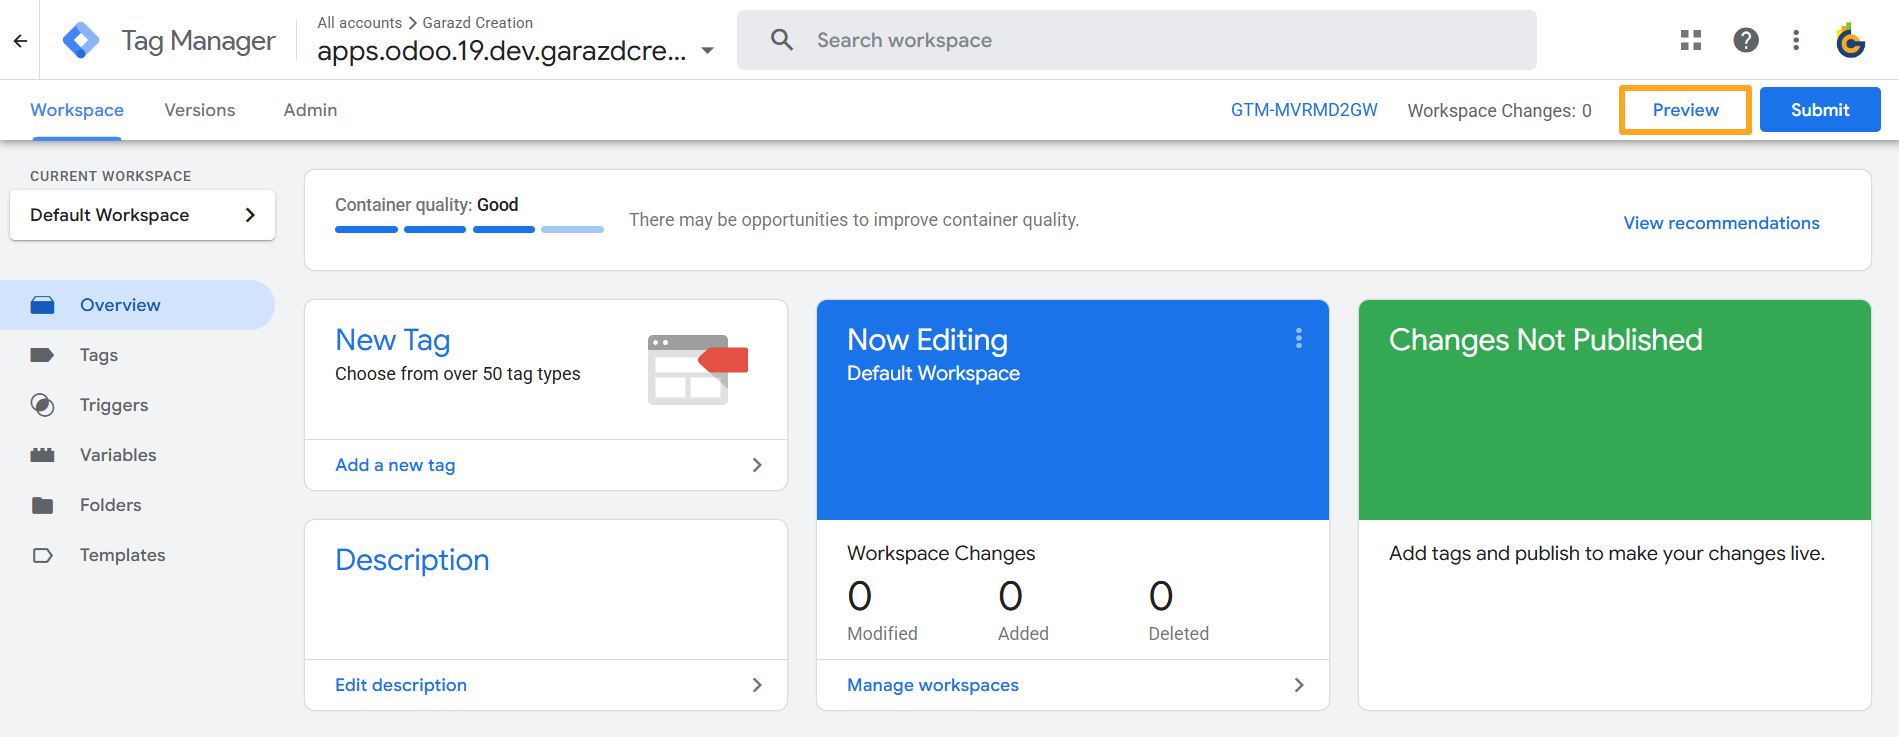
To test the GTM tracking script, use Google Tag Assistant. Click Preview.
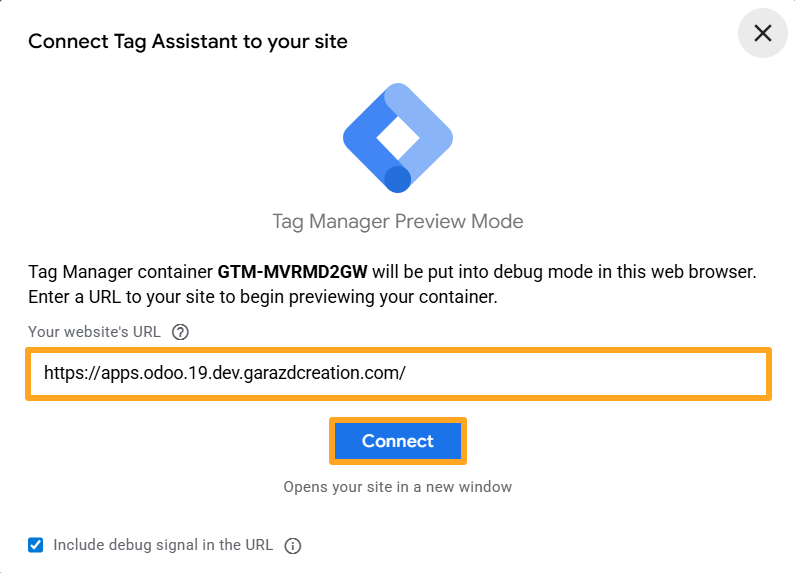
Then enter your Odoo website URL and click Connect.

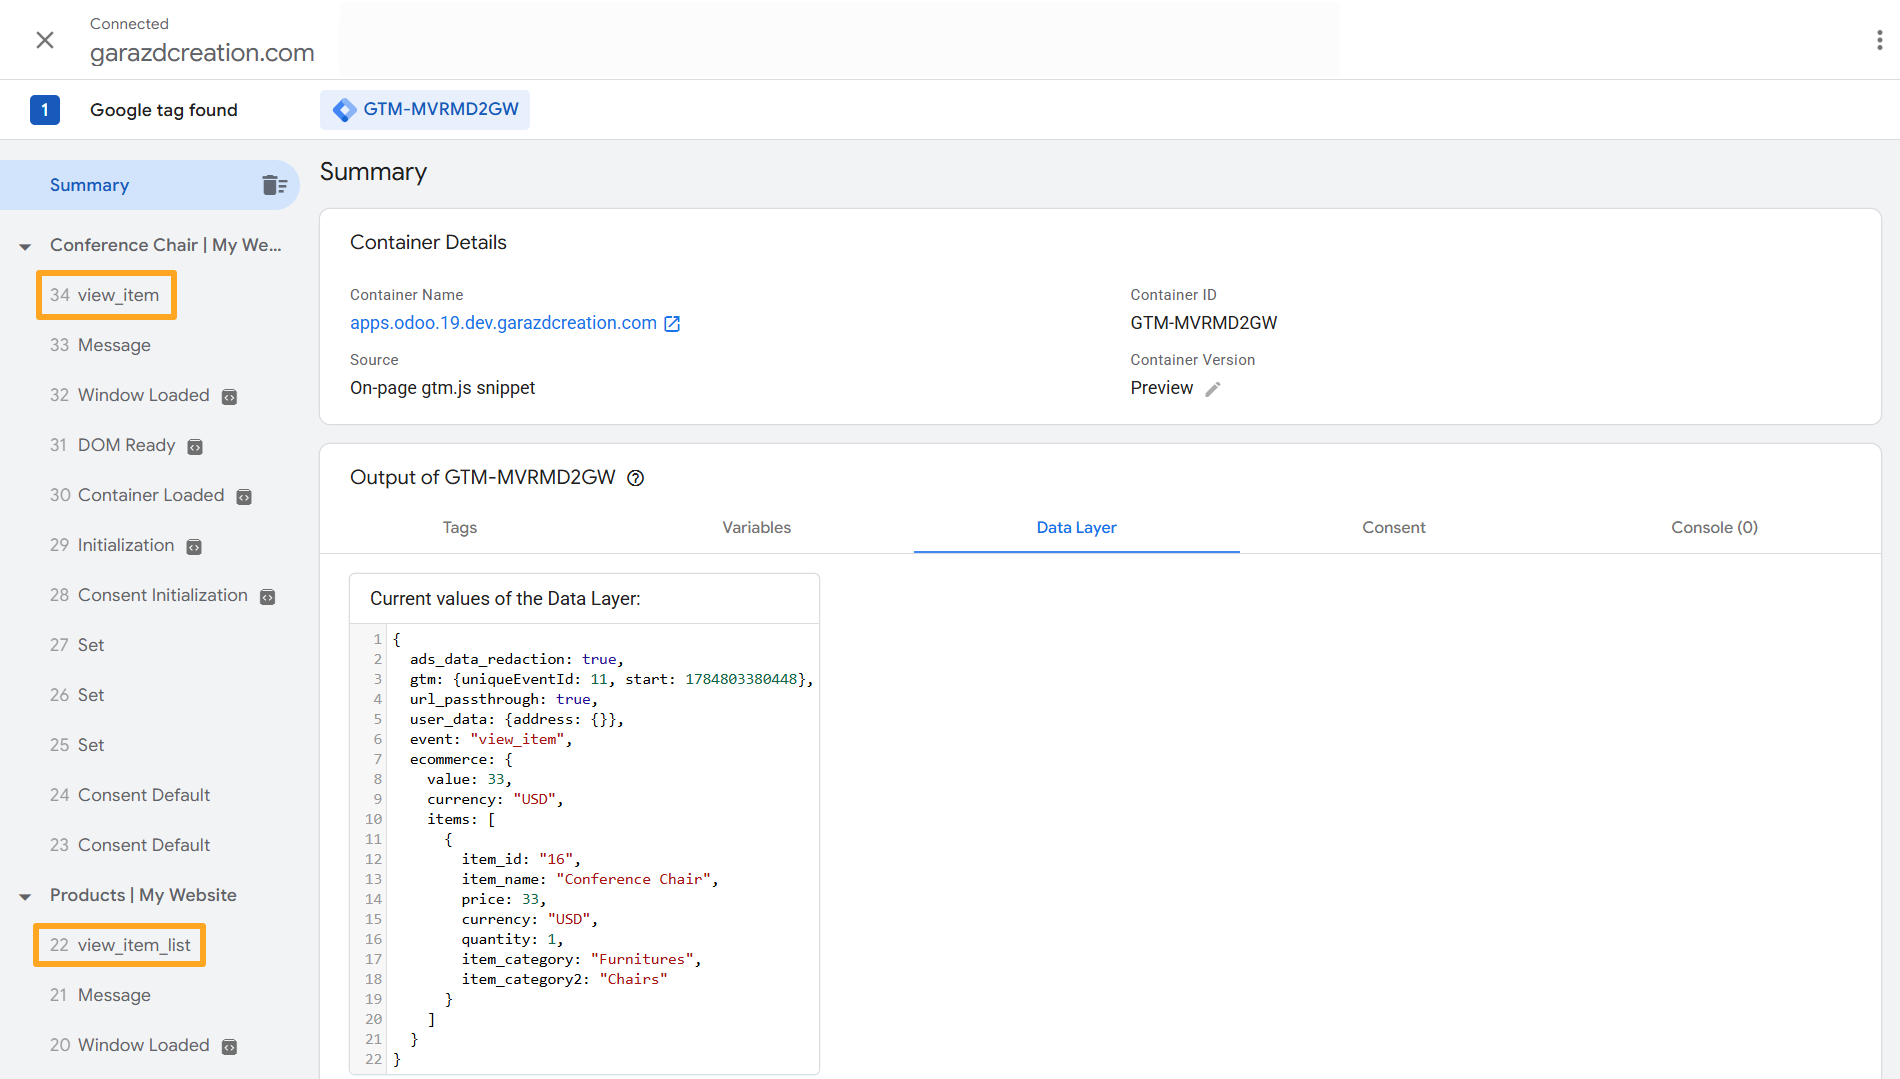
Perform a few eCommerce actions on your Odoo website and review the report in Google Tag Assistant.

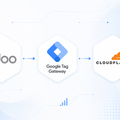
Google First-party Mode
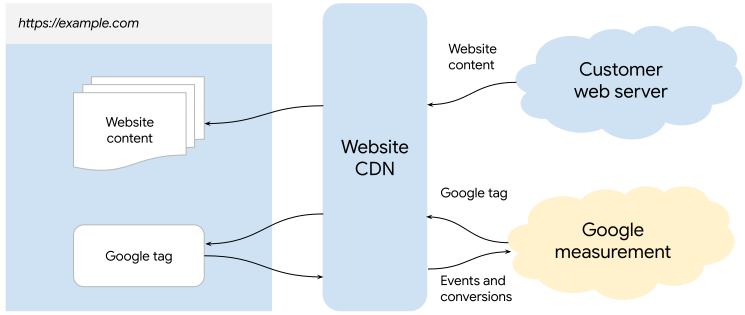
Google First-party Mode allows configuring Google tags on your Odoo website to load scripts from your tagging servers or CDN instead of Google's:
The app allows specifying a custom URL for Google Tag Serving. Open the website settings and, in the Tracking and SEO section, change the Tag Serving URL:
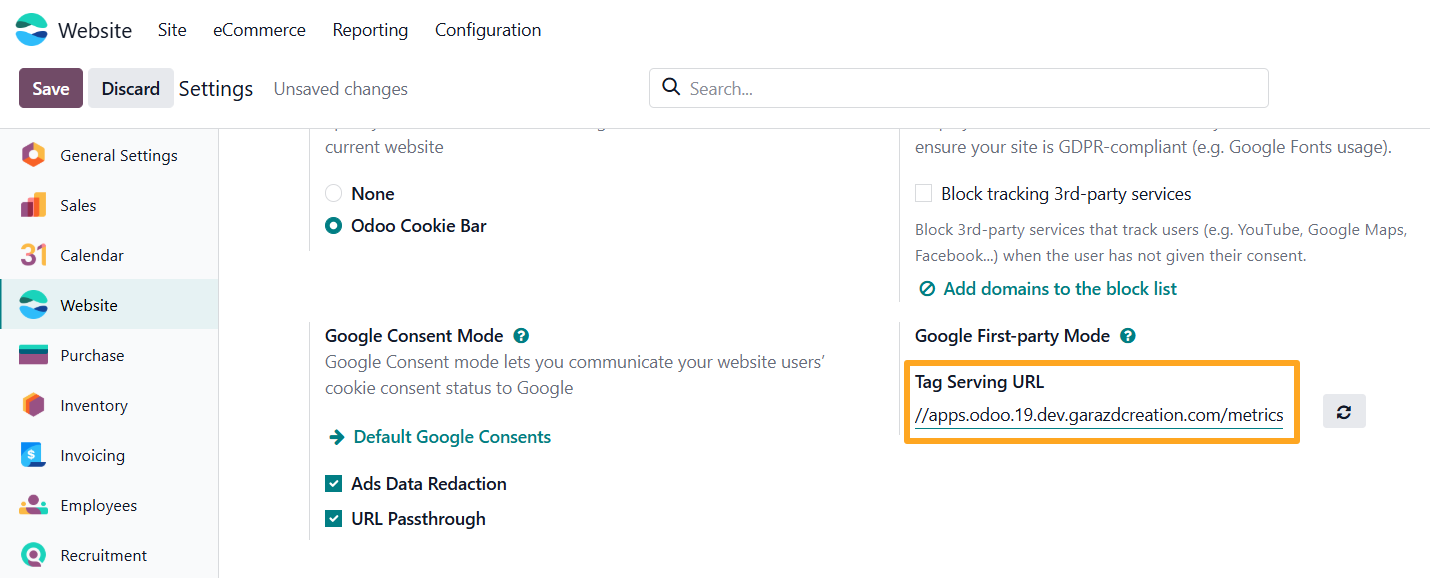
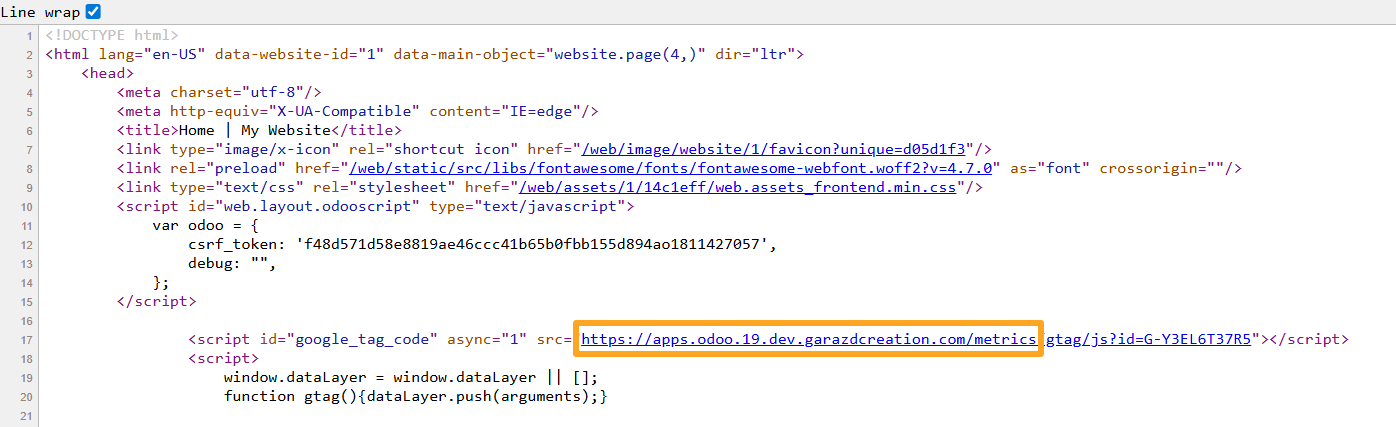
After saving the settings, sign out of Odoo and open the page source of your website to review the result:
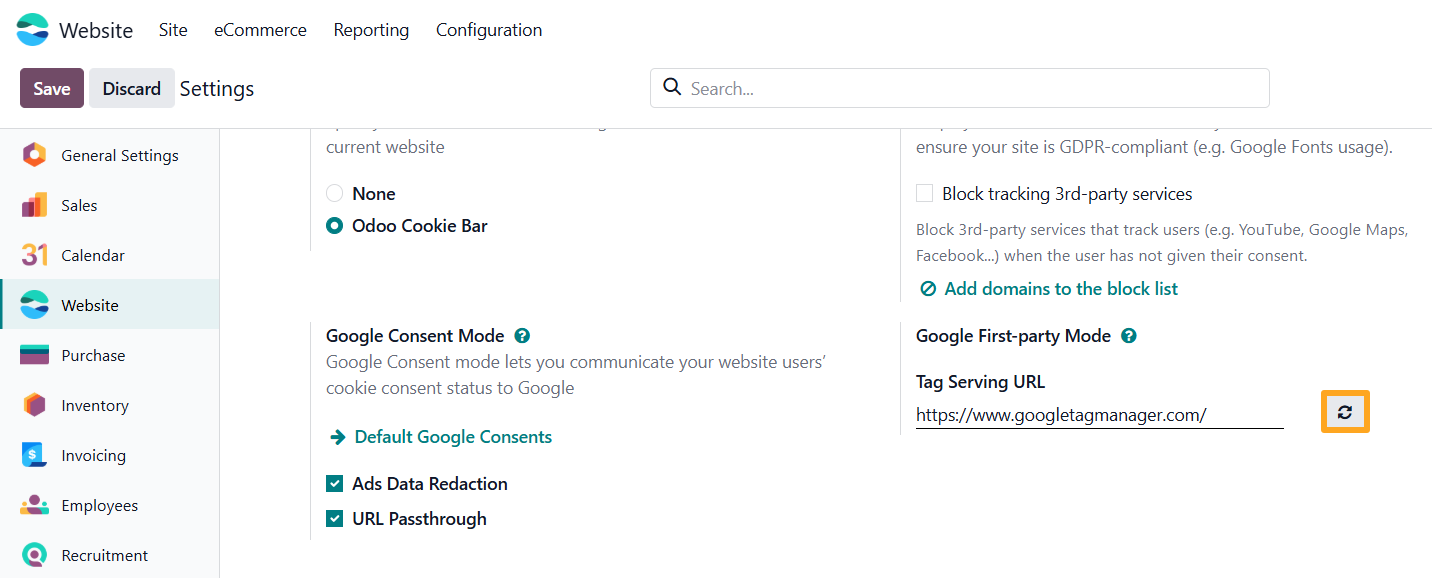
To restore the default Google tag URL, click the button on the right:

Changelog
16.0.1.0.1 2025-01-14
- Change the dataLayer calling.
16.0.1.0.0 2024-03-12
- Init version.
17.0.1.0.2 2026-05-25
- Improve getting of the list of allowed settings for user data.
17.0.1.0.1 2024-09-17
- Change the dataLayer calling.
17.0.1.0.0 2024-04-13
- Migration from 16.0.
18.0.1.0.1 2026-05-25
- Improve getting of the list of allowed settings for user data.
18.0.1.0.0 2024-10-11
- Migration from 17.0.
19.0.1.0.2 2025-12-29
- Improve getting of the list of allowed settings for user data.
19.0.1.0.1 2025-12-25
- Add a list of allowed user data settings.
19.0.1.0.0 2025-10-11
- Migration from 18.0.
20.0.1.0.0 2026-09-21
- Migration from 19.0.
Resources

How to configure Google First-party mode in Odoo with Cloudflare