Job search and job posting service Rоbota UA is one of the market leaders in this field. It is quite popular and in demand in the HR market of Ukraine. Integration of this service with Odoo allows you to optimize HR processes and spend less time on recruiting.
Connect to Robota.ua
After installing the module, go to the “Recruiting” menu and then to the Settings, where we will see a new section “Robota.UA”. Select the "Accounts" menu to create a new account.
Provide it with a name and specify the login and password that you use to log in to the robota.ua website.
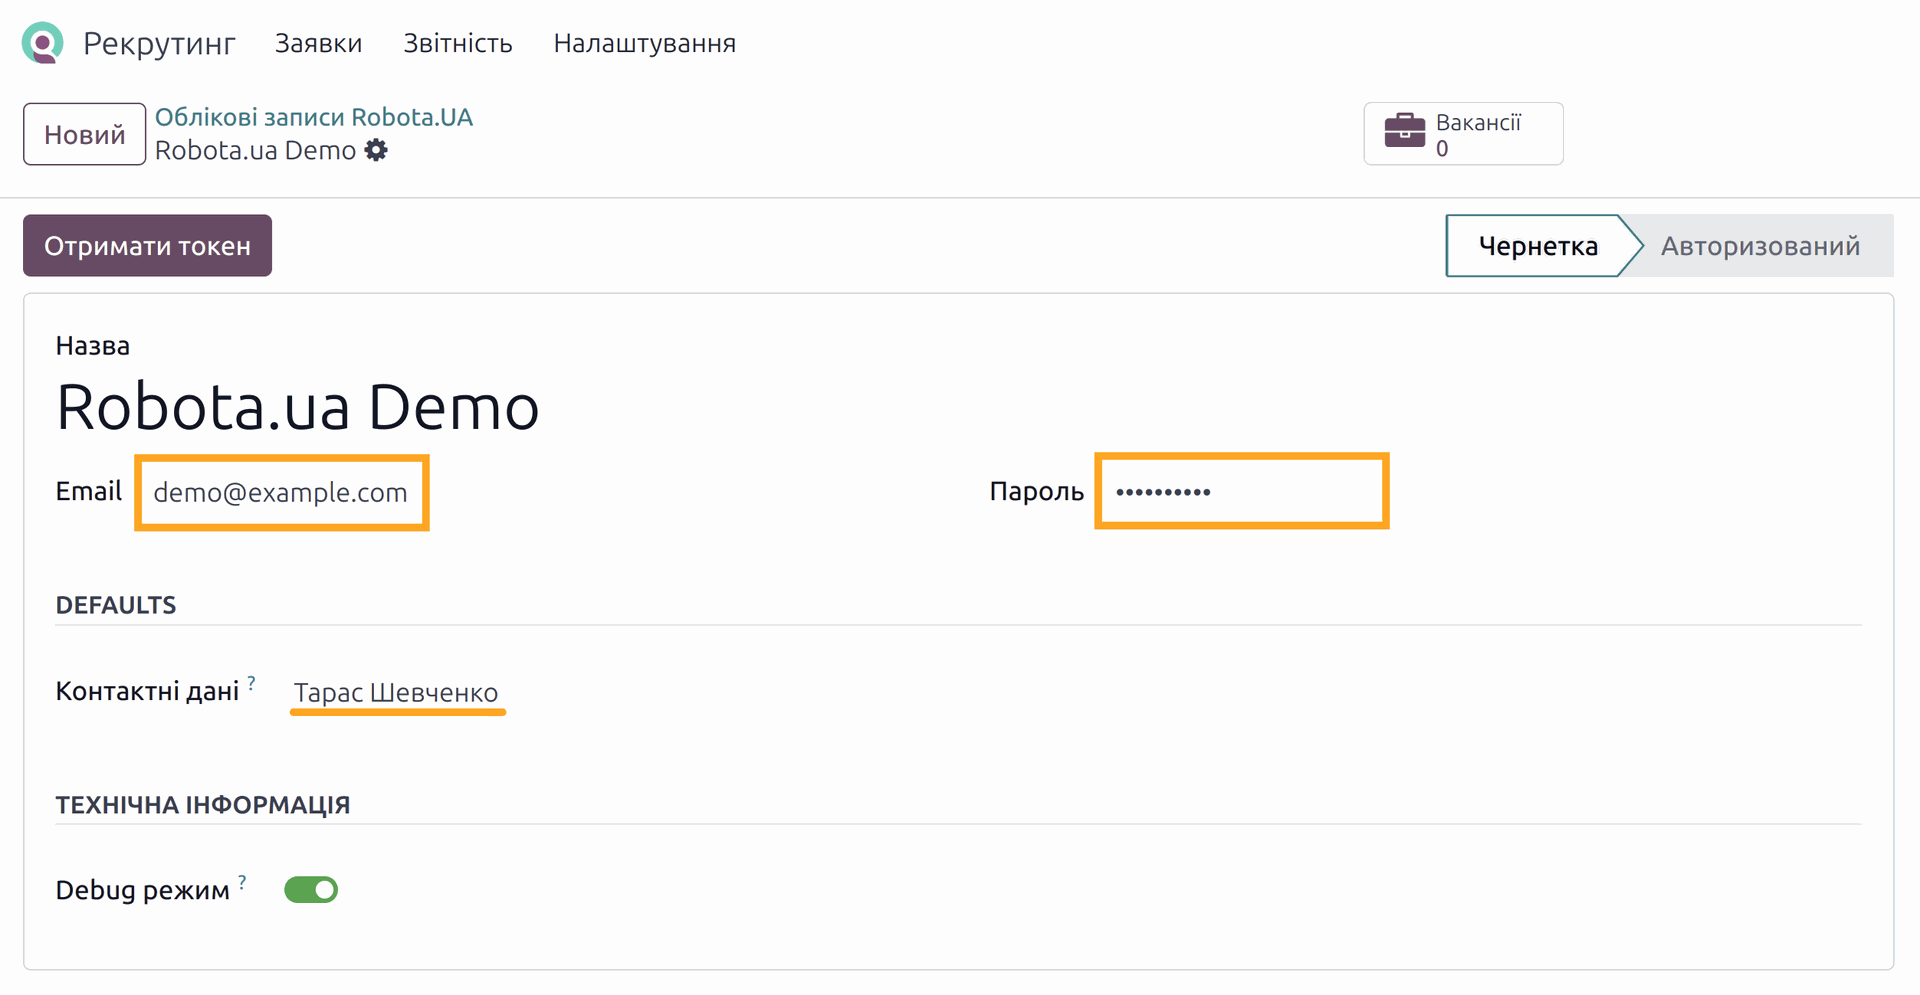
Choose a contact person from the partner list, their contact information will be displayed in the vacancies of this HR service.
Activate the “Debug mode” option if you want to view details for API requests in the Odoo log.

The next step is to get a token and start synchronization. The technical and job records will be synchronized, such as cities, types of publications, list of jobs and replies, and others.

Synchronize jobs and replies
Settings
During the initial synchronization, in addition to the technical lists, a list of your jobs and applications will be synced. By default, only active jobs are synchronized. If you want to download jobs in all states, make the necessary settings. To do this, go to the Configuration — Settings menu and in the “Integration with HR services of Ukraine” section — “Rabota.ua” deactivate the option “Download only active vacancies”.

You can also change other settings here that allows you to deactivate and delete jobs on Robota.ua side when you perform the corresponding actions in Odoo.
Jobs and applications
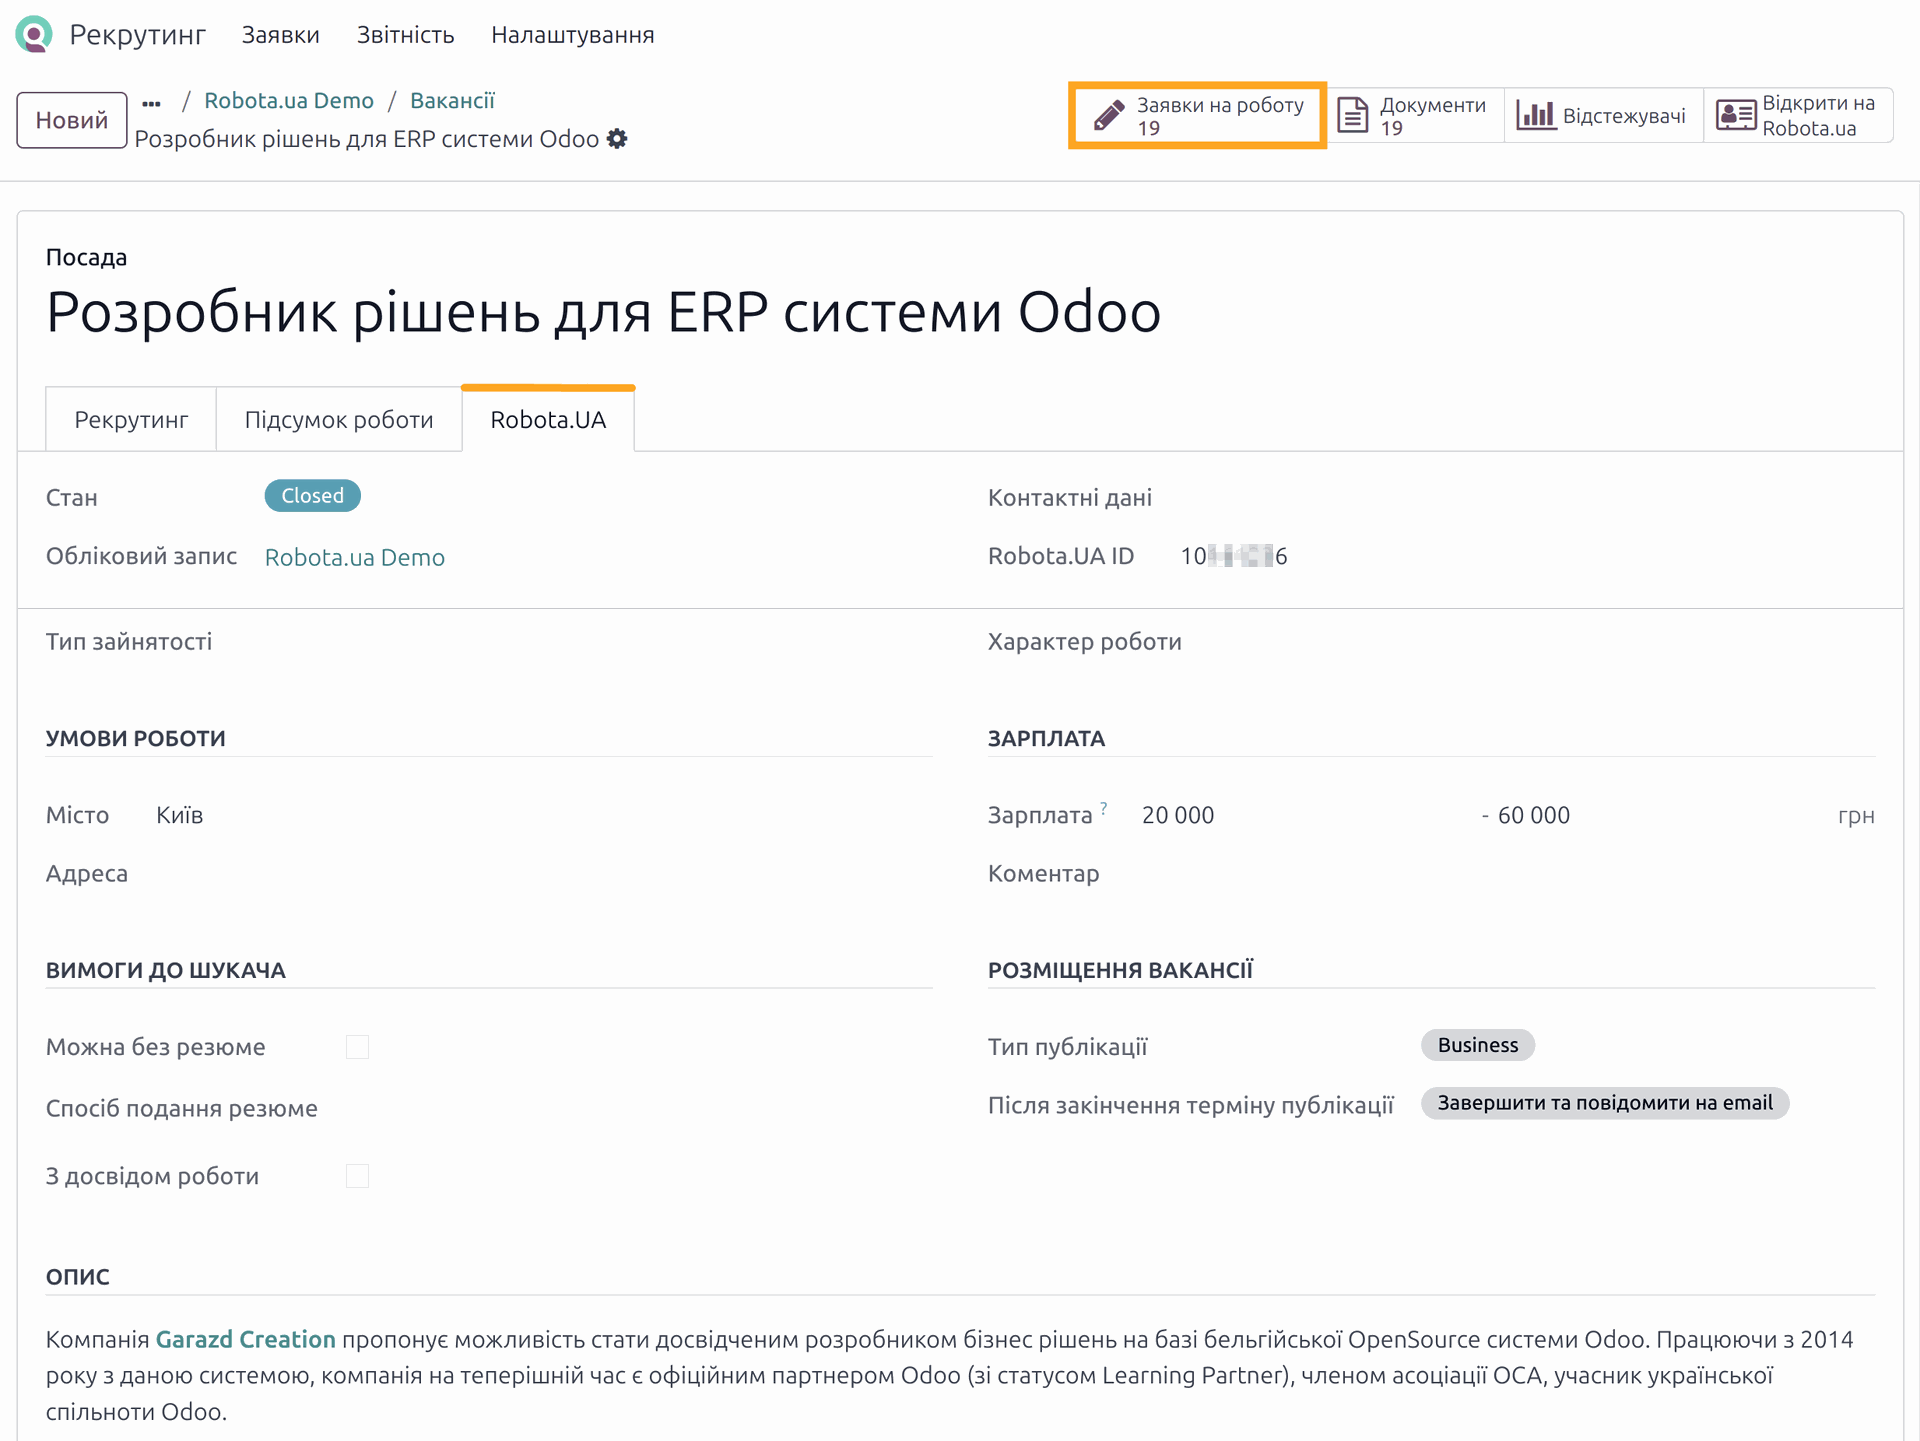
Let's view the jobs that have been synchronized. If the jobs have applications, they will also be downloaded to Odoo.

Now, take a look what data has been synchronized with Robota.ua. This information is on the tab of the same name, you can see it after opening one of the jobs.
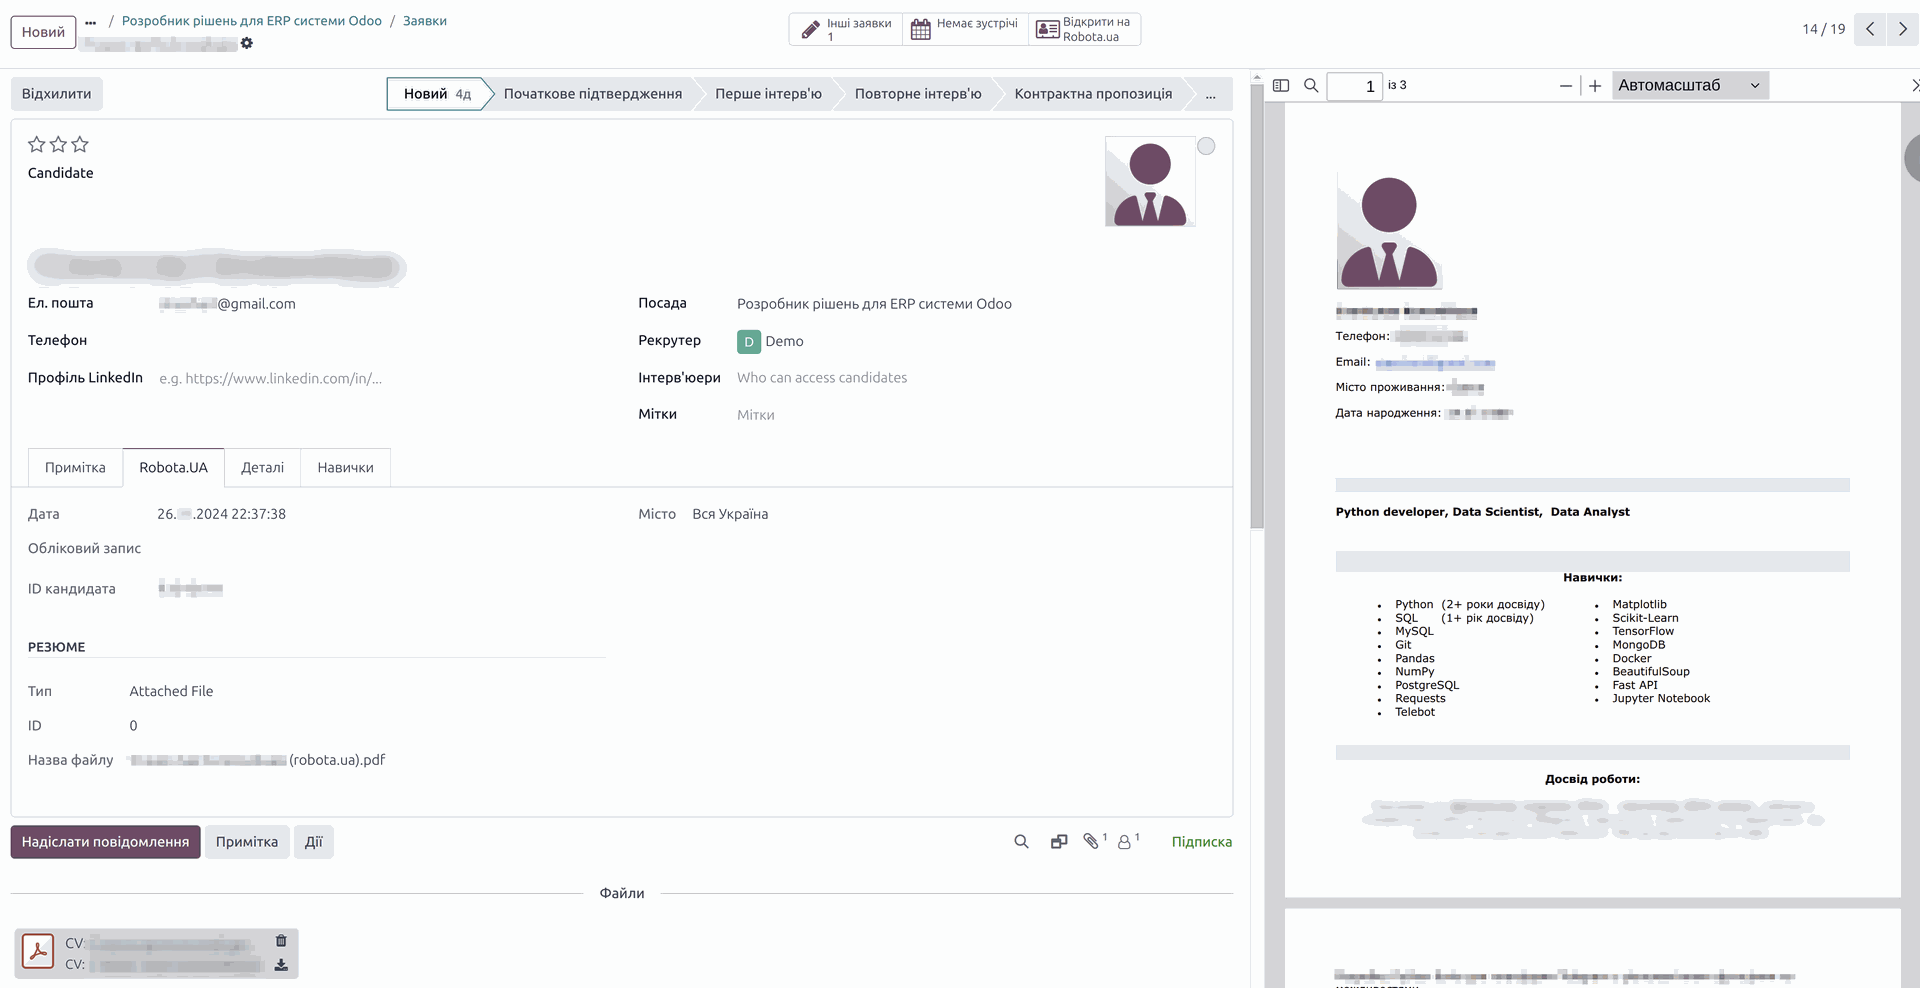
If we open a job application, we can also see information about the candidate for the job. If the candidate has attached a resume, it will be attached to this job application. The candidate's photo will also be uploaded if it is added on Rabota.ua side.
Vacancy actions
Add a vacancy
In addition to synchronizing of existing vacancies and downloading responses to them, we can also create jobs from within Odoo, edit them, and perform operations such as deactivation and deletion. Let's see how it works.
Let's start by creating a new job. This can be either a completely new record or a record that has already been created in Odoo. Create a new job, and in the Actions menu, select the "Sync with Robota.ua" item.

First, select the required account if we have several. Next, specify the job details: address, salary, type of employment, type of work, requirements, and additional job options. Choose the type of publication.
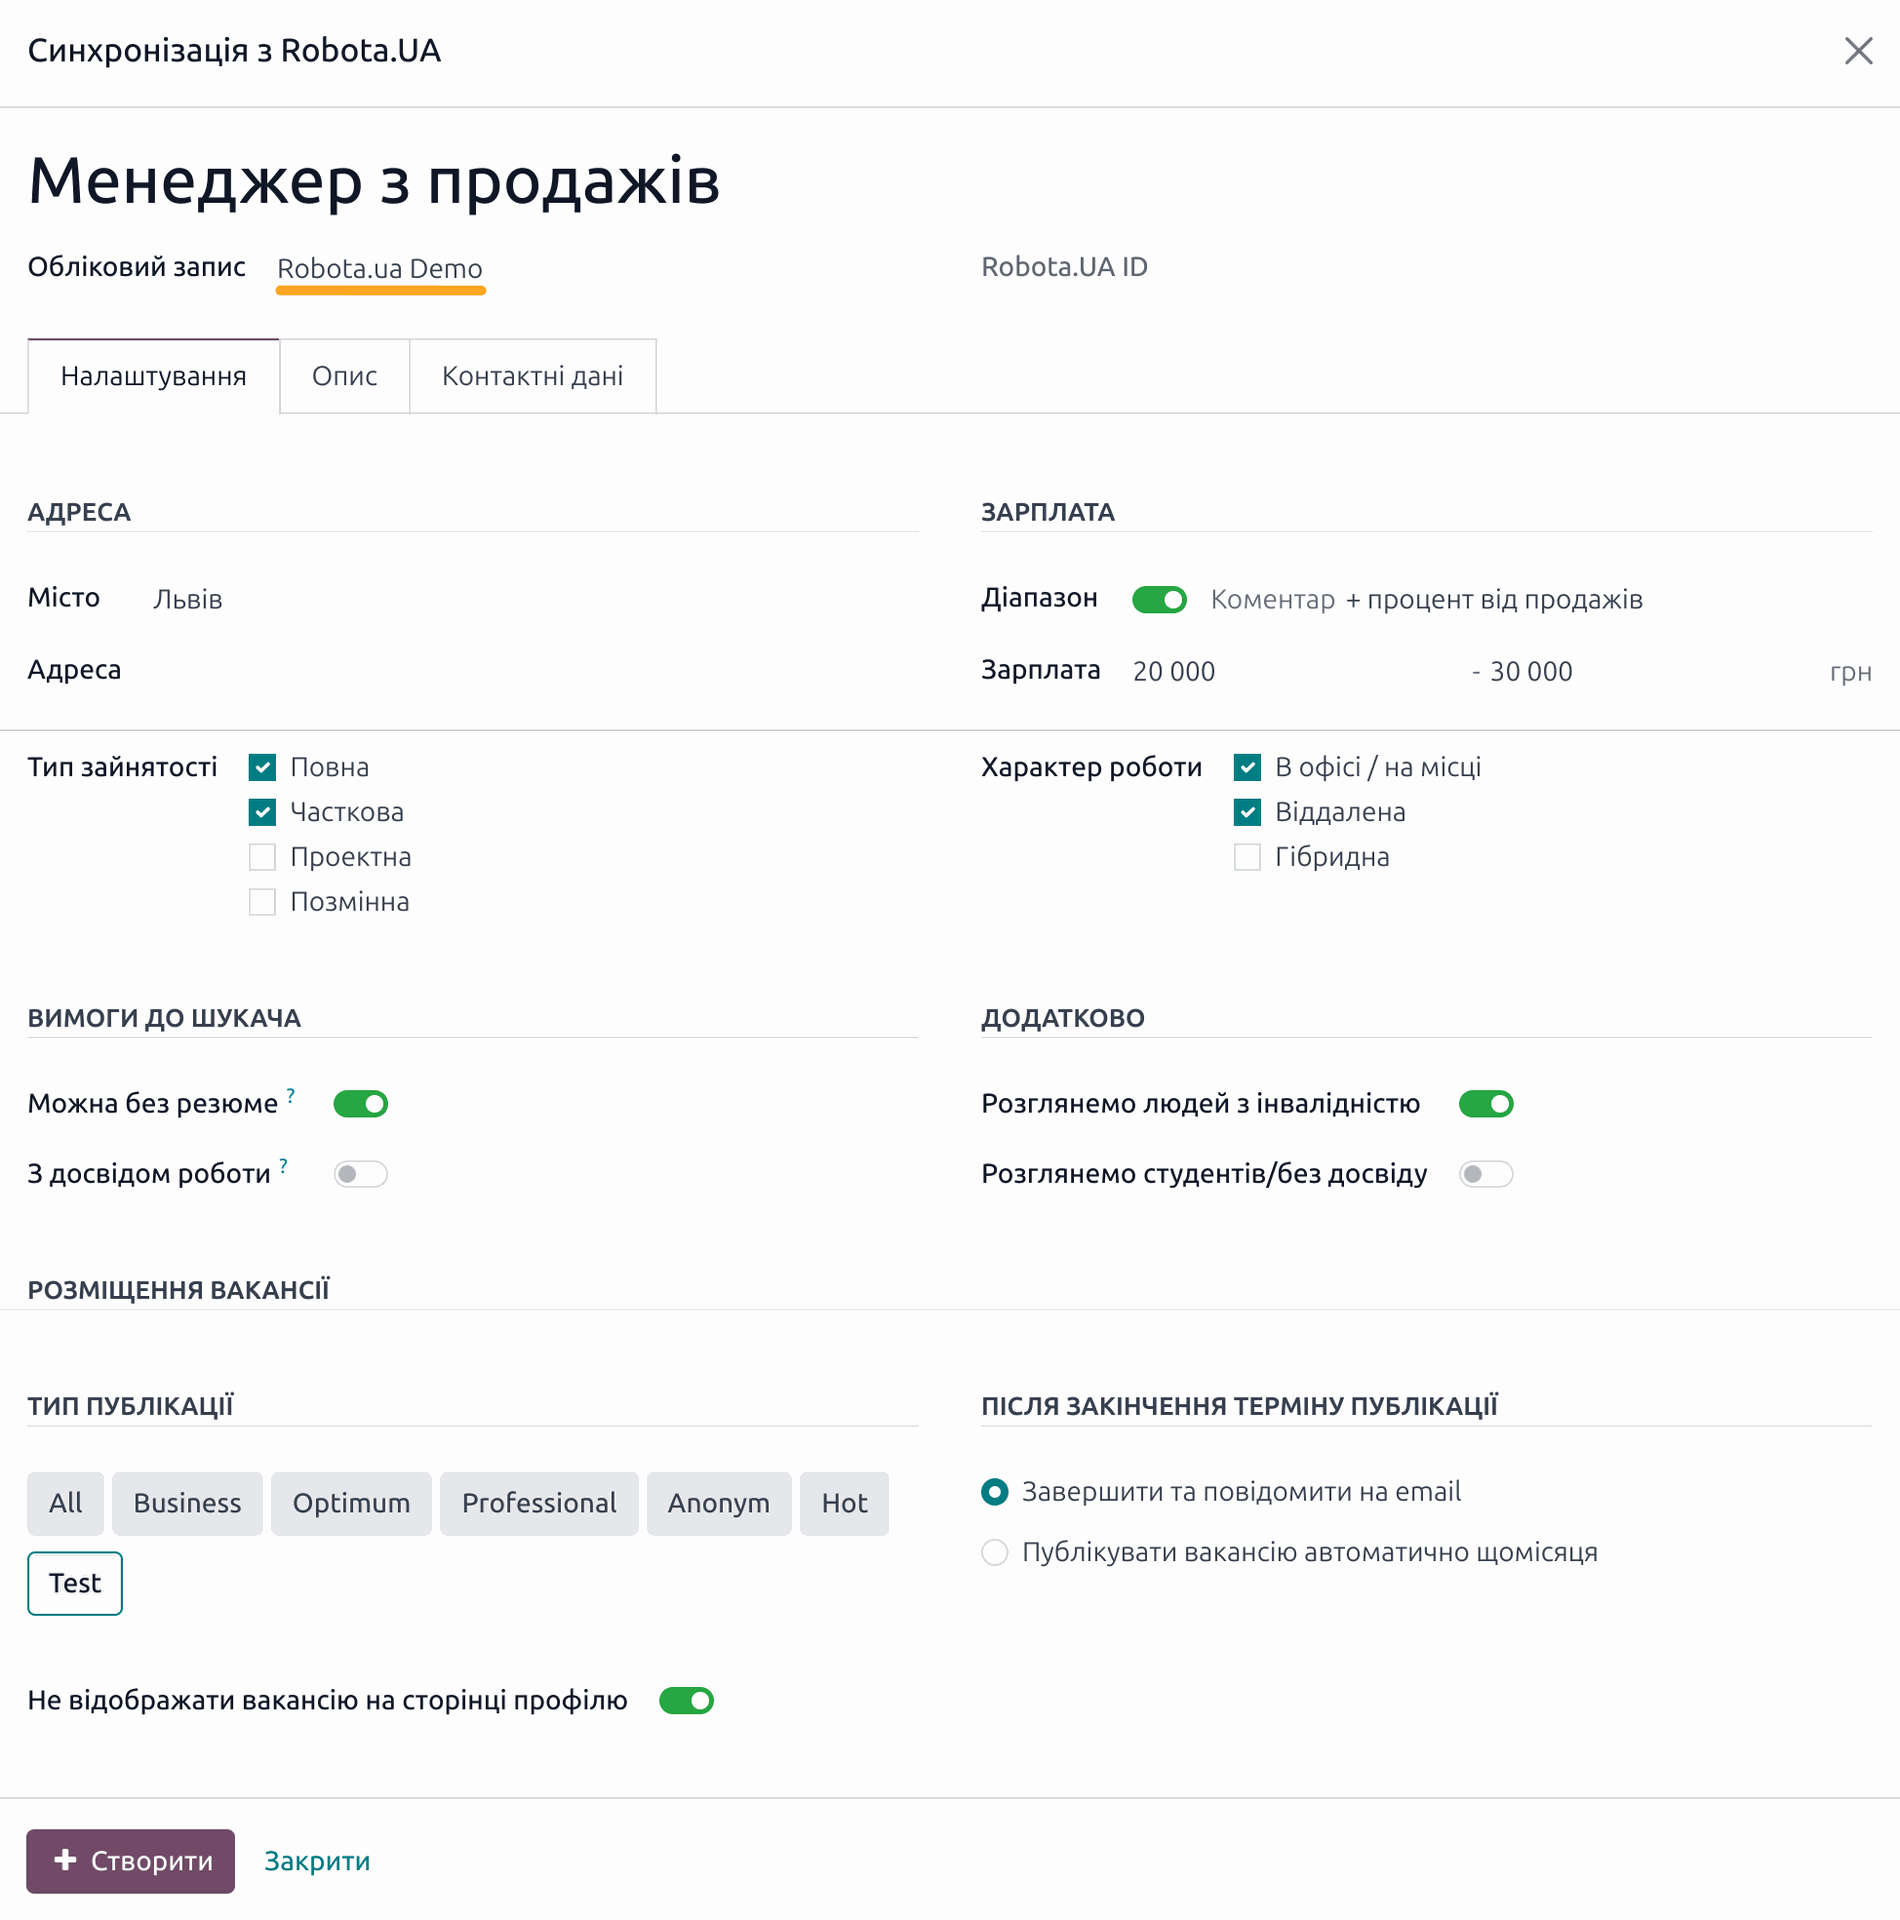
The next step is to fill in the job description. We can use the HTML format to highlight some text elements with different formatting and styles.
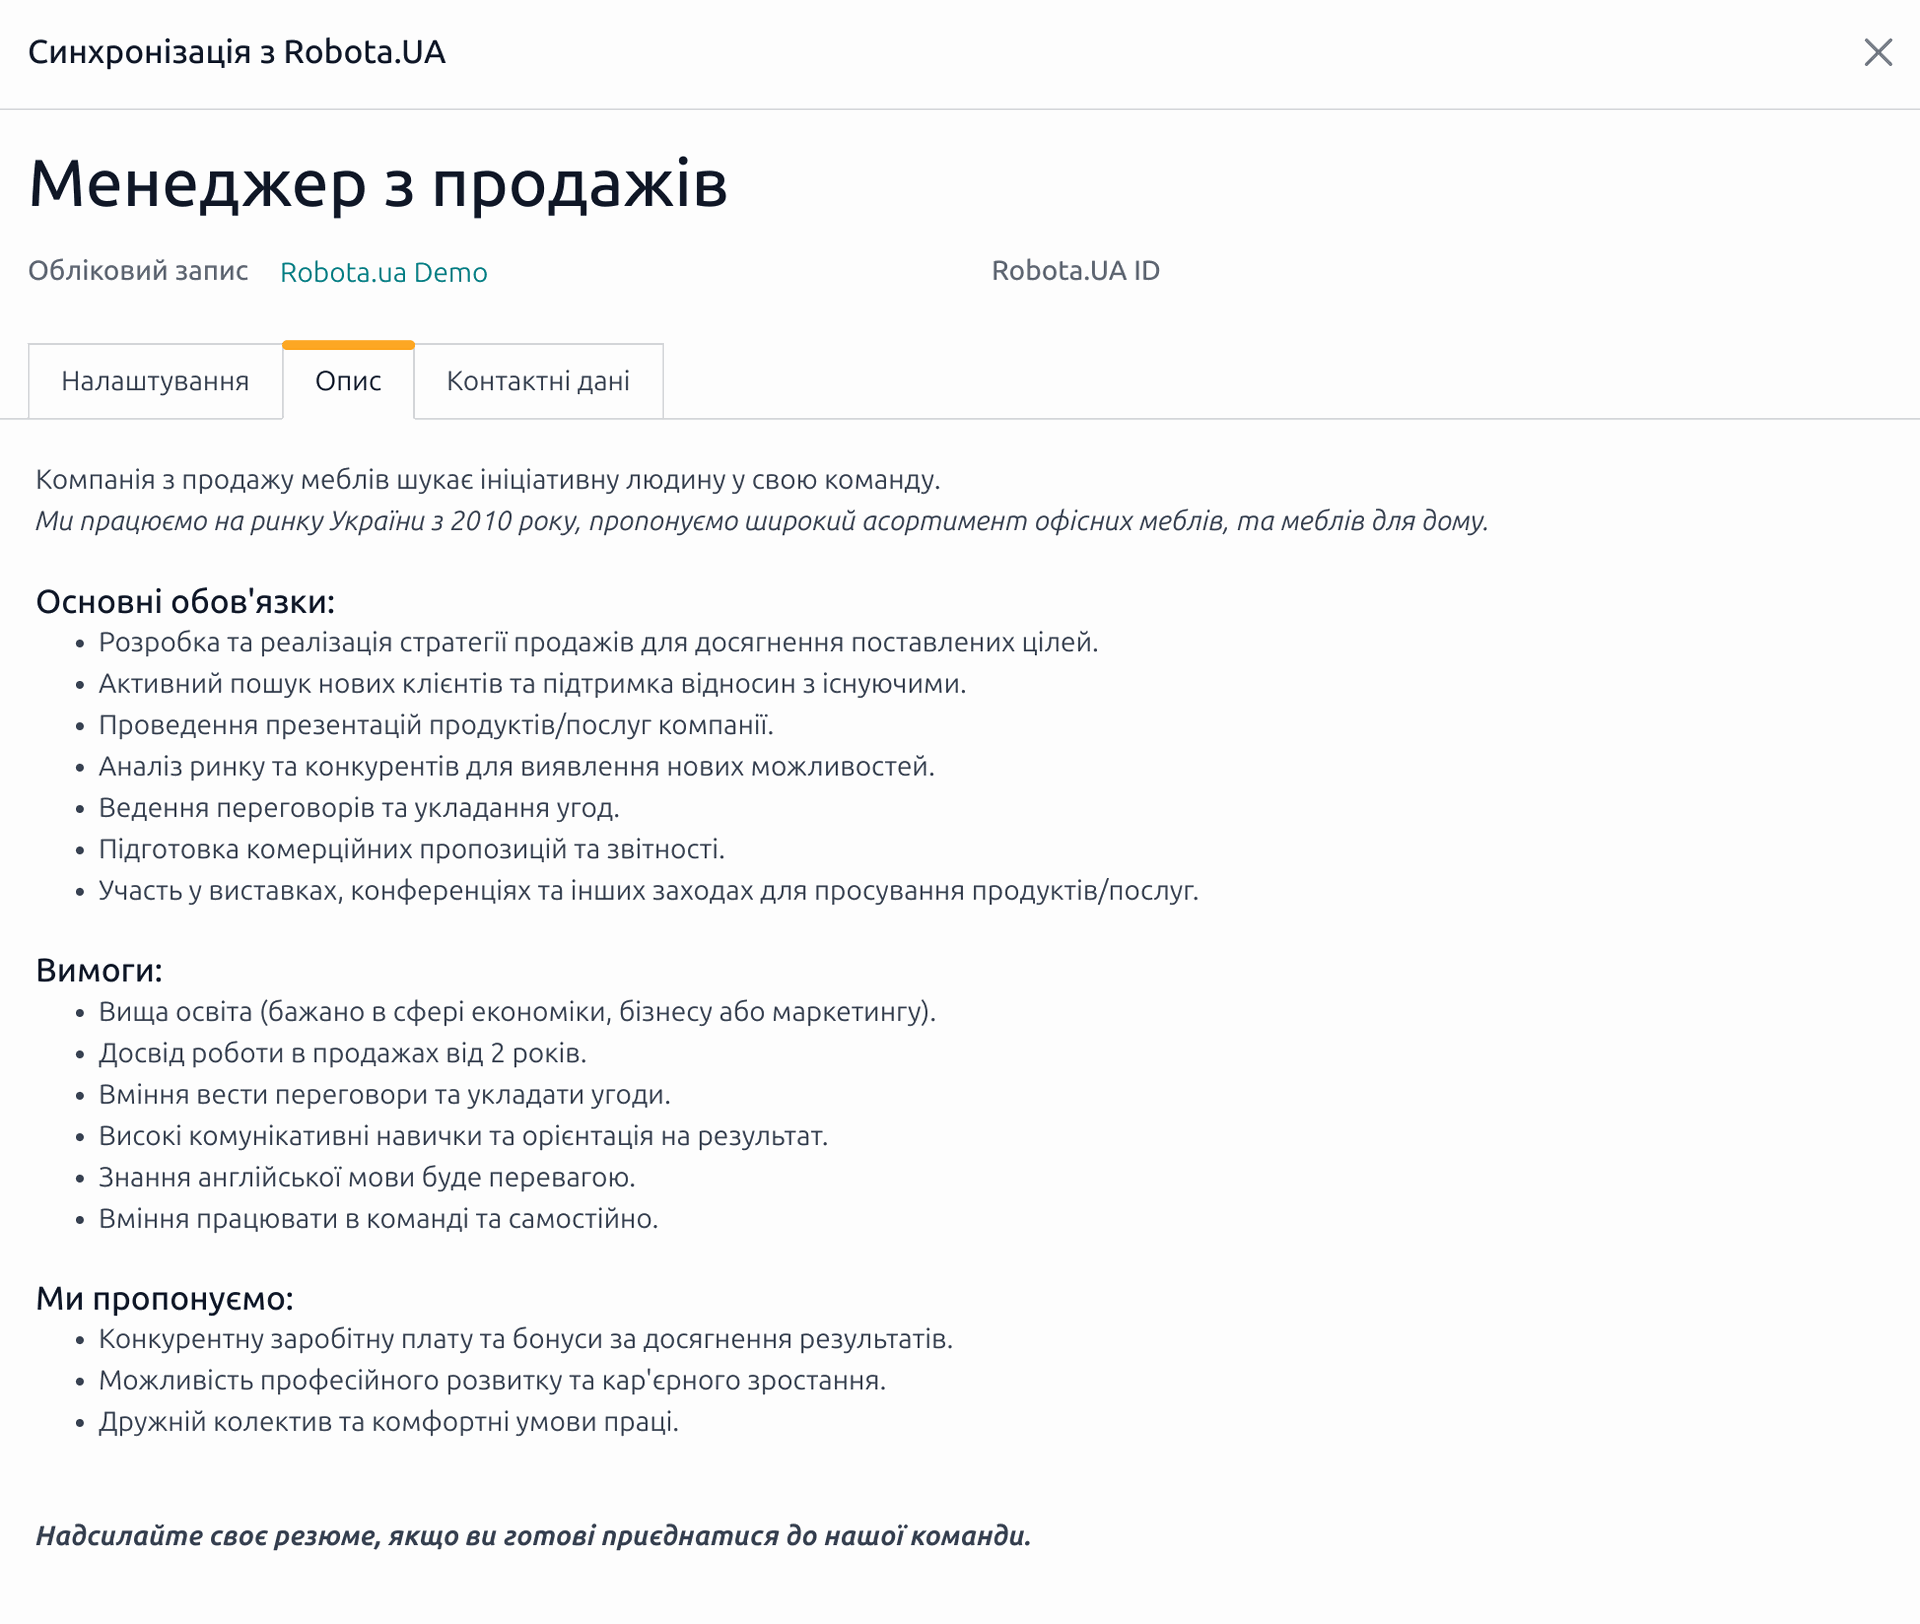
Thereafter, go to the "Contact Data" tab and choose the partner whose contact information will be specified for this vacancy.
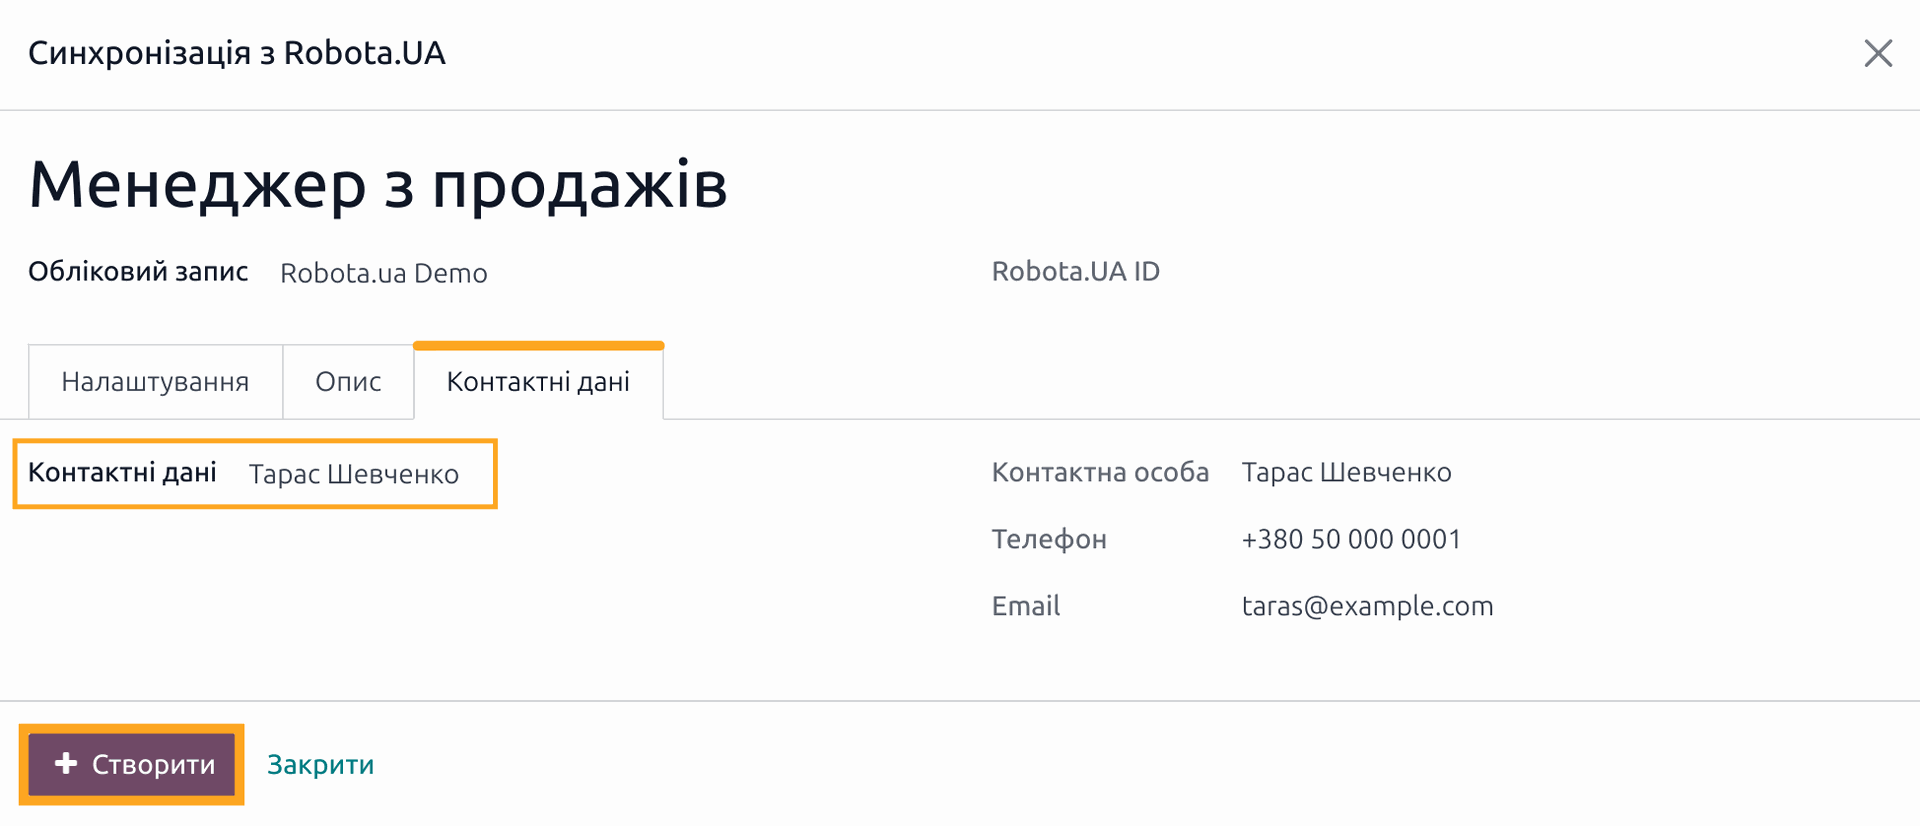
After filling in all the data, click on the "Create" button, a request will be made to Robota.ua and the job will be created in this service.

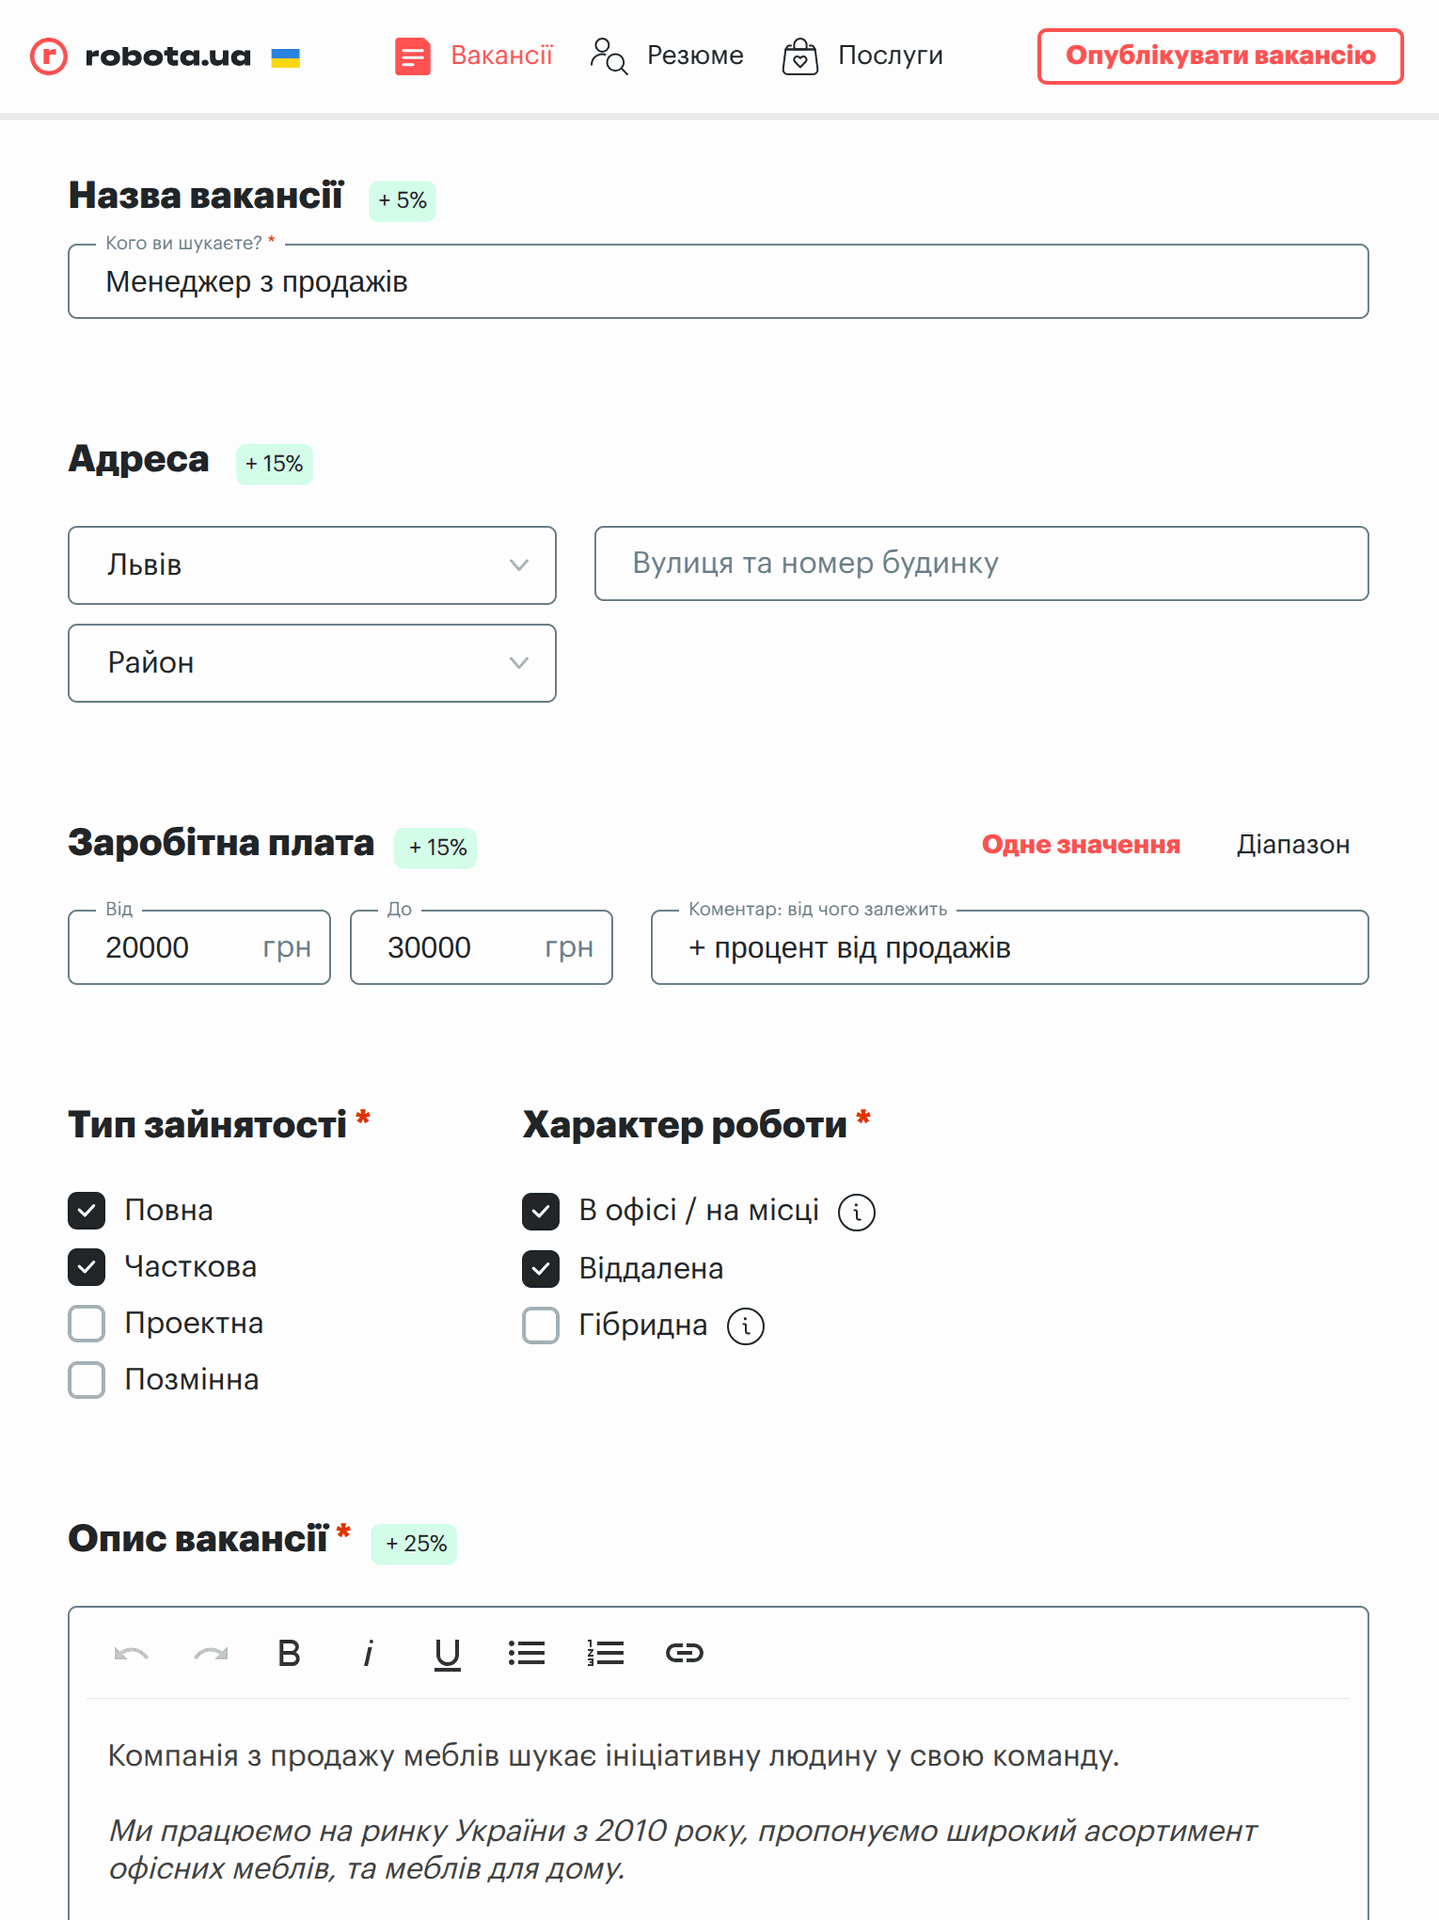
Edit a vacancy
Next, let's look at how to make changes to a vacancy that is already synchronized with the service. Open the vacancy, and from the Actions menu, open the same menu — Sync with Rabota.ua.
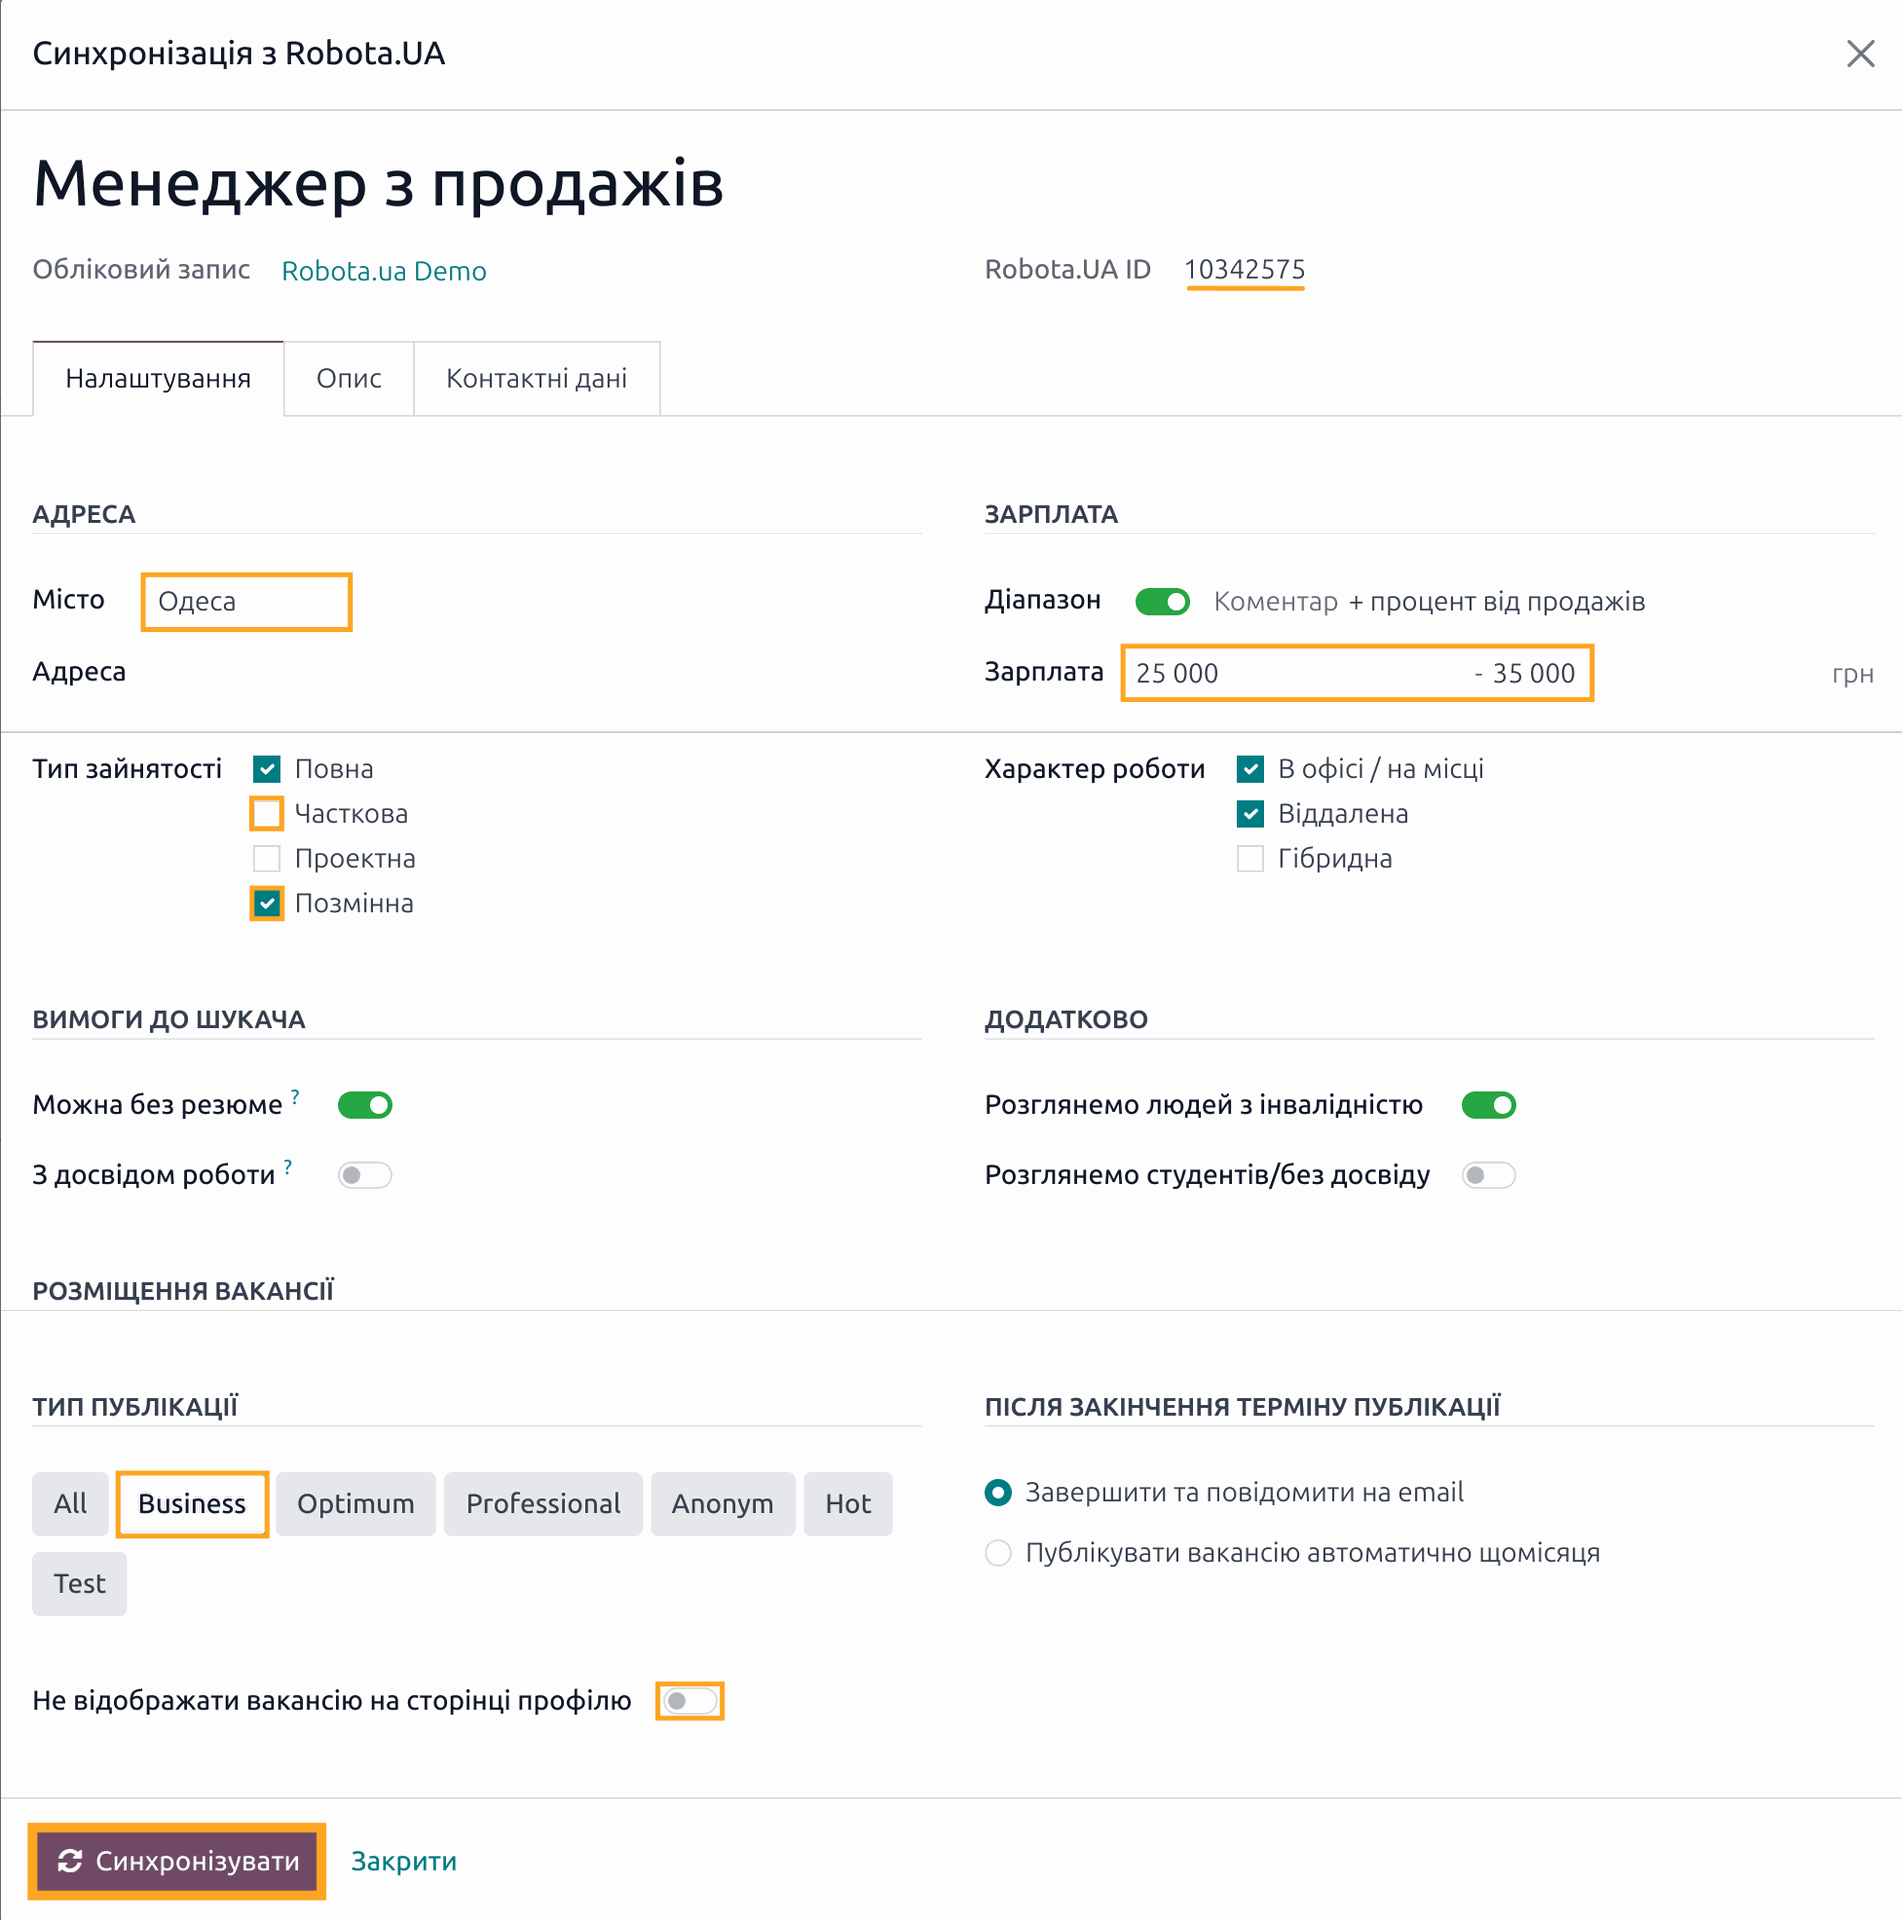
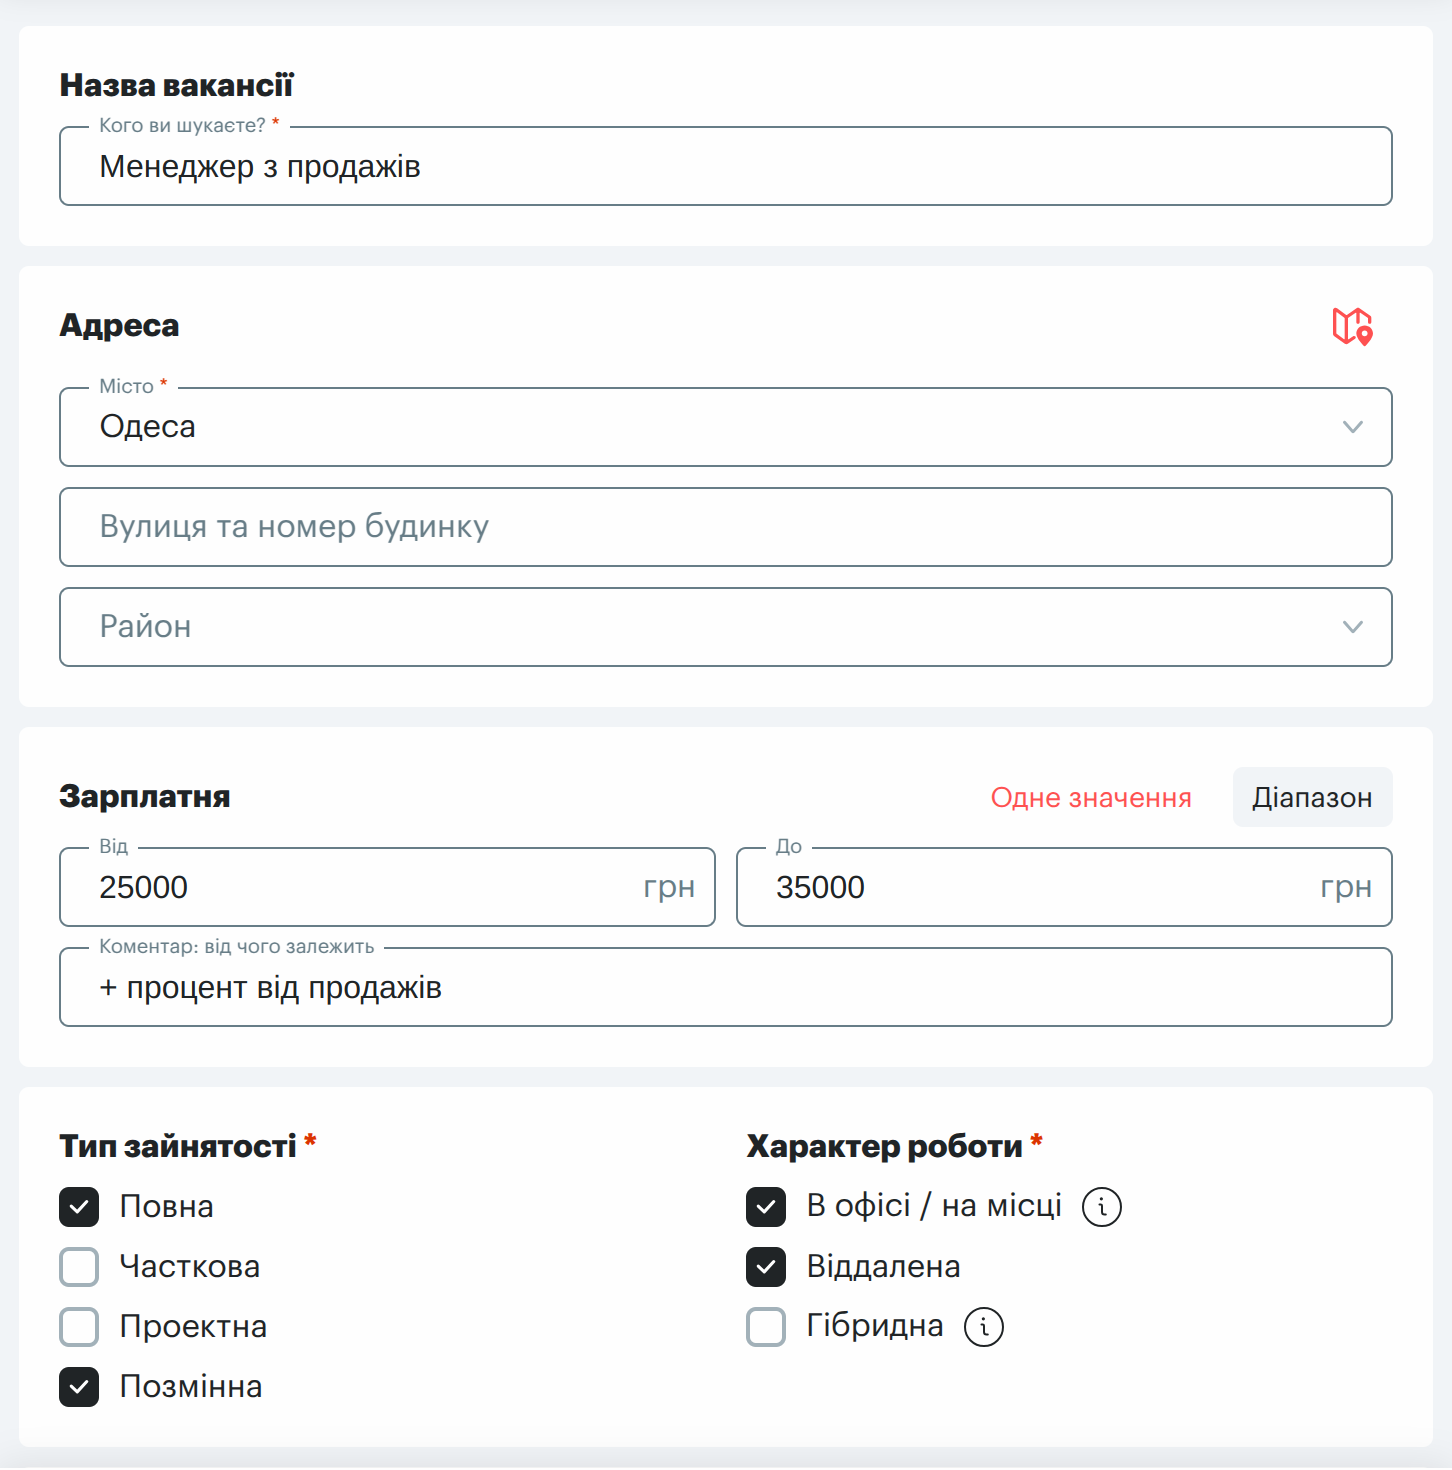
The vacancy data is displayed for us in a popup, where we can make the necessary changes. For example, we can change the city and the salary level. After editing the data, click on "Sync". The synchronization will take place and the data will be changed on the Rabota.UA side.
Link a vacancy
If you have created a vacancy on Rabota.ua and have the same job on the Odoo side, you can link them together. Using the "Link with Robota.ua" function, located in the "Actions" menu, call the wizard, where you select your Robota.ua account and provide a link to the vacancy webpage.


After clicking "Link and Sync", the relation will be established, and the vacancy data and applications will be downloaded.
If you select the "Link" action, only the relation will be established, and the vacancy parameters will be synchronized the next time you run the scheduled action "Robota.UA: Synchronization of vacancies and applications".

Deactivate a vacancy
To deactivate a job on the Robota.UA side, you need to make the following settings to allow this operation. Go to the Configuration — Settings menu and activate the option "Deactivate vacancy on Robota.UA".

After that, when you archive the job on the Odoo side, the vacancy will also be deactivated on Robota.ua.
Delete a vacancy
The next operation we consider is deleting a vacancy. As with the previous action, you need to make settings to allow it.

After granting permission, delete unnecessary jobs on the Odoo side. When performing this operation, these vacancies will also be removed in the Robota.ua service.
Get the app
You can purchase this Odoo module in our Apps Store.