
Introduction
Efficient product labeling is the foundation of organized warehouse management and high-quality customer service. However, the standard Odoo settings do not always meet specific business requirements or match the available paper formats.
Odoo Label Builder by Garazd Creation provides powerful tools for creating custom layouts that make it possible to place multiple labels on a single sheet while maximizing space efficiency.
This blog post explains in detail how to create an A4 sheet layout from scratch, perform accurate calculations for margins and spacing, and configure each label section step by step — from product images to dynamic pricing and QR codes.
Multiple Label Layout
Let’s start with creating a label layout. Firstly, determine your sheet size and measure the sheet margins from the top, bottom, left, and right edges. Then, detect vertical and horizontal gaps between labels on the sheet.
Perform the required calculations to ensure the labels fit the sheet. For demonstration, we use an A4 sheet with labels 99×67 mm in 2 columns and 4 rows:
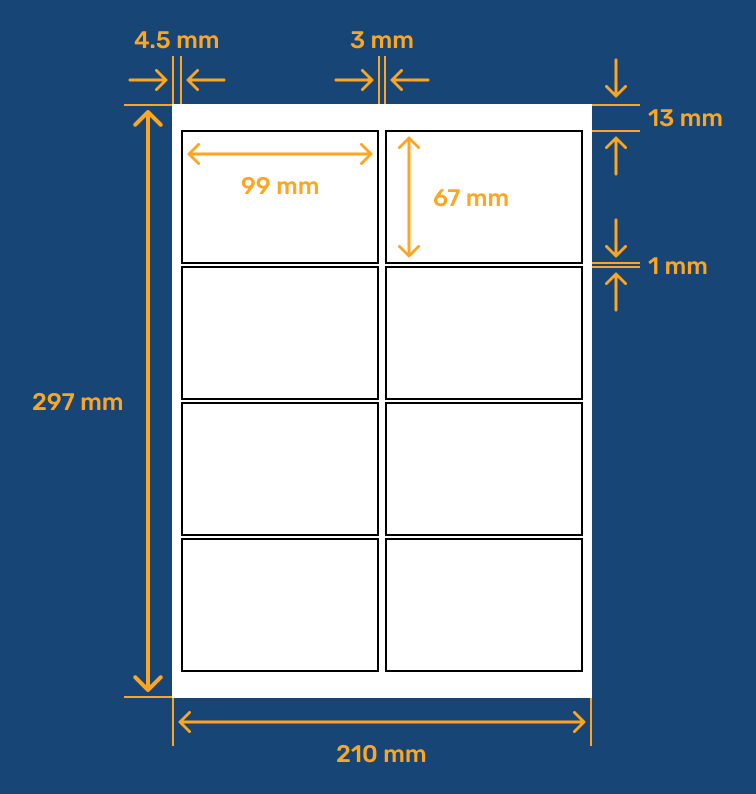
The sheet width is 210 mm. Let's sum all the row components: the left and right margins are 4.5 mm each, the label width is 99 mm, and the column gap is 3 mm:
So, all layout elements in a row are correct and are not located outside.
Repeat the same actions for the sheet column, which has a height of 297 mm:
The total value of the column components equals the sheet height.
Label Template
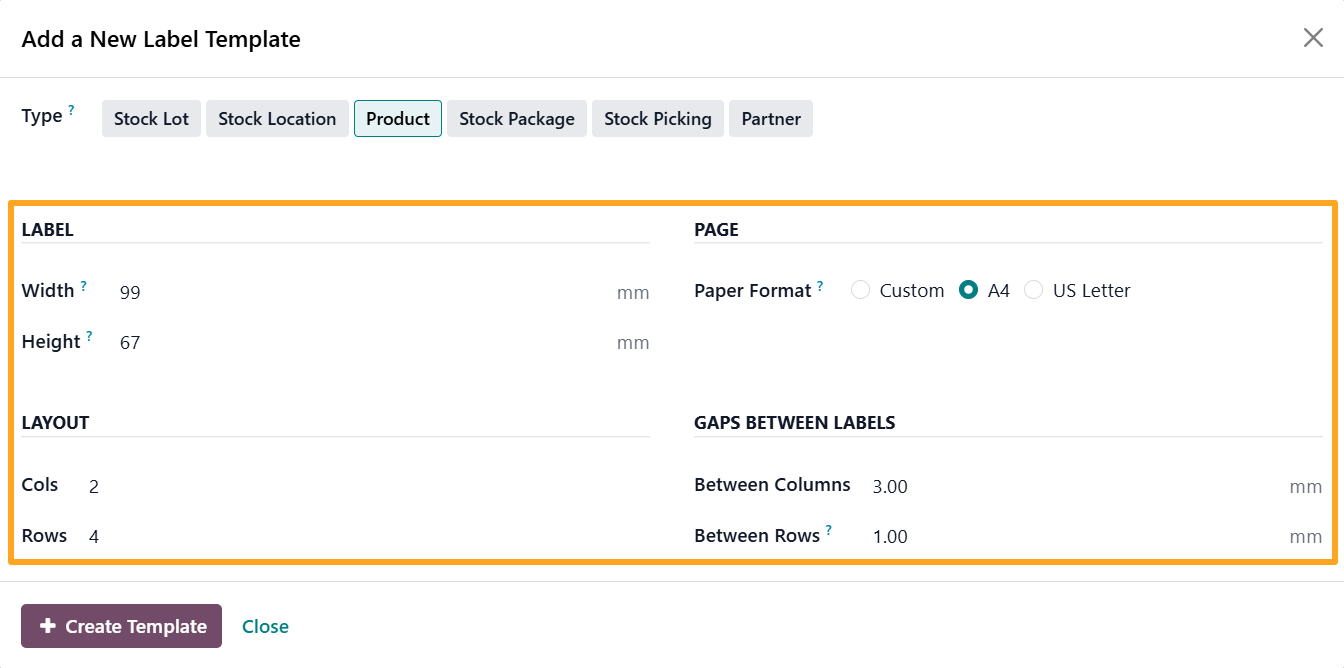
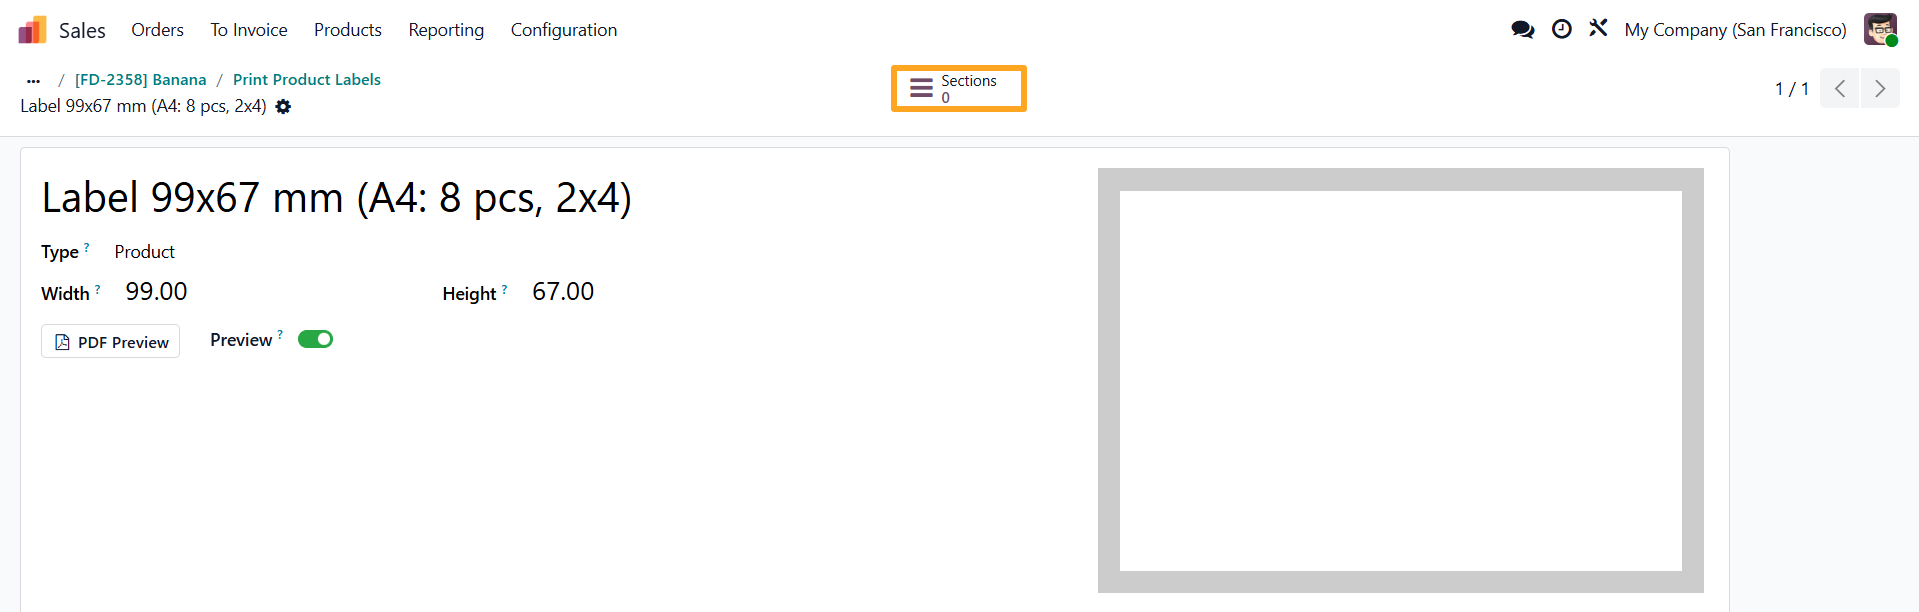
Let's go ahead and configure this layout in Odoo. Click New Label in the print wizard, then enter the dimensions calculated before:
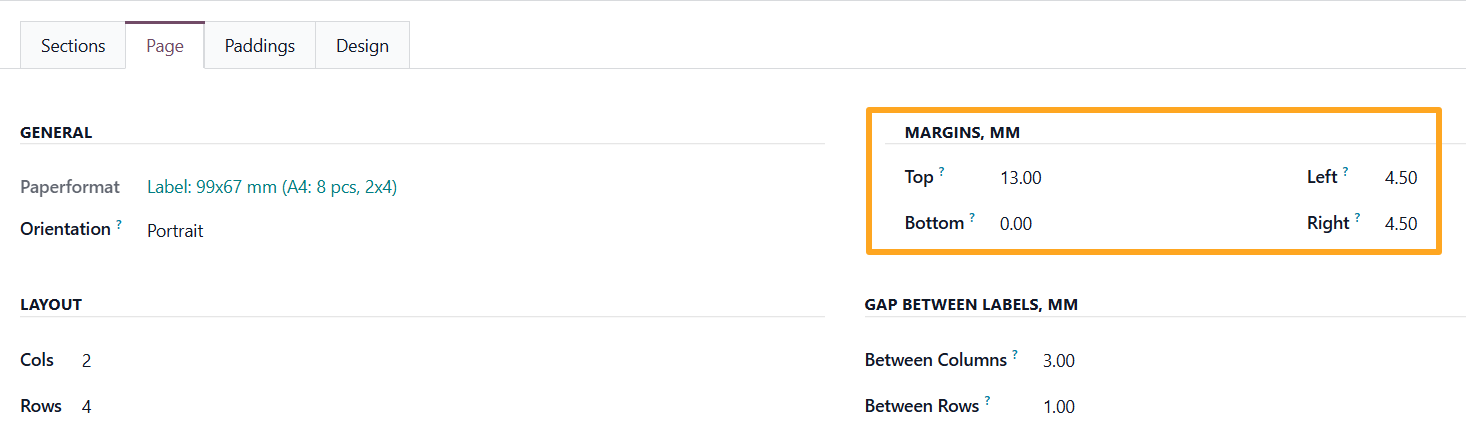
After adding the template, on the Page tab, set the top, left, and right margins for the page:
Label Design
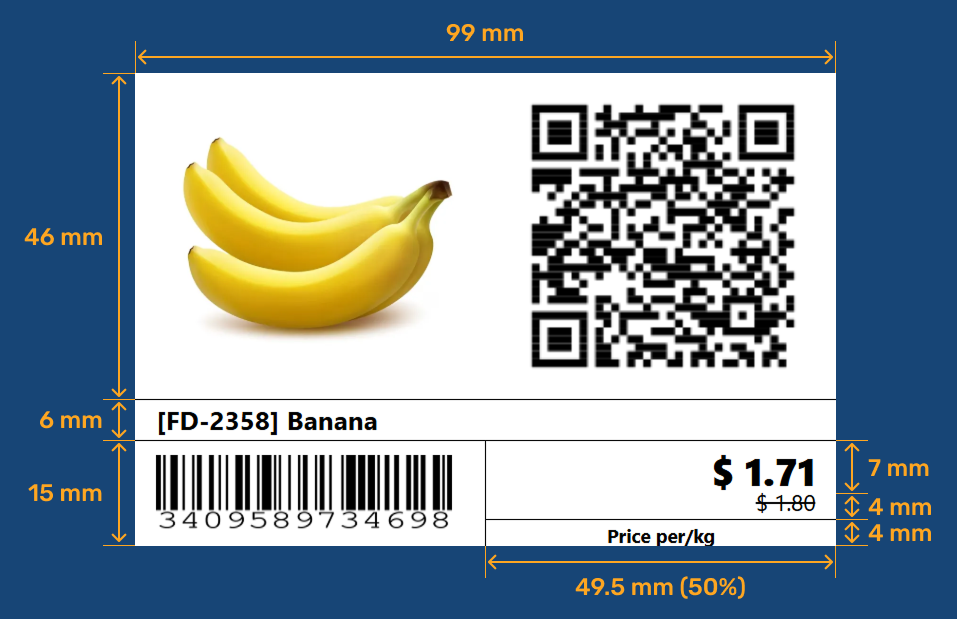
The next step is label designing. Prepare your label sample with the label sections you require. Decide what information should appear on them and determine the required height and width for each section:
When your single-label layout is ready, click Sections at the top of the page and then New to start building the label content:
Image
The first section contains the product image:
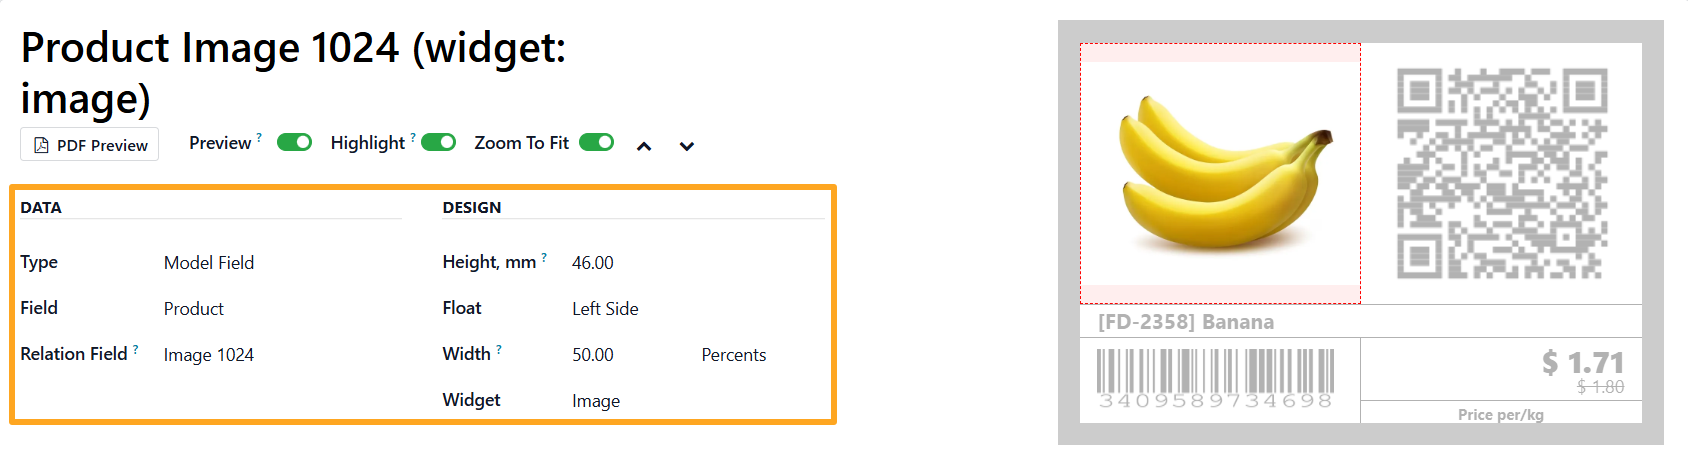
Set the section height to 46 mm, the Float to the Left side, half width, and choose the Image widget.
QR code
The next section is the product page as a QR code. Duplicate the previous section and change the Relation Field to Website Absolute URL. After scanning this code, the product page on your website is opened. Then set Float to the Right side and choose the QR code widget:
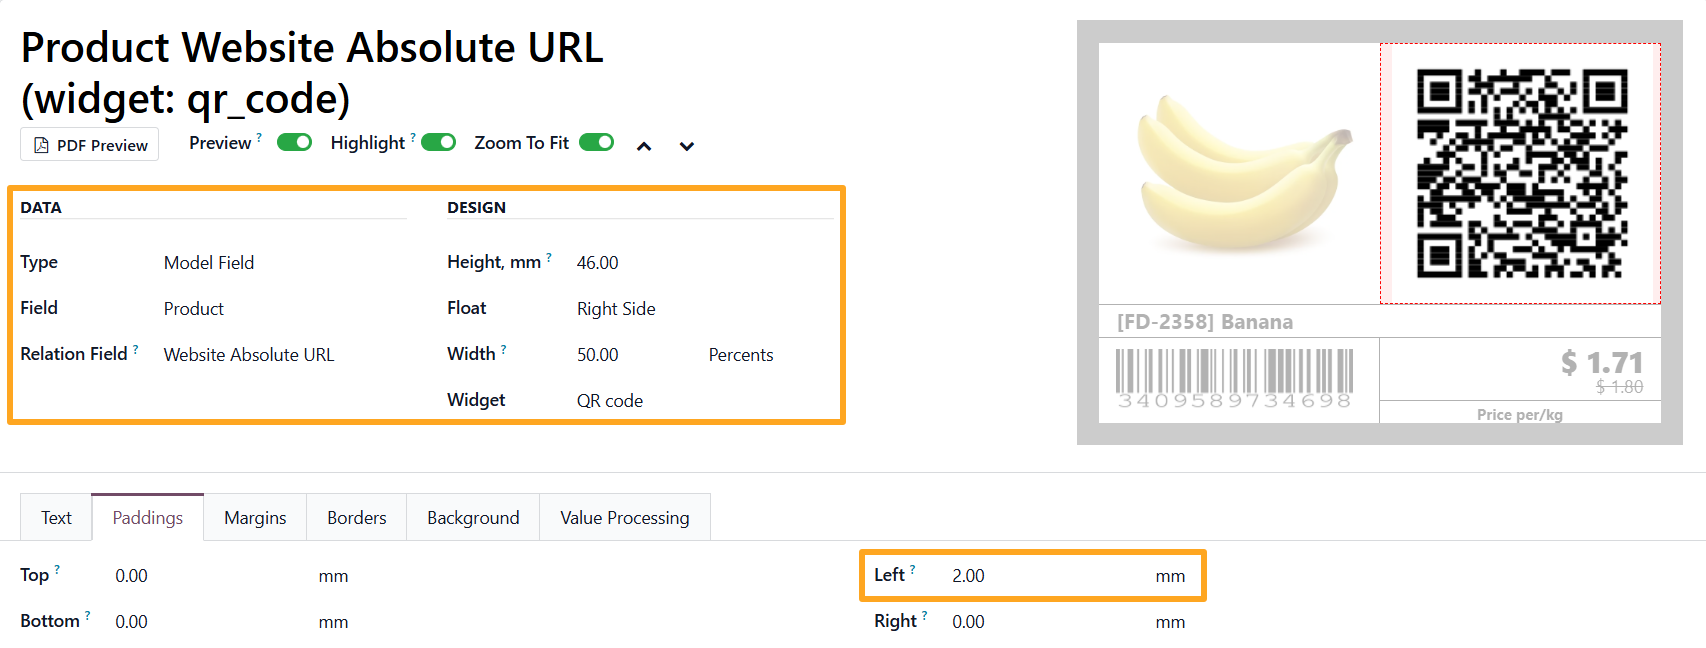
Also, add some padding to center the QR code within the section.
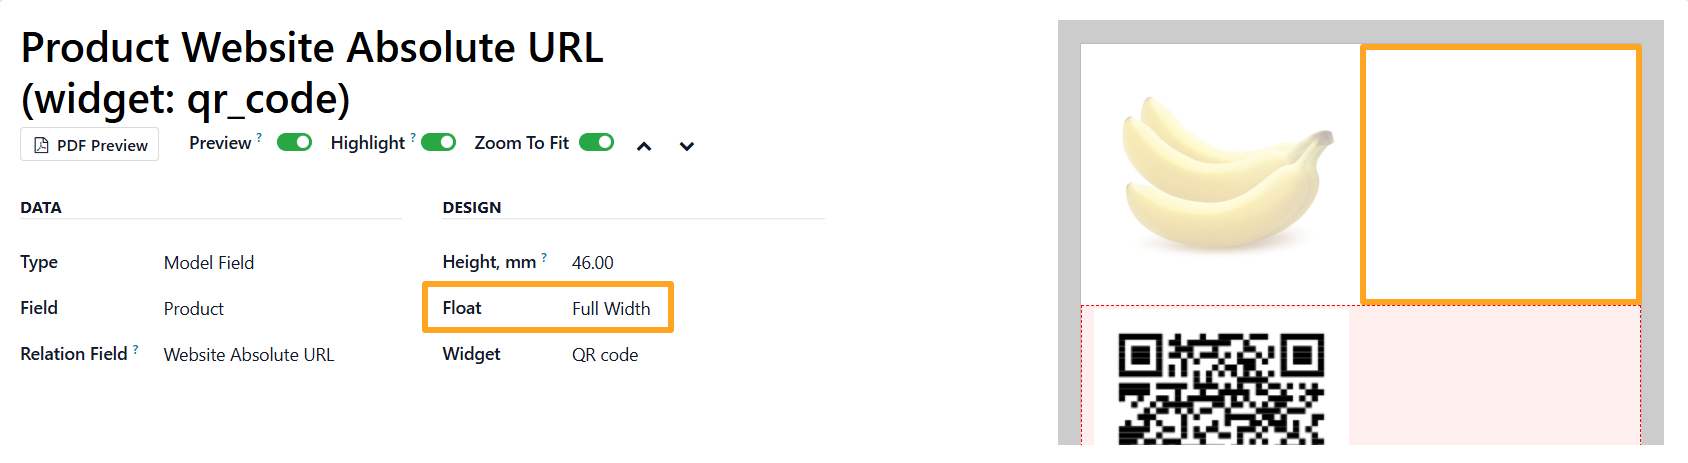
Note that sections are placed from left to right. This directly affects the order when multiple sections are in the same row. For example, if the template already has a half-width section and then adds a full-width section, it will move to the next row, leaving space on the right:
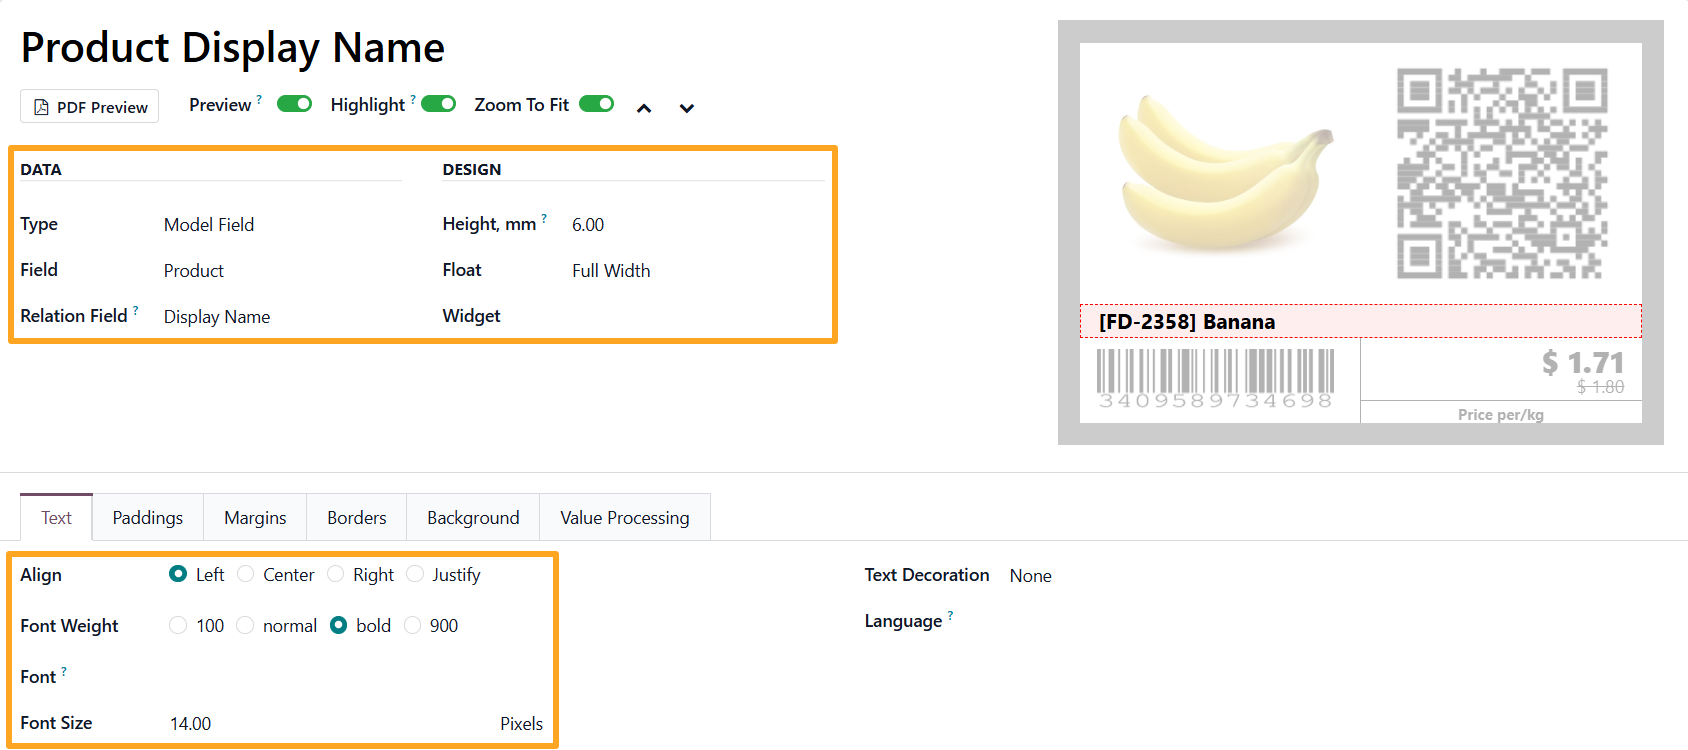
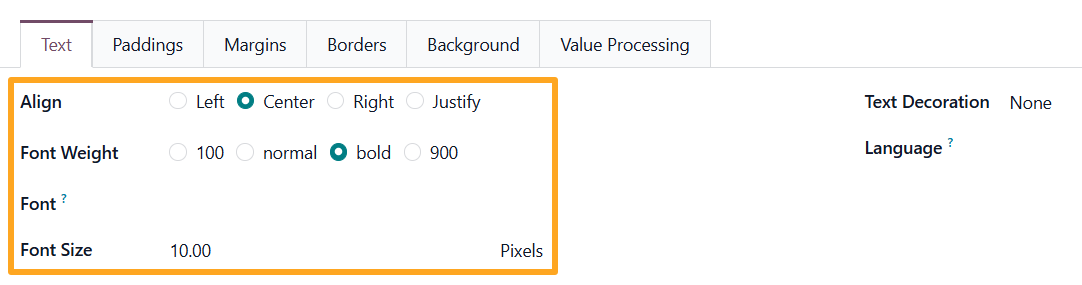
Name
The Display Name section has a height of 6 mm, text styling:
Specific padding:

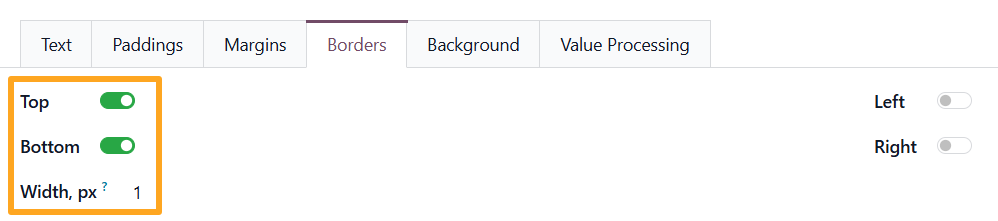
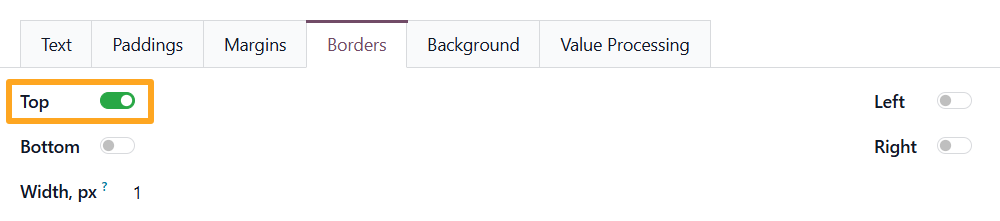
Top and bottom borders:
Barcode
The next section is the product barcode. Set the height, float position, and width, choose the Barcode widget, and enable the human-readable code below the barcode:
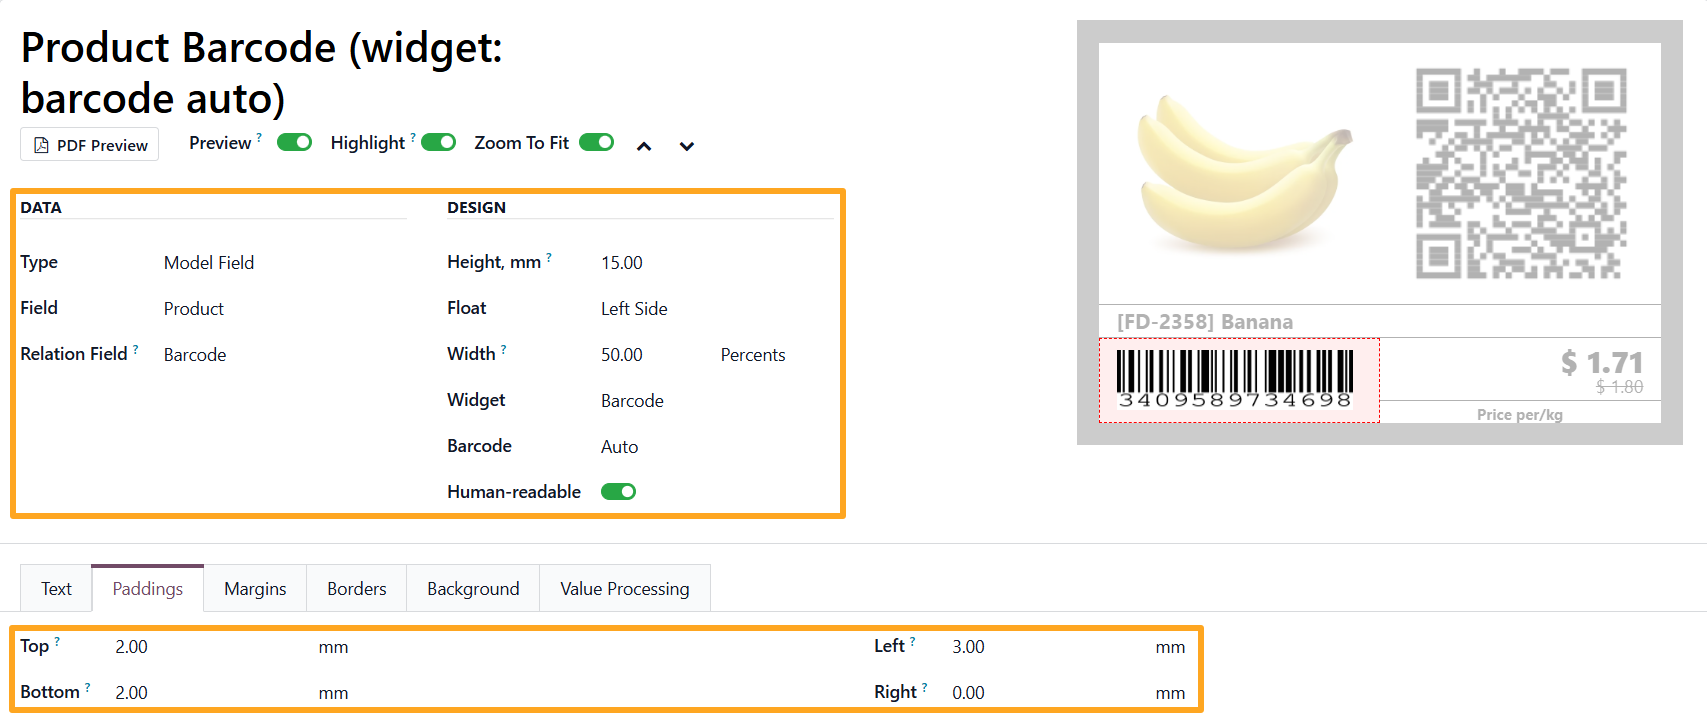
Adjust the position using padding and alignment.
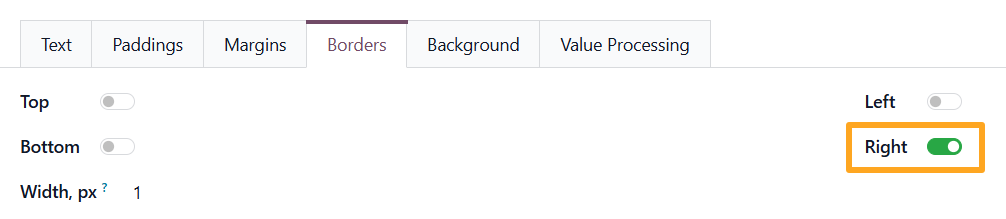
To separate this section, add a right border:
Promo Price
The Promo Price section includes the following settings:
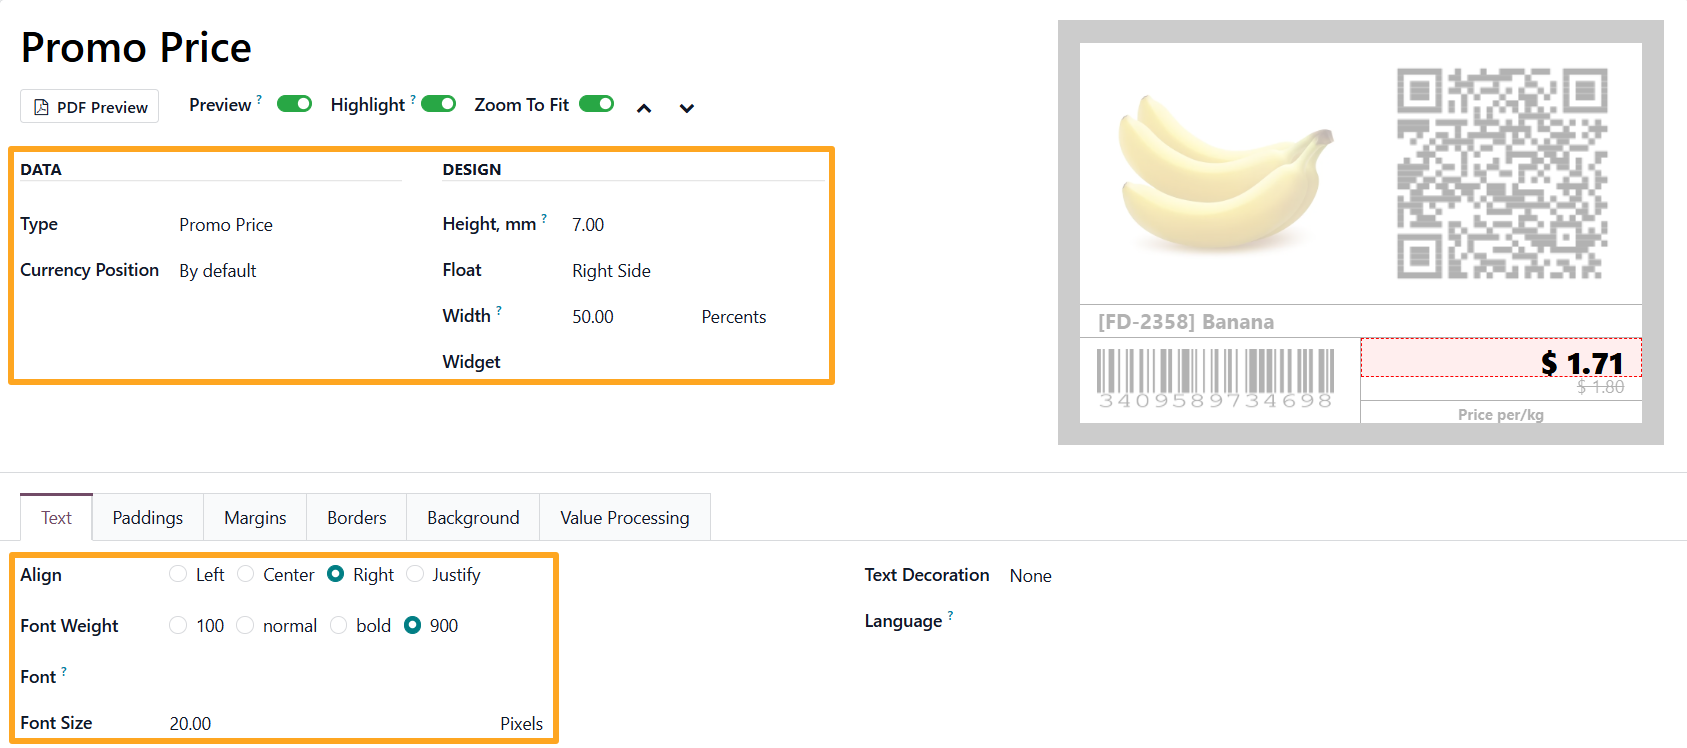
Paddings:

To display the numeric value in a region-specific format, enable Number Localization in the Value Processing tab:

Regular Price
The Regular Price section has a smaller size and text, with the Line Through style:
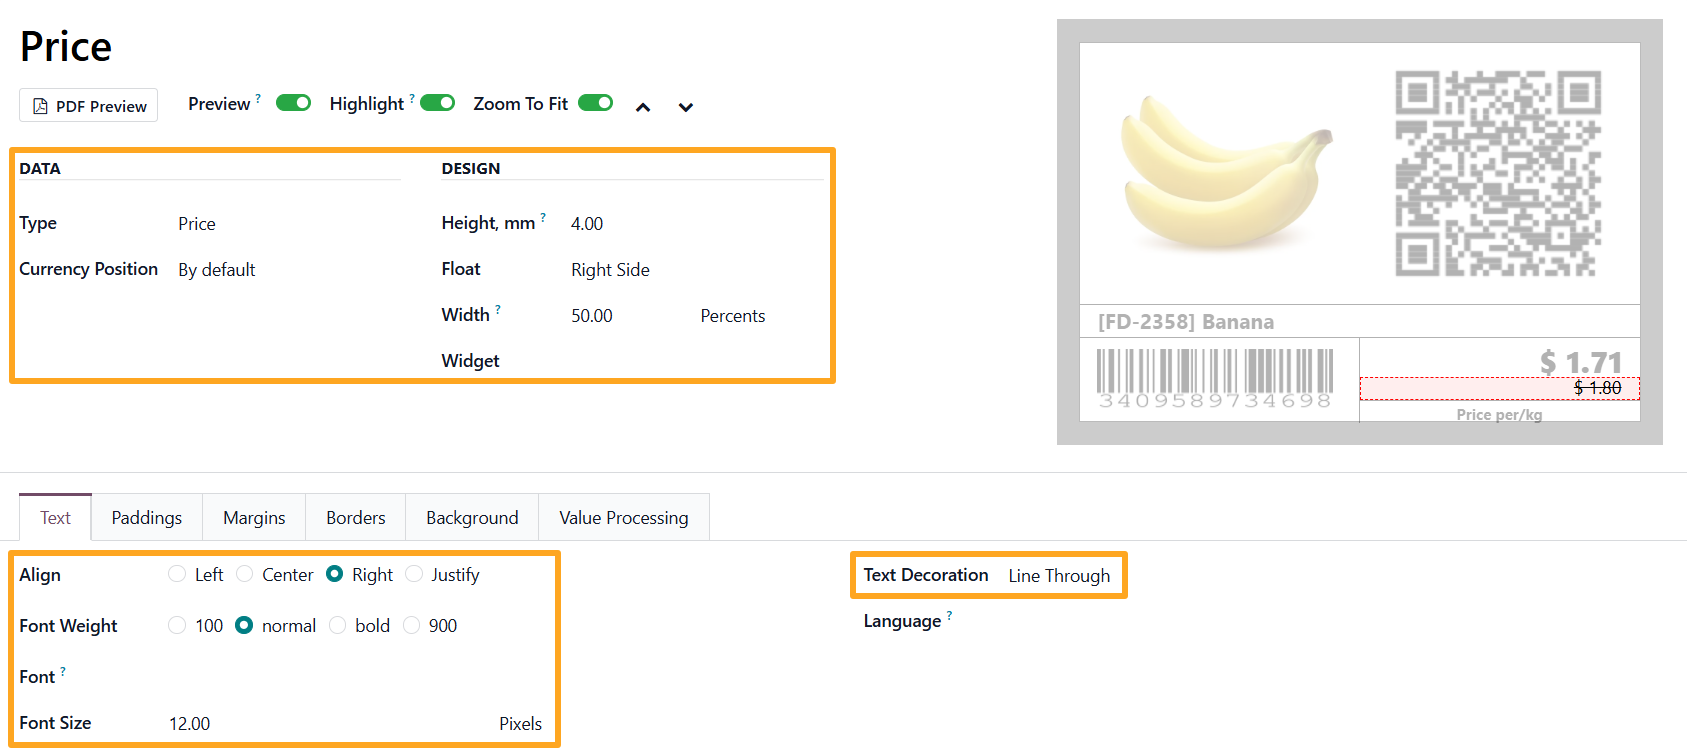
Right padding:

Unit of Measure
The section with a dynamic unit of measure value is used together with static text set as a prefix:
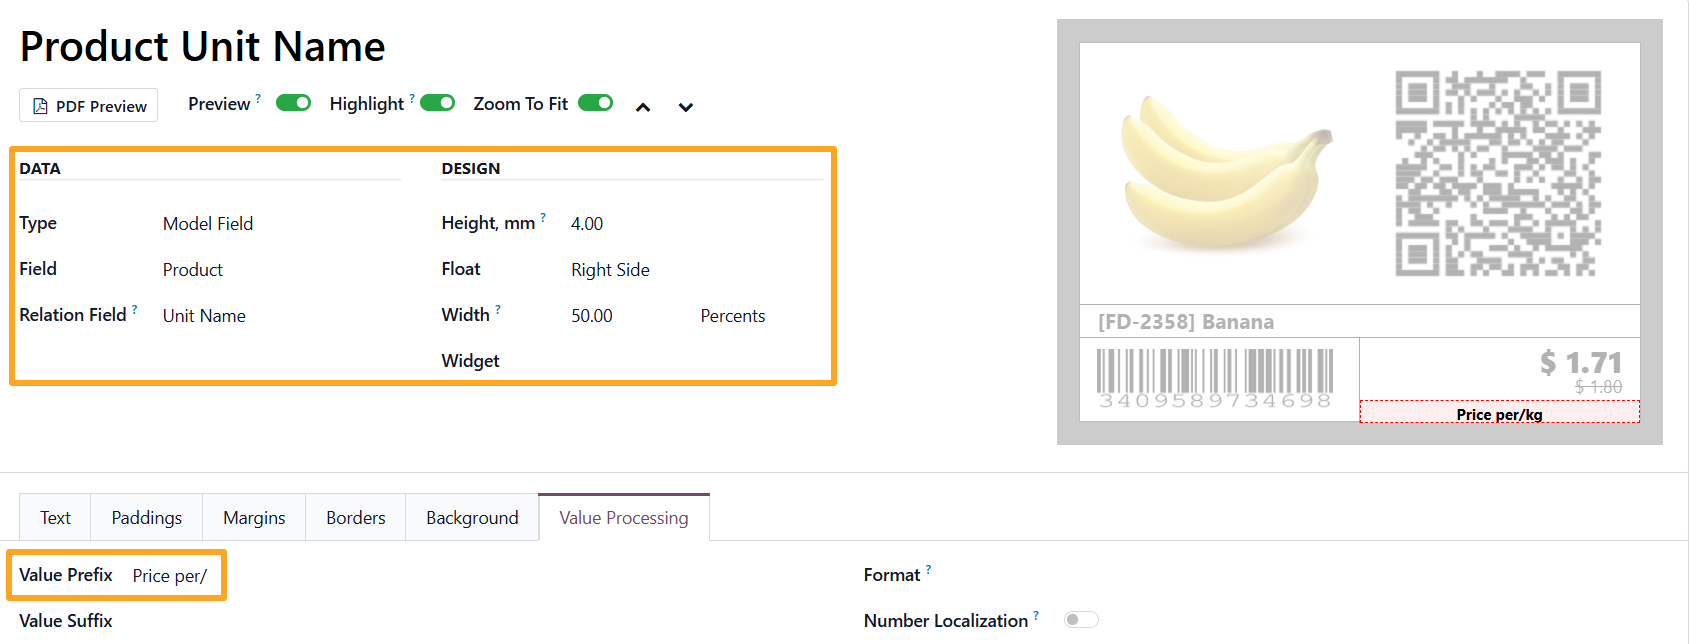
Add a top border to separate it from the pricing sections:
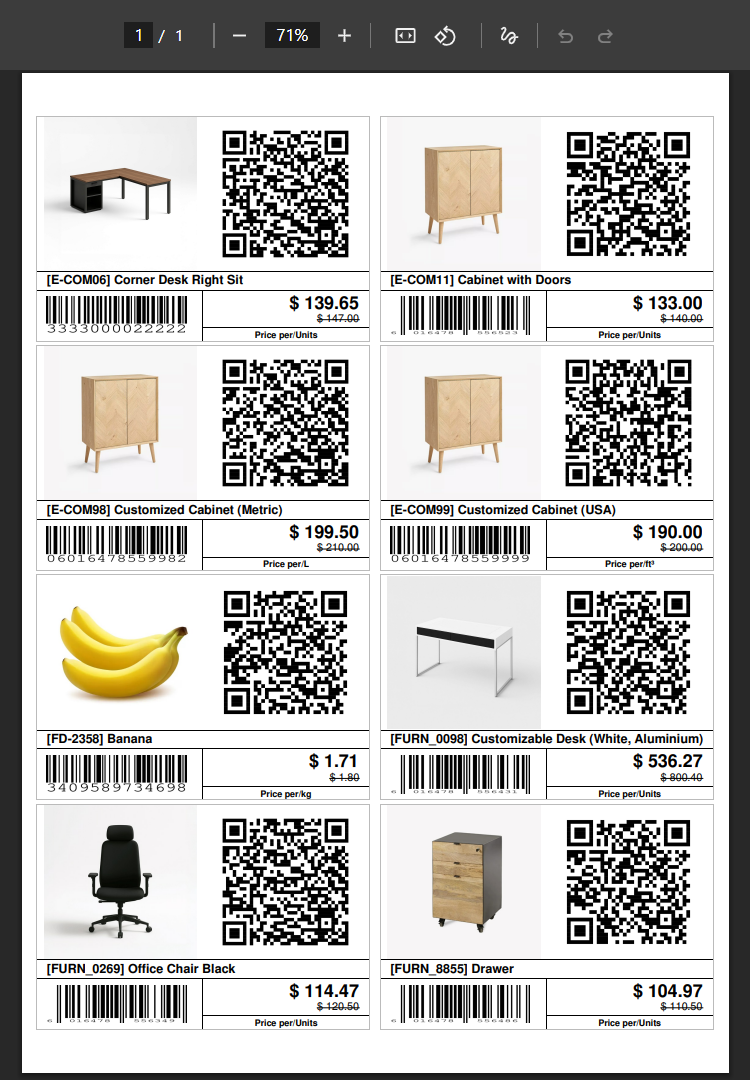
Result
The multi-label A4 sheet template is now ready, and the generated PDF file looks as follows:
Summary
Configuring a custom template in Odoo with Label Builder transforms the standard printing process into a flexible tool for branding and information management. With correctly calculated sheet parameters and a detailed design for each section, it is possible to generate a print-ready PDF or ZPL file in which every label contains all the necessary information: product visuals, scannable barcodes, and up-to-date pricing with applied discounts.
Using such a layout not only reduces material consumption but also significantly simplifies staff operations by improving the accuracy and speed of product labeling.