
Activate the Google Tag on your Odoo website to integrate with Google Analytics 4 (GA4) and Google Ads
This module serves as an extensible foundation for your Odoo tracking setup. It provides the core logic for sending data to Google, which you can expand with other modules to track specific e-commerce events or collect rich product and visitor insights.
| Availability |
Odoo Online
Odoo.sh
On Premise
|
|---|---|
| Compatibility |
Community
Enterprise
|
| Technical Name | website_google_analytics_4 |
| Version | 20.0.1.0.0 |
| License | OPL-1 |
| Category | |
| Support | Free 60 days support and 360 days bug-fixing |
Use Case

Jorem ipsum dolor sit amet, consectetur adipiscing elit. Nunc vulputate libero et velit interdum, ac aliquet odio mattis. Class aptent taciti sociosqu ad litora torquent per conubia nostra, per inceptos himenaeos.
Forem ipsum dolor sit amet, consectetur adipiscing elit. Nunc vulputate libero et velit interdum, ac aliquet odio mattis. Class aptent taciti sociosqu ad litora torquent per conubia nostra, per inceptos himenaeos.
Dorem ipsum dolor sit amet, consectetur adipiscing elit. Nunc vulputate libero et velit interdum, ac aliquet odio mattis.
It is a long established fact that a reader will be distracted by the readable content of a page
Korem ipsum dolor sit amet, consectetur adipiscing elit. Nunc vulputate libero et velit interdum, ac aliquet odio mattis. Class aptent taciti sociosqu ad litora torquent per conubia nostra, per inceptos himenaeos.
Korem ipsum dolor sit amet, consectetur adipiscing elit. Nunc vulputate libero et velit interdum, ac aliquet odio mattis.
Odoo App Installation
Upload modules
Upload modules from the ZIP archive to your Odoo hosting, or a GitHub repository connected there.
Place the unzipped modules in your custom add-on directory and restart the Odoo system service.
Update App List
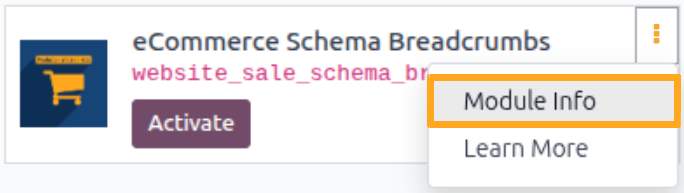
After restarting, activate the Developer Mode, and go to the Apps menu.

Click on Update Apps List to fetch the new modules in the list.
Activate the App
Install the new module, finding it by name and clicking on the Activate button.

* If you don't see the module, try to remove the default Apps filter from the search bar.
Configuration
Follow the instructions in the module description to complete the installation process and start using the app.

Manual

Google Tag in Odoo
The Google Tag JS script can send core tracking data to two Google services: Google Analytics 4 and Google Ads.

You can add the Google tag to an Odoo website in two ways:
- Using Odoo's built-in Google Analytics feature
- Using the Odoo Google Tag module by Garazd Creation
If Odoo's built-in tracking logic is sufficient for your needs, choose the first way. If you require features beyond basic tracking, the second way provides a convenient and extensible foundation for integrating with Google services.
Additional modules related to this feature allow you to implement Google Consent Mode, as well as collect and send rich product and visitor data from your website to Google Analytics, Google Ads, and Google Tag Manager.

Getting the Tag ID
Before using the module, obtain a tracking ID from your chosen service — Google Analytics or Google Ads.
Getting the Measurement ID in Google Analytics
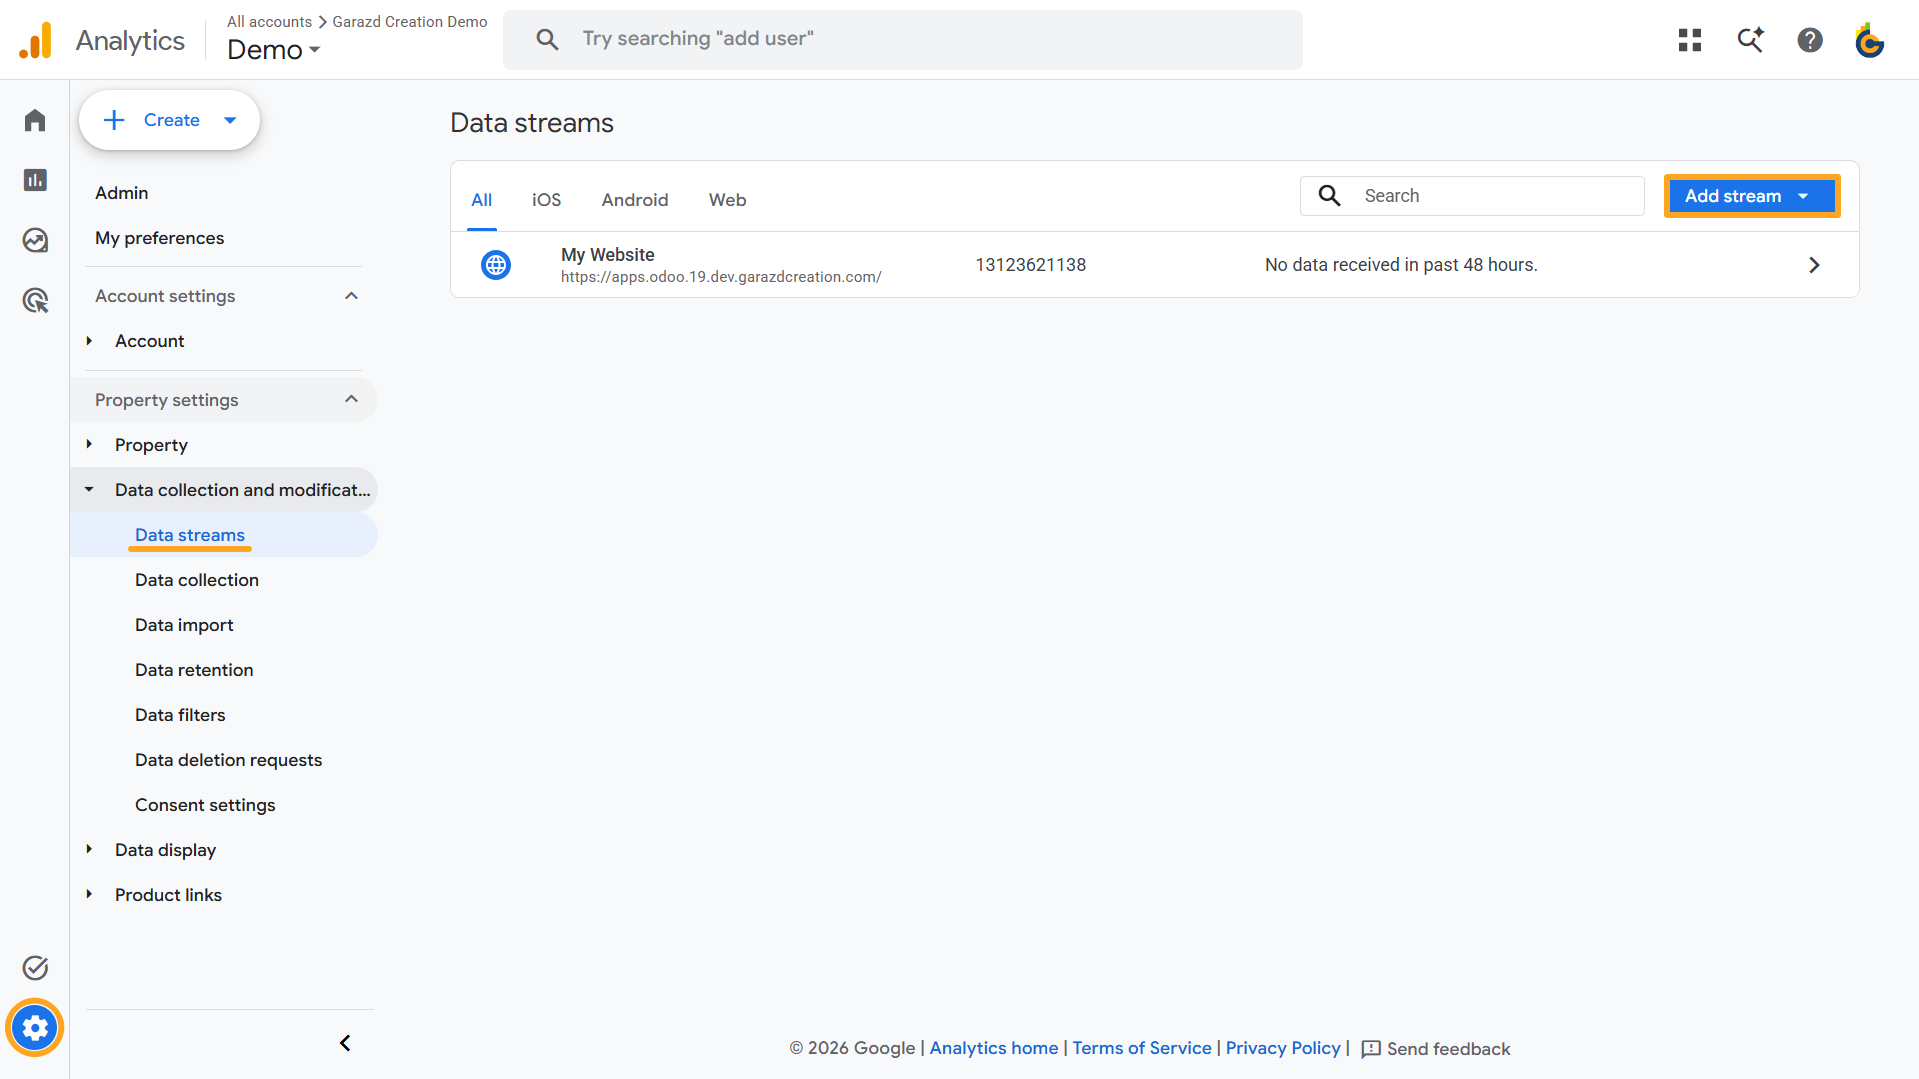
To obtain a tag ID in Google Analytics, log in to your account and navigate to Admin — Data Collection and Modification — Data Streams. If you do not have a data stream yet, create one by clicking Add Stream.
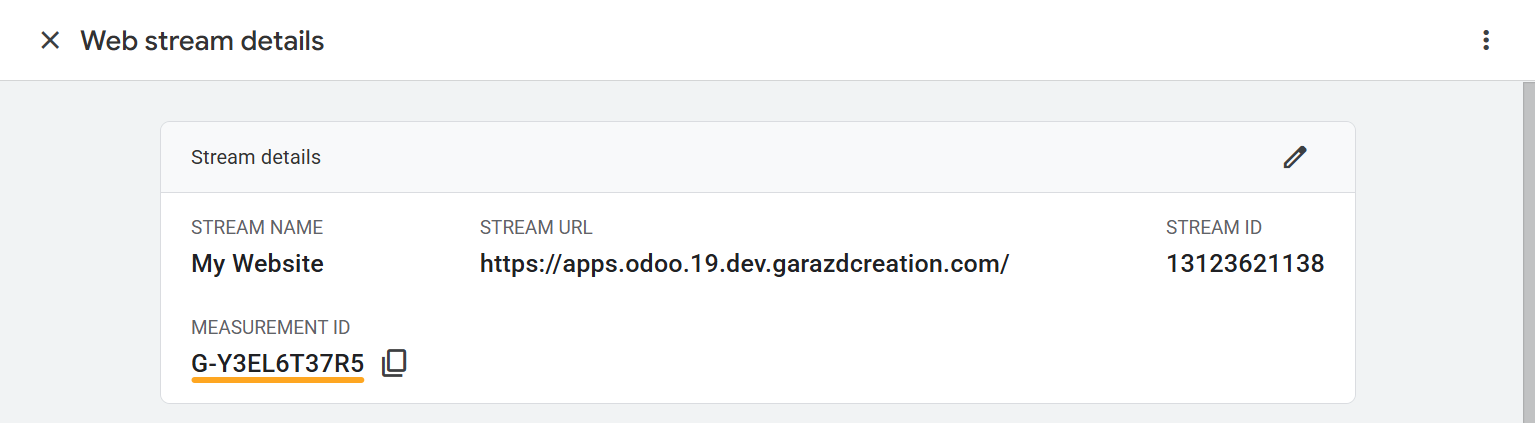
Open the data stream and copy the Measurement ID.
Getting the Tag ID in Google Ads
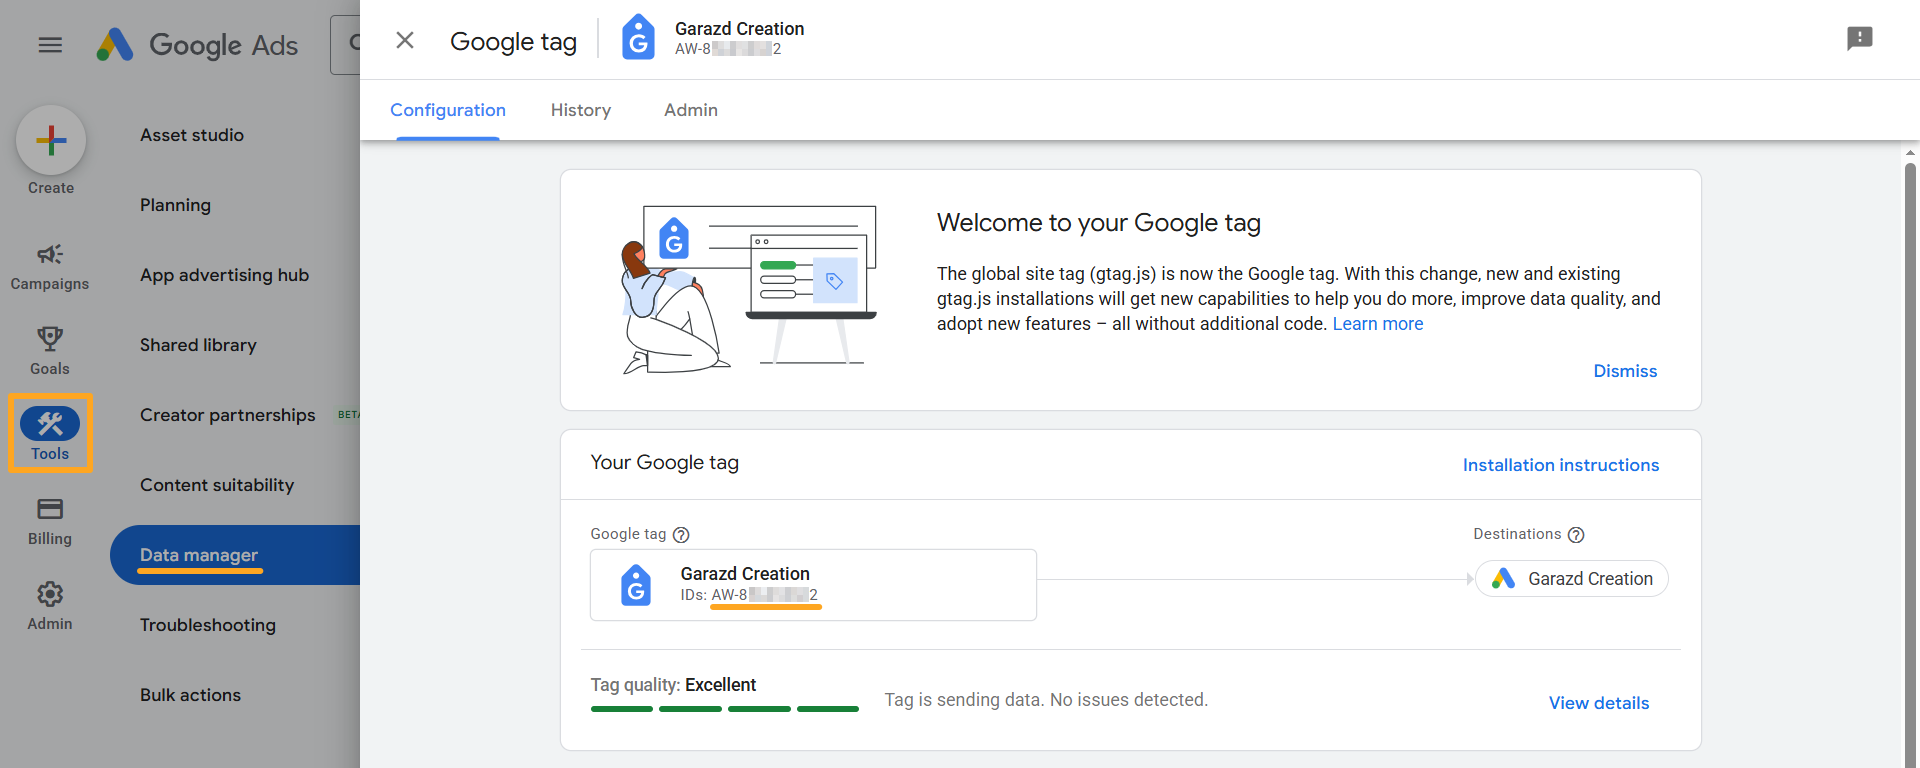
To obtain a tag ID in Google Ads, log in to your account and navigate to Tools — Data Manager. Open your Google tag and copy the ID.

Tracking Activation
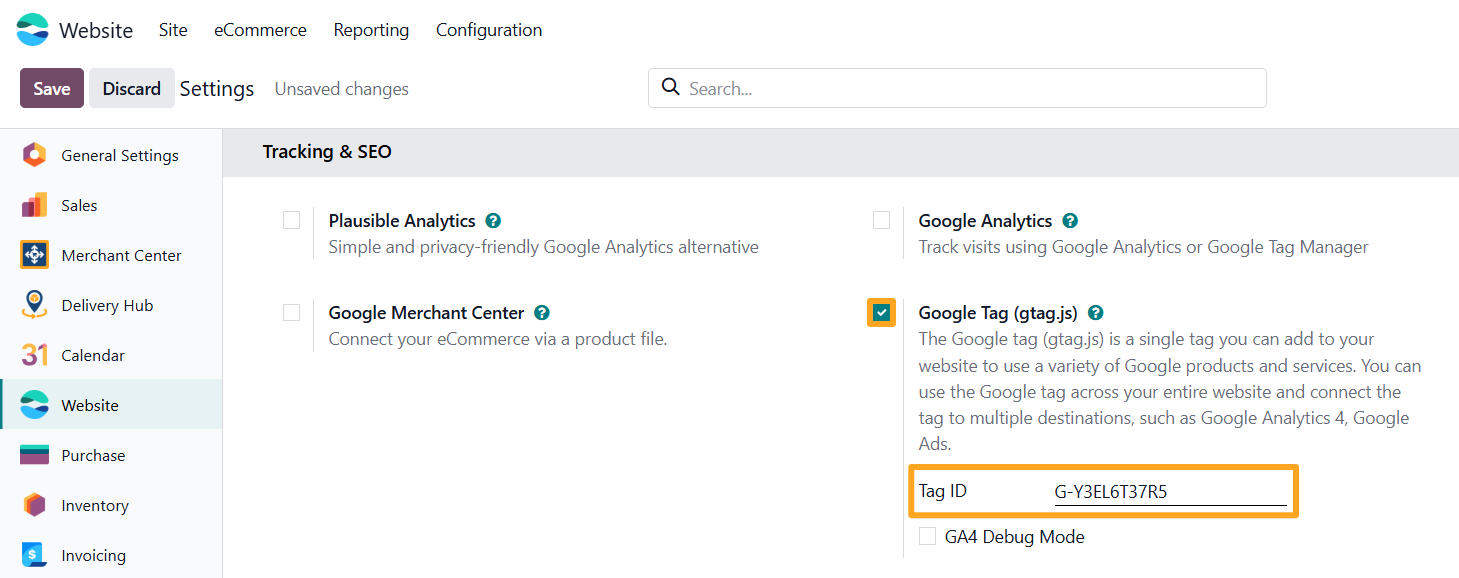
After installing the module, activate tracking by completing the following steps:
-
01Open the website settings
-
02Enable the Google Tag (gtag.js) option in the Tracking and SEO section
-
03Paste the copied identifier into the Tag ID field
-
04Save the settings
After that, the module automatically adds the Google tag script to all pages of the Odoo website.

Cookie Consent
The module is compatible with the Odoo Google Consent Mode solution, which allows managing cookie consent and updating consent states by sending them to Google.


Testing
You have a few ways to verify your Google tag integration:
- Debug View in Google Analytics 4
- Browser Extensions
Testing with Debug View
To test the tag integration with Google Analytics 4, enable the GA4 Debug Mode option in your Odoo website settings and save the changes.
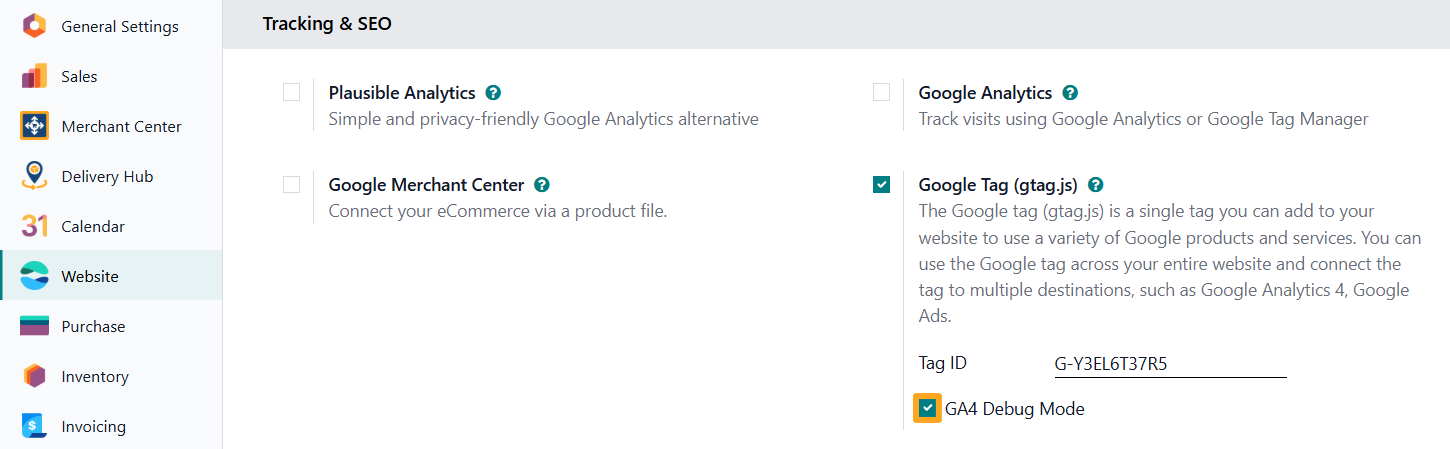

Next, open several pages on your website to send test events to Google.
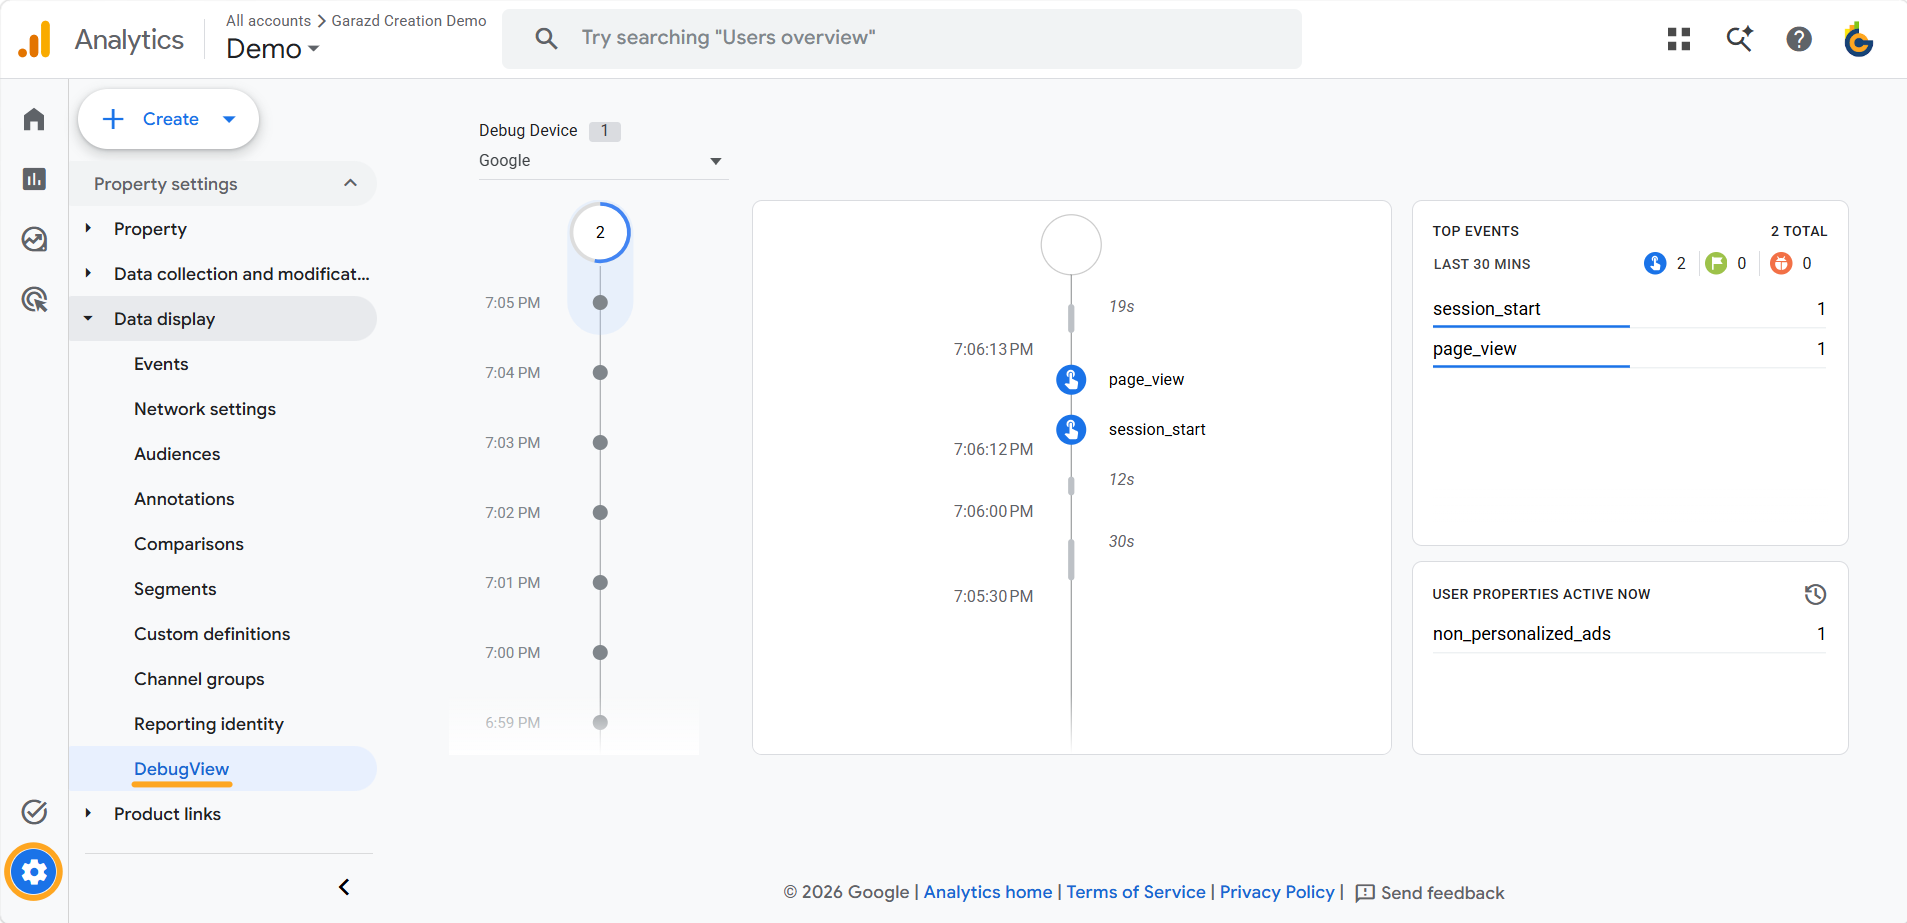
After that, review the tracked events in the Debug View menu of your Google Analytics 4 account.
Testing via Browser Extension
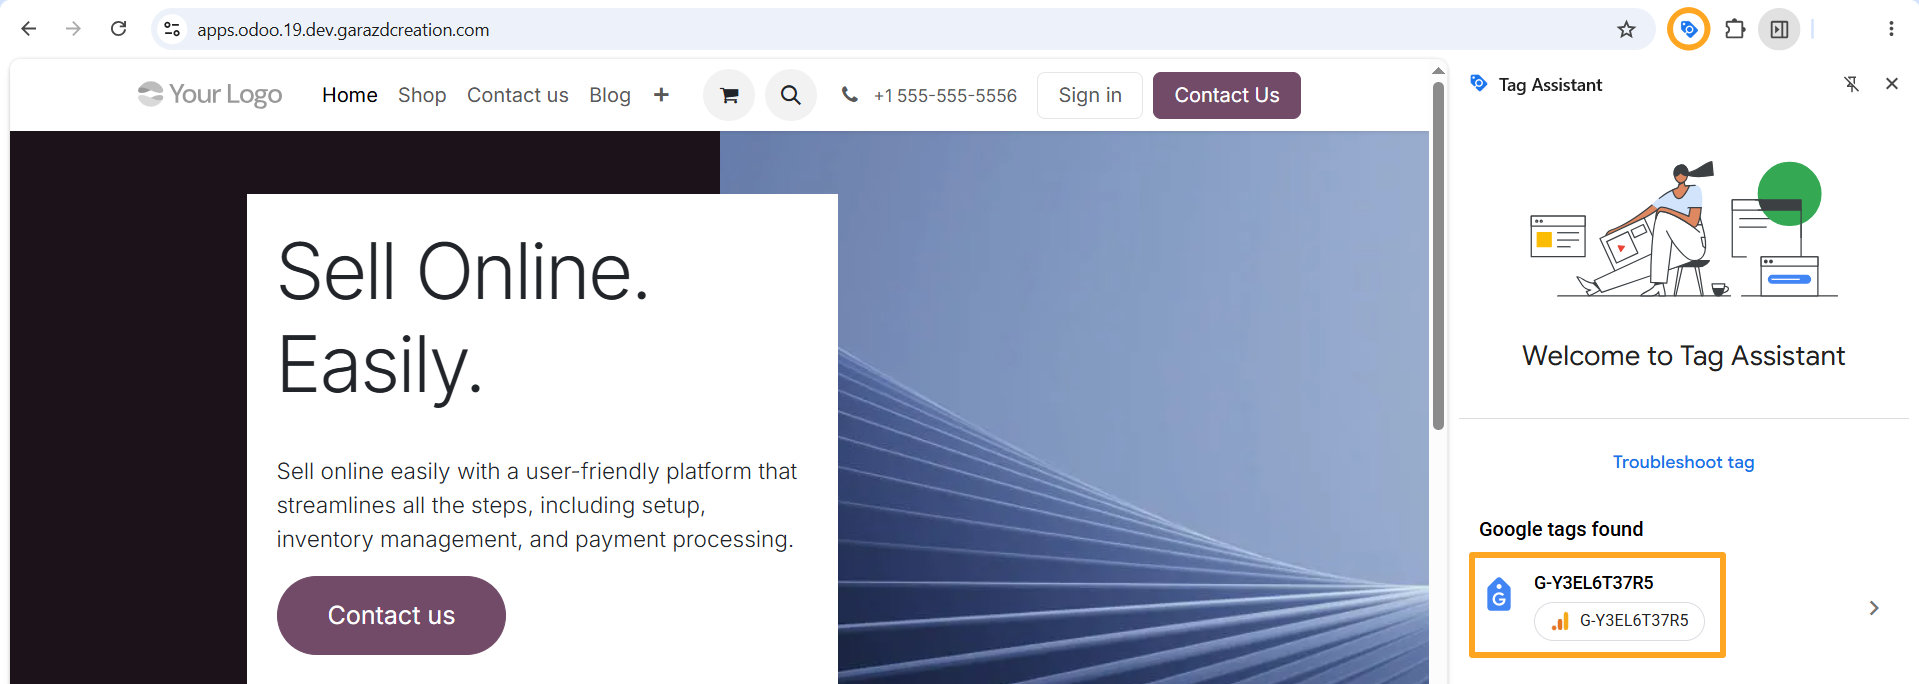
An alternative way to test the Google tag integration on your Odoo website is to use the Tag Assistant browser extension: https://chromewebstore.google.com/detail/tag-assistant/kejbdjndbnbjgmefkgdddjlbokphdefk.

Unlock the full functionality of this module
Track e-commerce events on your website and send them to Google along with product information and user-provided data. Google Consent Mode configuration is included.



App Edition Comparison
|
Choose the edition that best fits your business needs |

Global Site Tag (gtag.js) is now the Google Tag
|
Google Analytics 4 eCommerce
|
GA Measurement Protocol
|
|---|---|---|---|
website_google_analytics_4
|
website_sale_google_analytics_4
|
website_sale_google_analytics_api
|
|
|
Adding a Tag to All Webpages
|

|
|
|
|
Page View Event Tracking
|
|
|
|
|
Support for Google Consent Mode
|

|
|
|
|
eCommerce Event Tracking
|
|
|
|
|
Sending Product Data
|
|
|
|
|
Sending User-Provided Data
|
|
|
|
|
Sending Data When the Script Tag is Blocked
|
|
|
|
|
Server-side Integration Via the Measurement Protocol
|
|
|
|
|
Full Price
|
0.0
€
|
129.0
€
|
245.0
€
|
|
Upgrade Price
|
|
|
116.0
€
|

Changelog
14.0.3.0.0 2024-03-16
- Refactor from GA4 to the Google Tag.
14.0.2.0.1 2024-02-05
- Fix linter warnings.
- Add README.rst.
14.0.2.0.0 2023-06-14
- Improved for new website tracking logic.
- Change the license to OPL-1.
- Remove "sign_up" and "login" GA4 events tracking.
14.0.1.1.1 2022-08-13
- Fix click function for logged users.
14.0.1.1.0 2022-08-12
- Add Google Analytic 4 "Debug Mode" option.
14.0.1.0.1 2021-07-07
- Move script block to the end of the head tag.
14.0.1.0.0 2021-06-02
- Init version.
15.0.3.1.1 2024-04-02
- Rename the "ga4_tracking_key" field to the "gtag_tracking_key".
15.0.3.1.0 2024-03-16
- Refactor from GA4 to the Google Tag.
15.0.3.0.0 2023-07-19
- Remove "sign_up" and "login" GA4 events tracking.
- Improved for new website tracking logic.
- Change the license to OPL-1.
15.0.2.1.0 2022-11-11
- Improve passing params to the gtag script.
15.0.2.0.0 2022-09-06
- Rebuilt logic, extend the standard Google Analytics instead add a new.
15.0.1.1.0 2022-08-15
- Add Google Analytic 4 "Debug Mode" option.
15.0.1.0.0 2022-02-02
- Migrate from 14.0
16.0.3.0.1 2024-05-02
- Improve the script insertion with the post gtag call section.
16.0.3.0.0 2024-03-16
- Refactor from GA4 to the Google Tag.
16.0.2.2.0 2024-01-17
- Implement compability with Google Consent Mode extension.
16.0.2.1.0 2023-12-22
- Fix linter warnings.
- Add README.rst.
16.0.2.0.0 2023-07-27
- Change the license to OPL-1.
- Improved for new website tracking logic.
- Remove "sign_up" and "login" GA4 events tracking.
16.0.1.0.0 2022-11-11
- Migration from 15.0.
17.0.2.1.0 2024-06-20
- Improve the script insertion with the post gtag call section.
17.0.2.0.0 2024-04-09
- Refactor from GA4 to the Google Tag.
17.0.1.1.0 2024-02-17
- Implement compability with Google Consent Mode extension.
17.0.1.0.0 2023-11-02
- Migration from 16.0.
- Implement compability with Google Consent Mode extension.
18.0.1.1.0 2025-05-29
- Refactor the Google Tag gtag.js script insertion.
18.0.1.0.0 2024-10-08
- Migration from 17.0.
19.0.1.0.0 2025-09-22
- Migration from 18.0.
20.0.1.0.0 2026-08-27
- Migration from 19.0.