
Overview
There are several ways to collect tracking data on your Odoo website and send it to Google. The Google Tag Manager is a way to send tracking data via DataLayer, that is preferred by marketers and advanced users, who have experience with configuring tags on the GTM side.
| Availability |
Odoo Online
Odoo.sh
On Premise
|
|---|---|
| Compatibility |
Community
Enterprise
|
| Technical Name | website_sale_google_tag |
| Version | 19.0.1.0.2 |
| License | OPL-1 |
| Category | |
| Support | Free 60 days support and 360 days bug-fixing |
Use Case
Jorem ipsum dolor sit amet, consectetur adipiscing elit. Nunc vulputate libero et velit interdum, ac aliquet odio mattis. Class aptent taciti sociosqu ad litora torquent per conubia nostra, per inceptos himenaeos.
Forem ipsum dolor sit amet, consectetur adipiscing elit. Nunc vulputate libero et velit interdum, ac aliquet odio mattis. Class aptent taciti sociosqu ad litora torquent per conubia nostra, per inceptos himenaeos.
Dorem ipsum dolor sit amet, consectetur adipiscing elit. Nunc vulputate libero et velit interdum, ac aliquet odio mattis.
It is a long established fact that a reader will be distracted by the readable content of a page
Korem ipsum dolor sit amet, consectetur adipiscing elit. Nunc vulputate libero et velit interdum, ac aliquet odio mattis. Class aptent taciti sociosqu ad litora torquent per conubia nostra, per inceptos himenaeos.
Korem ipsum dolor sit amet, consectetur adipiscing elit. Nunc vulputate libero et velit interdum, ac aliquet odio mattis.
Odoo App Installation
Upload modules
Upload modules from the ZIP archive to your Odoo hosting, or a GitHub repository connected there.
Place the unzipped modules in your custom add-on directory and restart the Odoo system service.
Update App List
After restarting, activate the Developer Mode, and go to the Apps menu.

Click on Update Apps List to fetch the new modules in the list.
Activate the App
Install the new module, finding it by name and clicking on the Activate button.
* If you don't see the module, try to remove the default Apps filter from the search bar.
Configuration
Follow the instructions in the module description to complete the installation process and start using the app.


Manual
There are several ways to collect tracking data on your Odoo website and send it to Google. The Google Tag Manager is a way to send tracking data via DataLayer, that is preferred by marketers and advanced users, who have experience with configuring tags on the GTM side.
However, a process of manual relations building between website CSS selectors and GTM triggers is quite complicated and takes a time. Various ready-made GTM integrations CMS providers simplify this process and allow you to quickly start tracking conversions on your website.
On Odoo websites, if you prefer using of the Google Tag Manager to integrate with analytical and advertising services, this solution provides you with convenient tools and can save time.
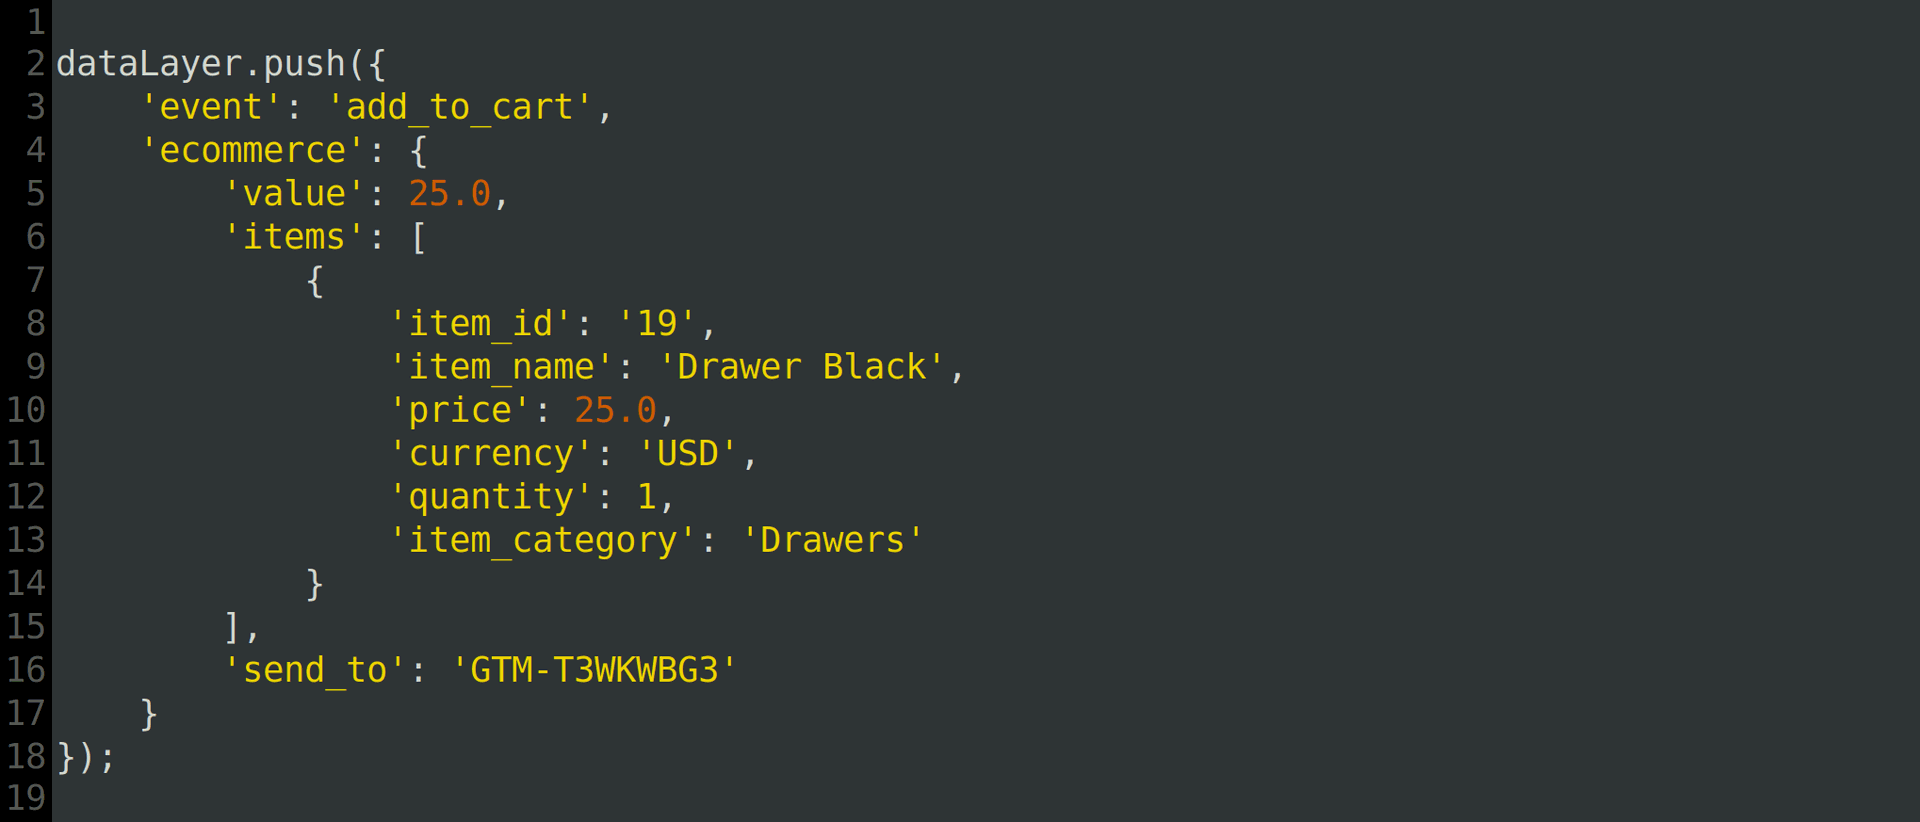
You can use Odoo e-Commerce events, like as "view_item", "add_to_cart", "begin_checkout", "purchase", and others, to set up conversion actions and send tracking data about your products and hashed users' data to Google, for getting enhanced conversions and track dynamic conversion values.
The module allows you to configure tracking events via Odoo UI, without additional development on your website, and allows minimizing of manual configuring actions on the GTM side.
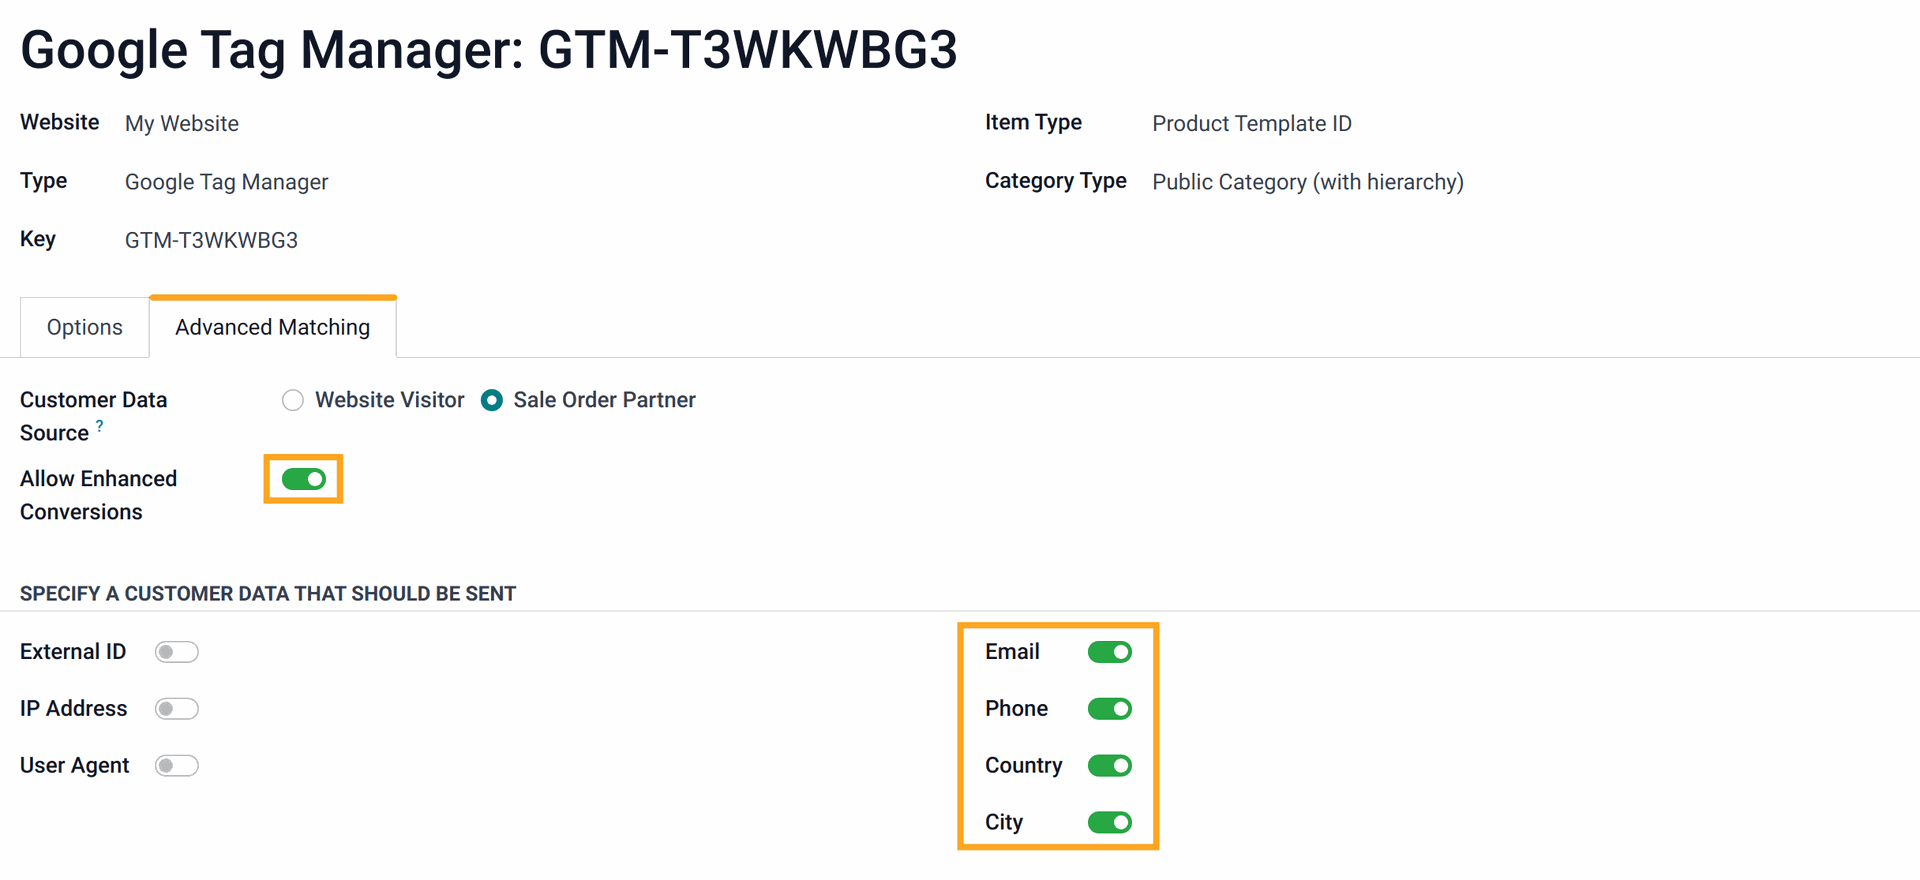
Click on the "Manage Tracking Services" link in the Settings view, or go to the "Configuration" - "Tracking" - "Services" menu and create a new tracking service for your Odoo website.
- Specify a website (if you have a multi-website environment).
- Select the service type "Google Tag Manager".
- Fill in your container ID.
If you want to get data about tracking events in Odoo, activate the "Internal Logs" option. To view the log records related to the current service, click the "Logs" button at the top of the form.
| Data Field | Parameter Name | Description | Example |
|---|---|---|---|
| Email address | sha256_email_address |
Hashed user email. | Raw value: test@example.com | Hashed value: a8af8341993604f29cd4e0e5a5a4b5d48c575436c38b28abbfd7d481f345d5db |
| Phone number | sha256_phone_number |
User phone number that is converted in E.164 format, including a plus sign (+) prefix and country code with no dashes, parentheses, or spaces. | Raw value: +380500000000 | Hashed value: e9d3eef677f9a3b19820f92696be53d646ac4cea500e5f8fd08b00bc6ac773b1 |
| Street address | address.street |
User street address. | 123 Sun Street, 7 |
| City | address.city |
User city name. | Kyiv |
| Region | address.region |
User province, state, or region. | Kyivska |
| Postal code | address.postal_code |
User post code. | 12345 |
| Country | address.country |
User country code with 2 letters according to the ISO 3166-1 alpha-2 standard. | UA |
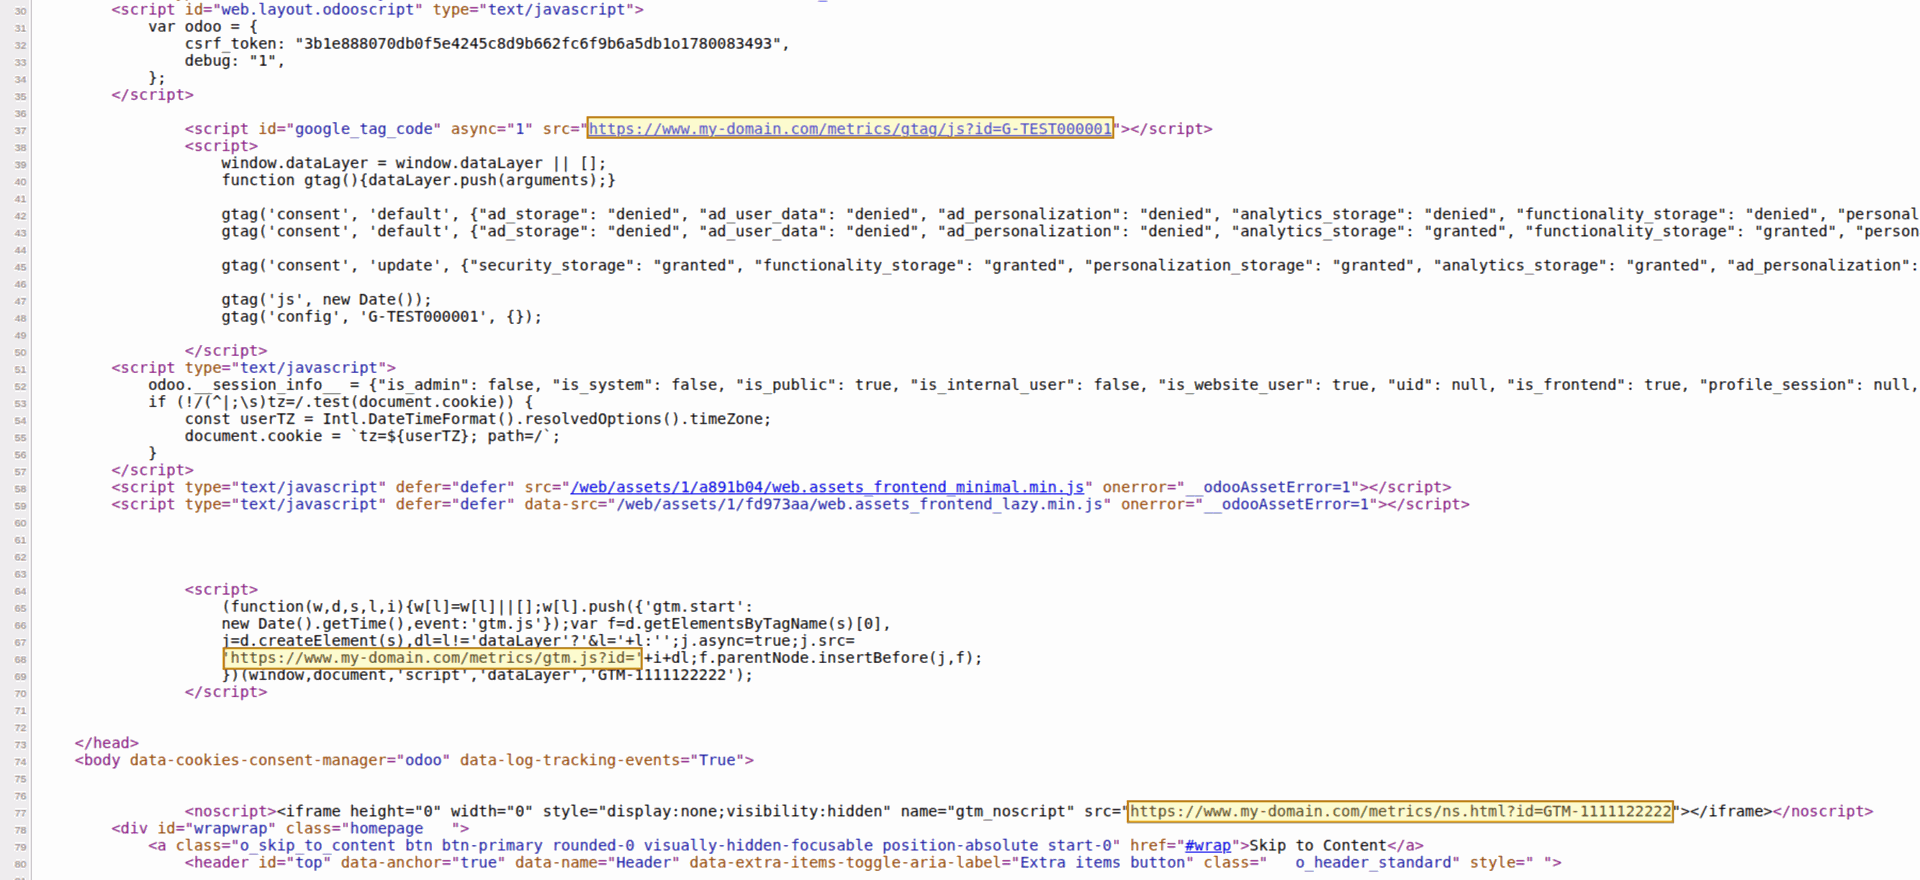
- How to set up Google tag gateway: https://developers.google.com/tag-platform/tag-manager/gateway/setup-guide
- Set up Google tag gateway with Cloudflare: https://support.google.com/tagmanager/answer/16061406
- Google First-party mode - load Google scripts through server-side tagging: https://developers.google.com/tag-platform/tag-manager/server-side/dependency-serving
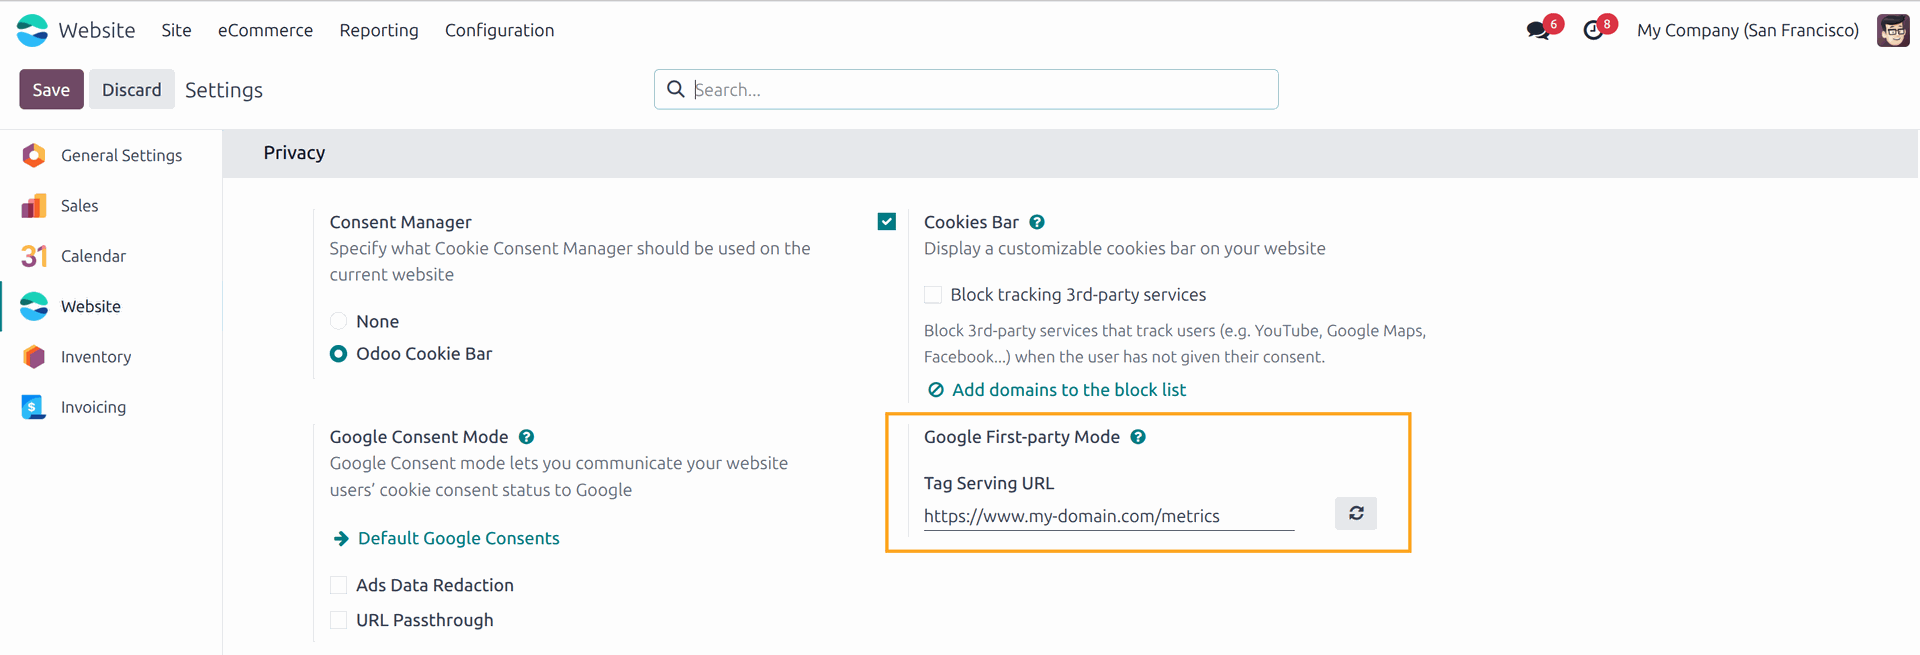
https://www.googletagmanager.com/, click the button on the right.

Changelog
16.0.1.0.1 2025-01-14
- Change the dataLayer calling.
16.0.1.0.0 2024-03-12
- Init version.
17.0.1.0.2 2026-05-25
- Improve getting of the list of allowed settings for user data.
17.0.1.0.1 2024-09-17
- Change the dataLayer calling.
17.0.1.0.0 2024-04-13
- Migration from 16.0.
18.0.1.0.1 2026-05-25
- Improve getting of the list of allowed settings for user data.
18.0.1.0.0 2024-10-11
- Migration from 17.0.
19.0.1.0.2 2025-12-29
- Improve getting of the list of allowed settings for user data.
19.0.1.0.1 2025-12-25
- Add a list of allowed user data settings.
19.0.1.0.0 2025-10-11
- Migration from 18.0.
Resources


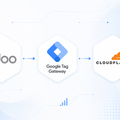
How to configure Google First-party mode in Odoo with Cloudflare
