

Introduction
Odoo integration with the Nova Poshta delivery service allows you to build a single ecosystem for instant order processing and shipping. Instead of manually filling in addresses and product packages, and generating shipping documents on the Nova Poshta website, set up this integration to significantly speed up sales processing and delivery. Using a specialized solution allows you to expand the capabilities of your ERP system and integrate it with a leading logistics provider.
This blog post provides step-by-step instructions for configuring the Odoo Nova Poshta module with an official API key. You will learn how to configure user access rights, start automatic synchronization of up-to-date Nova Poshta catalogs for branches and parcel lockers, optimize partner forms for instant address autofill, and automate the creation of express waybills directly from sales orders or related inventory documents.
Access Rights
First, configure user access to the Nova Poshta features. Open the user settings and select a role in the Nova Poshta field on the Access Rights tab:
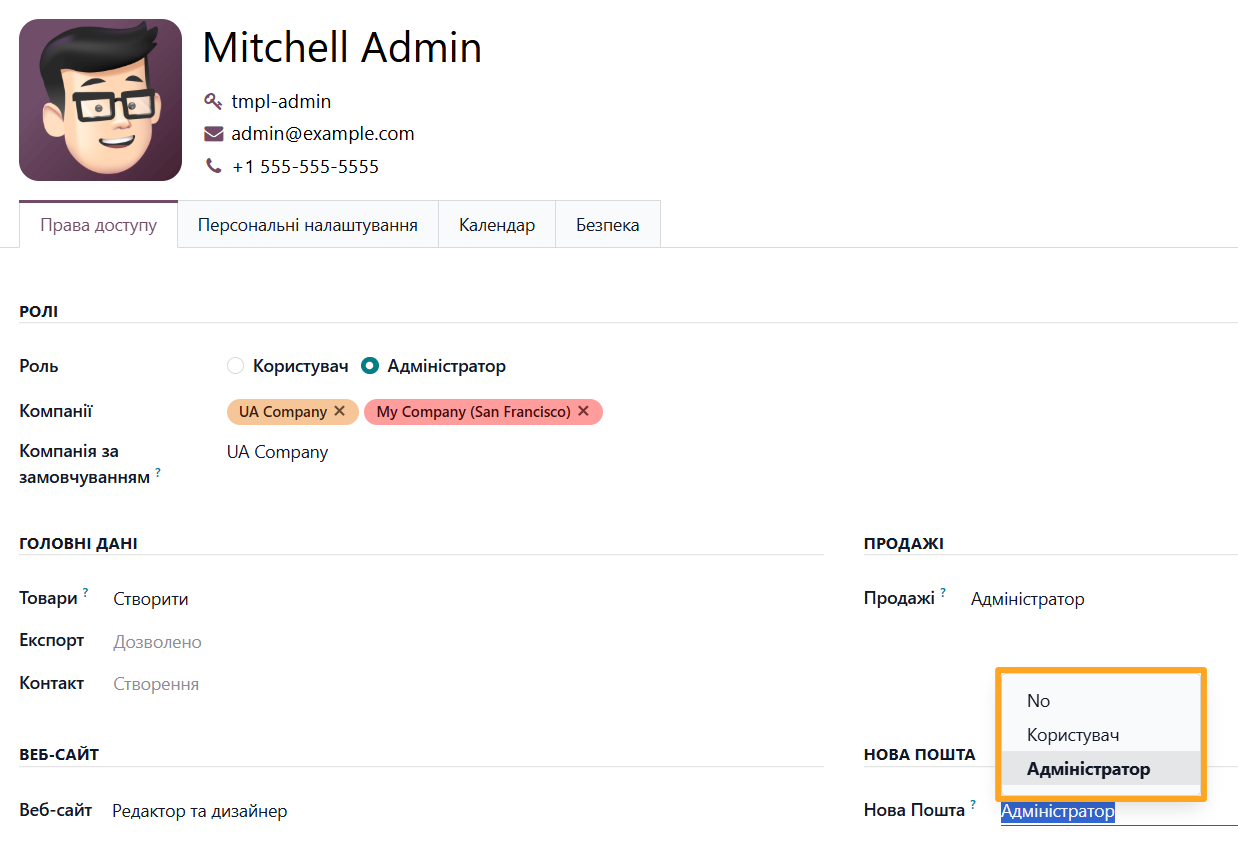
- No: The user has no access to Nova Poshta features
- User: The user has limited access to view information and perform certain actions
- Administrator: The user has full access
Get an API Key
Odoo connects to Nova Poshta through an API. Log in to your Nova Poshta business account as an individual or legal entity. Go to Settings — Security and click Create Key.
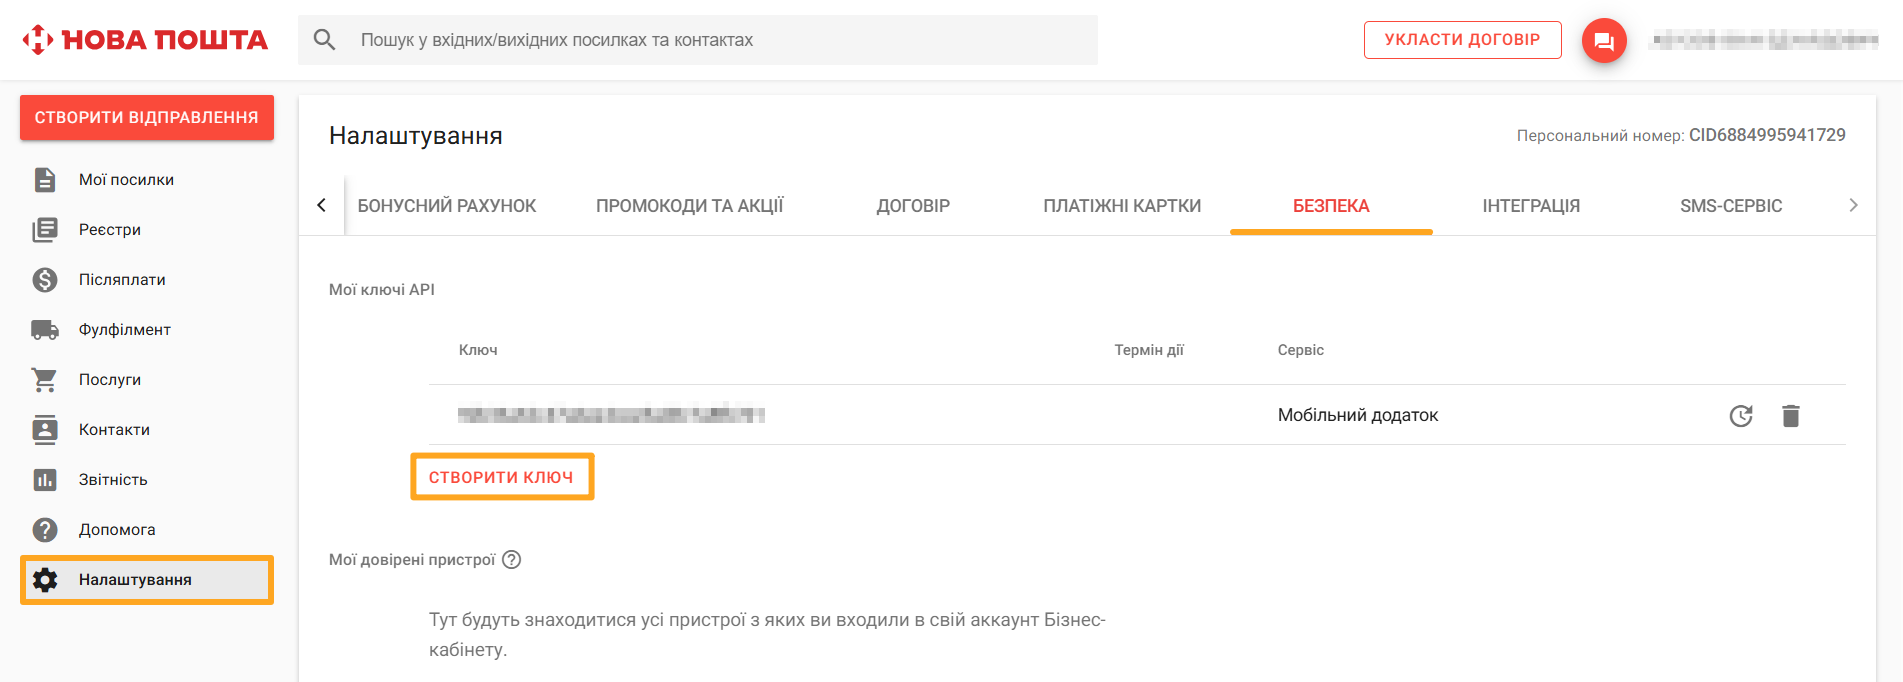
After confirming the action, copy the generated key and return to Odoo.
Account Configuration
Now create a new account. Go to Nova Poshta — Configuration — Accounts and click New.
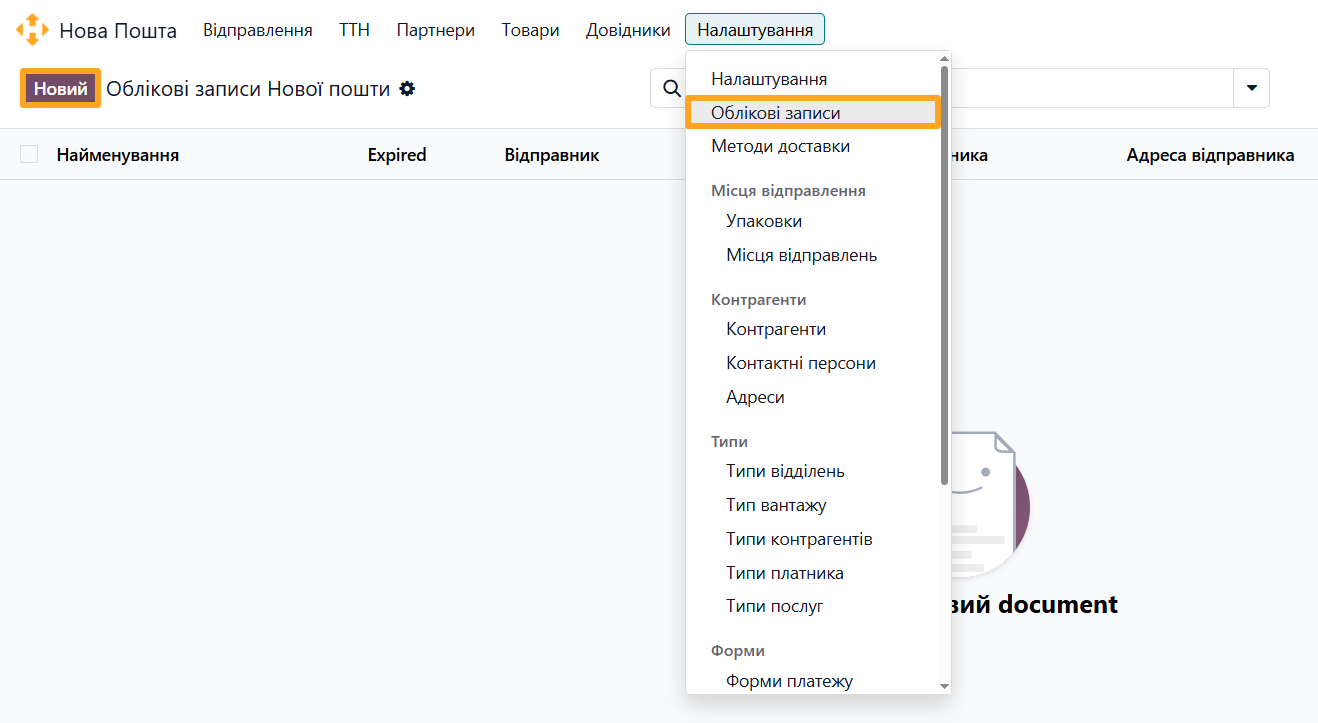
In the pop-up window:
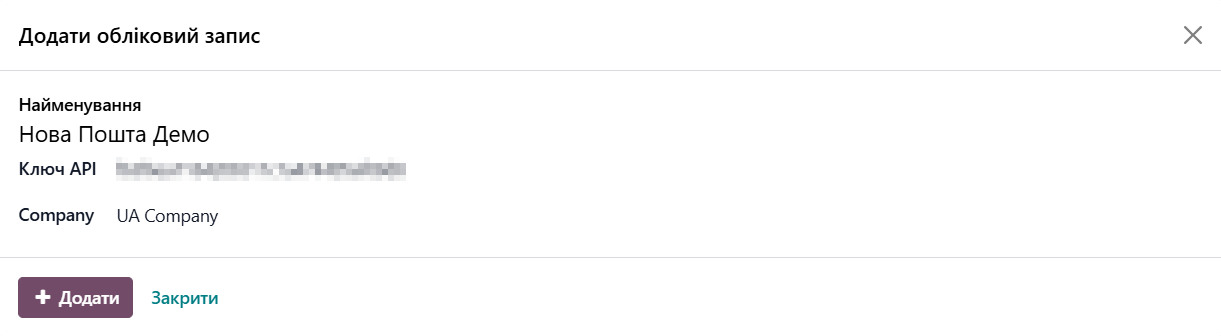
- Enter the account Name
- Paste the generated API key
- Select a Company (if you use an Odoo multi-company environment)
- Click Add
The module can automatically prefill shipment data.
First, click Add in the Sender Data section to specify the sender address.
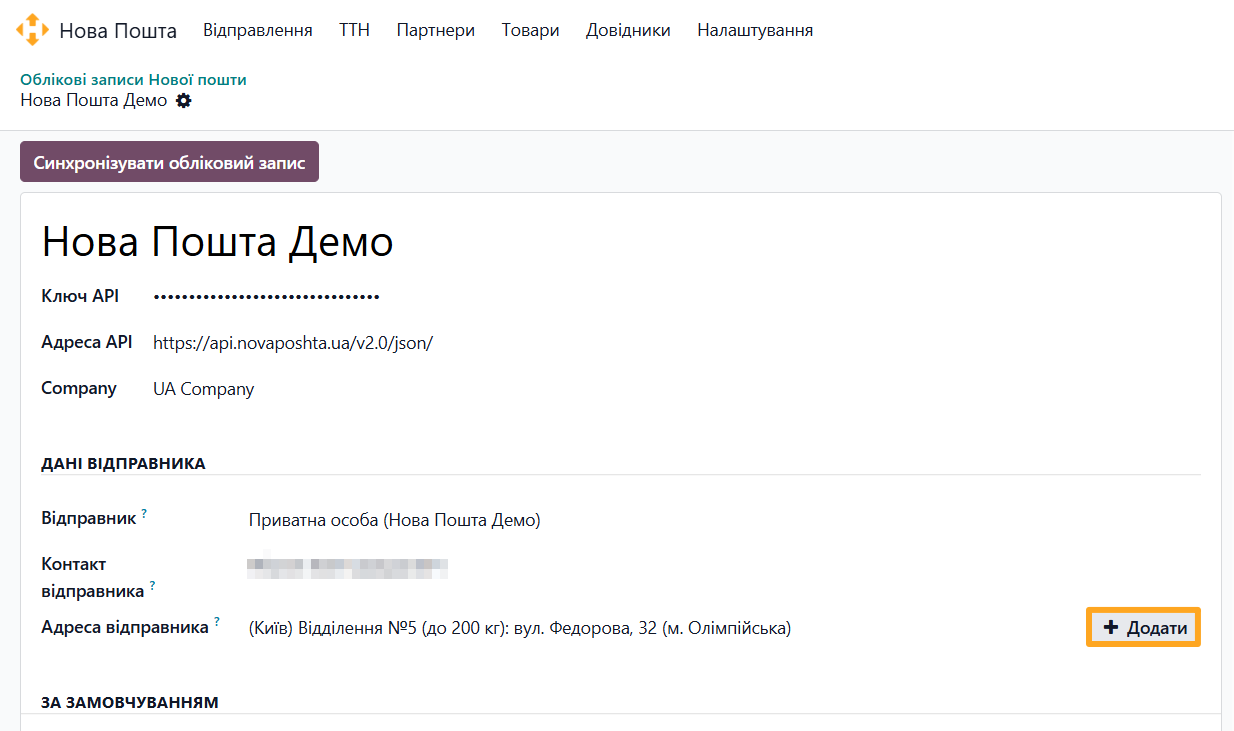
Fill in the address form:
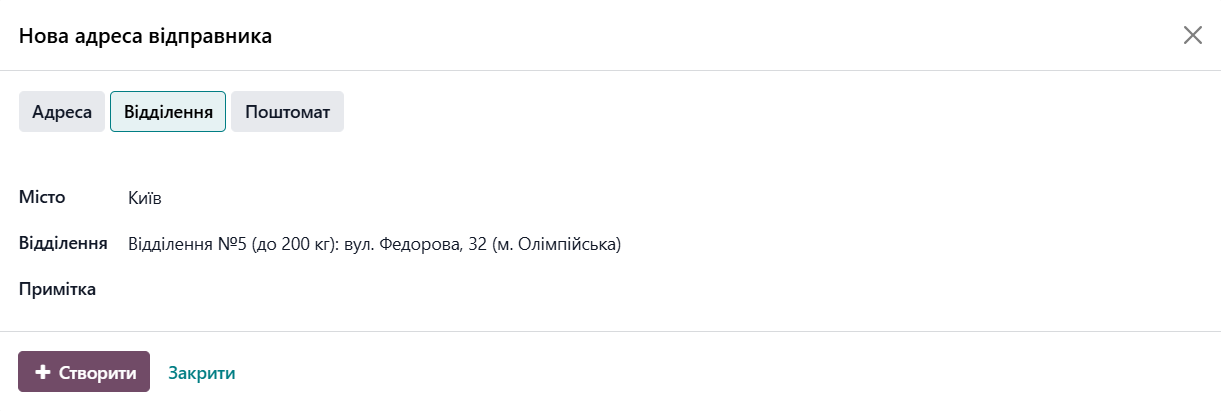
- Select a type: Address, Warehouse, or Postomat
- Select a City
- Specify the shipping location according to the selected type.
- Add a Note (optional)
Click Create to save the sender address.
Configure default values in the General Data and Backward sections.
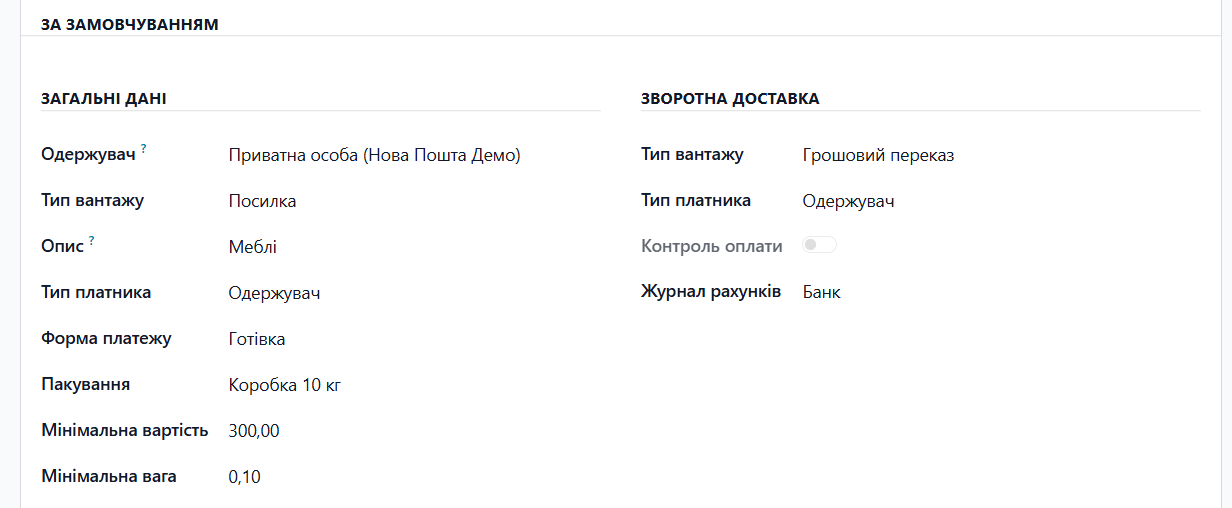
Contacts and Delivery Addresses
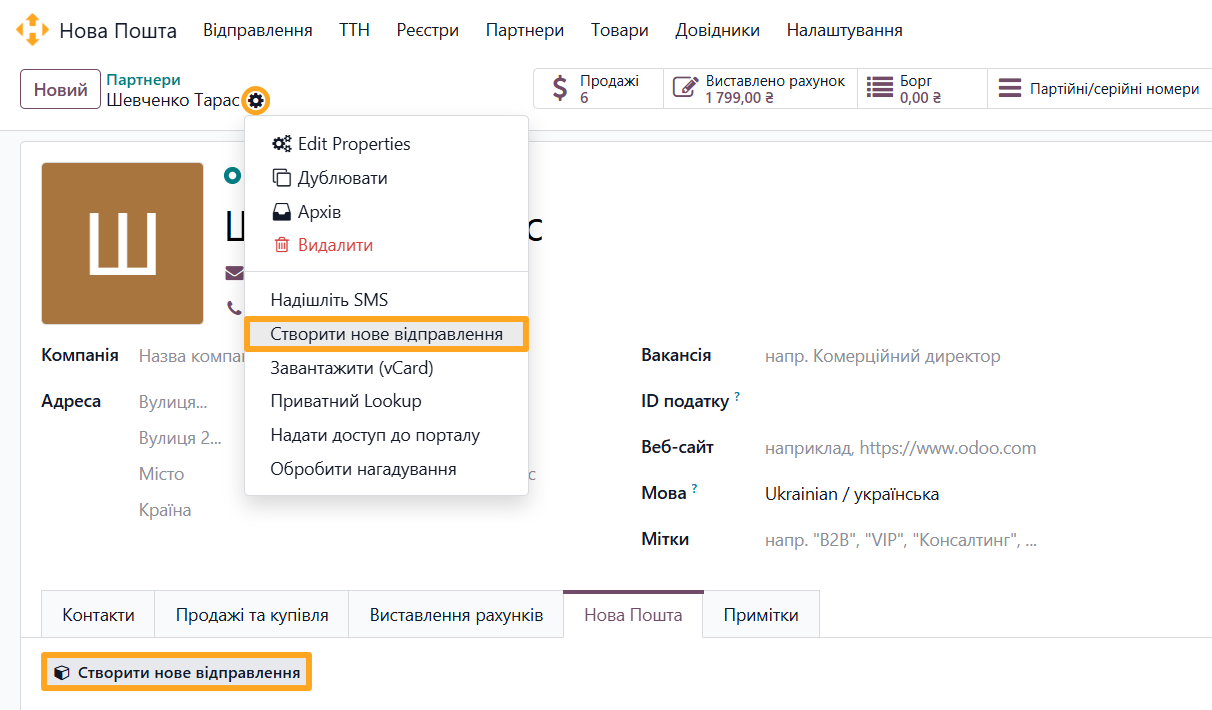
Save and manage partner contact and address data on the Nova Poshta tab of the partner form. You can add multiple contacts for recipients and specify recipient addresses, including Nova Poshta warehouses and postomats or addresses for courier delivery.
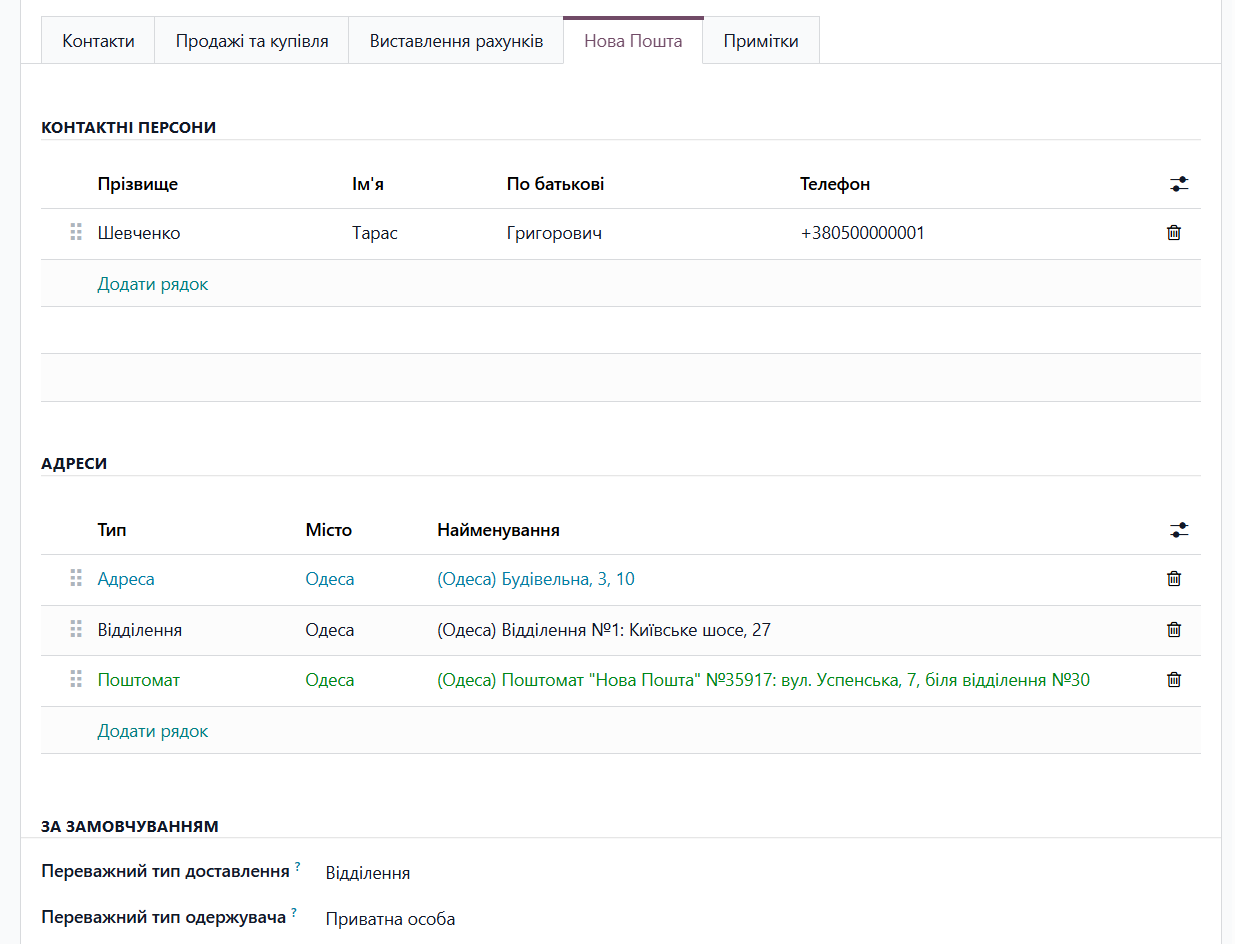
To prioritize a specific data type during shipment autofill, select the preferred type in the corresponding fields.
You can manually sort the lists to define the priority of values.
You can also launch the shipment creation wizard directly from this tab.
Product Configuration
The module lets you specify the product description and packaging that Nova Poshta uses for shipping.
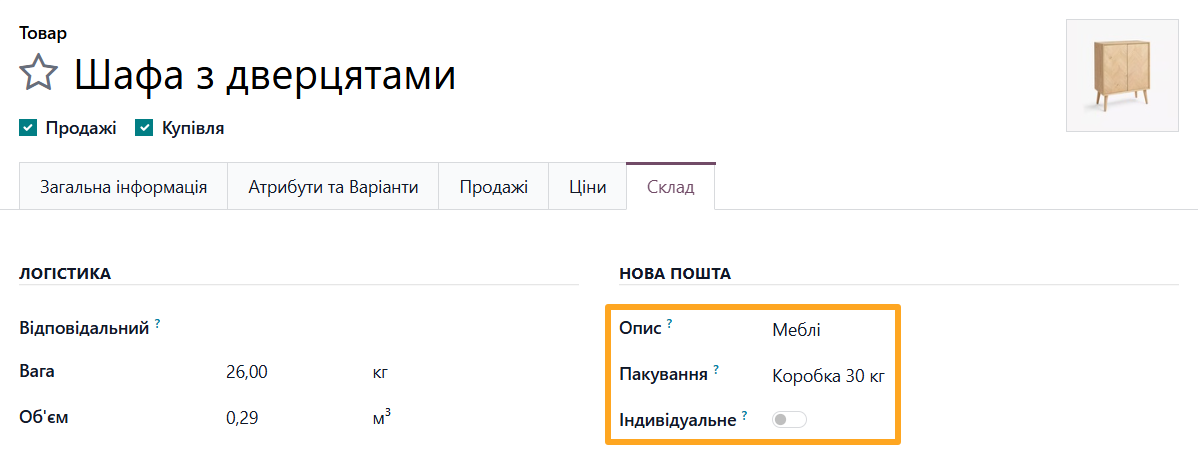
Open a product, go to the Inventory tab, and select a Description in the Nova Poshta section or create a new one. You can also specify the Seat that you usually use to ship this product. For products that require a unique seat and cannot share a package with other products, enable the Is Individual option.
Data Synchronization
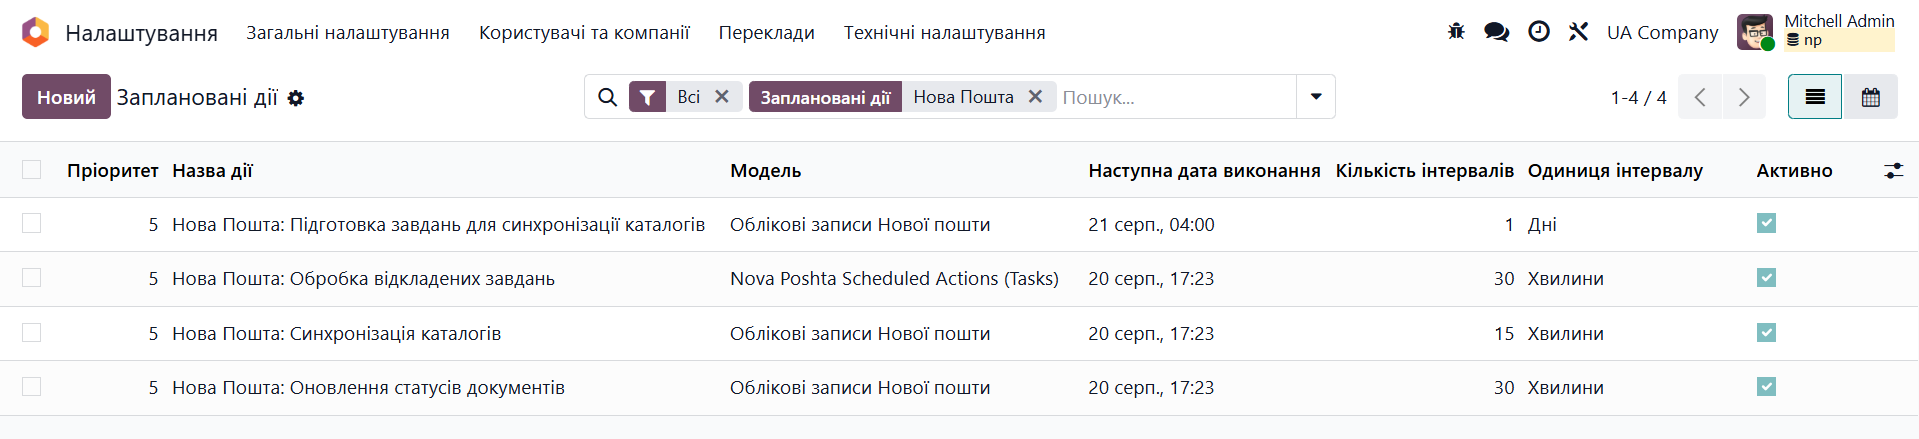
Up-to-date Nova Poshta data is one of the solution's key features. The module synchronizes data in batches on a regular basis to optimize server resource usage and keep the information up to date. This mechanism operates automatically and requires no regular control.
General Settings
The Nova Poshta integration module includes general settings available under Nova Poshta — Configuration — Settings.
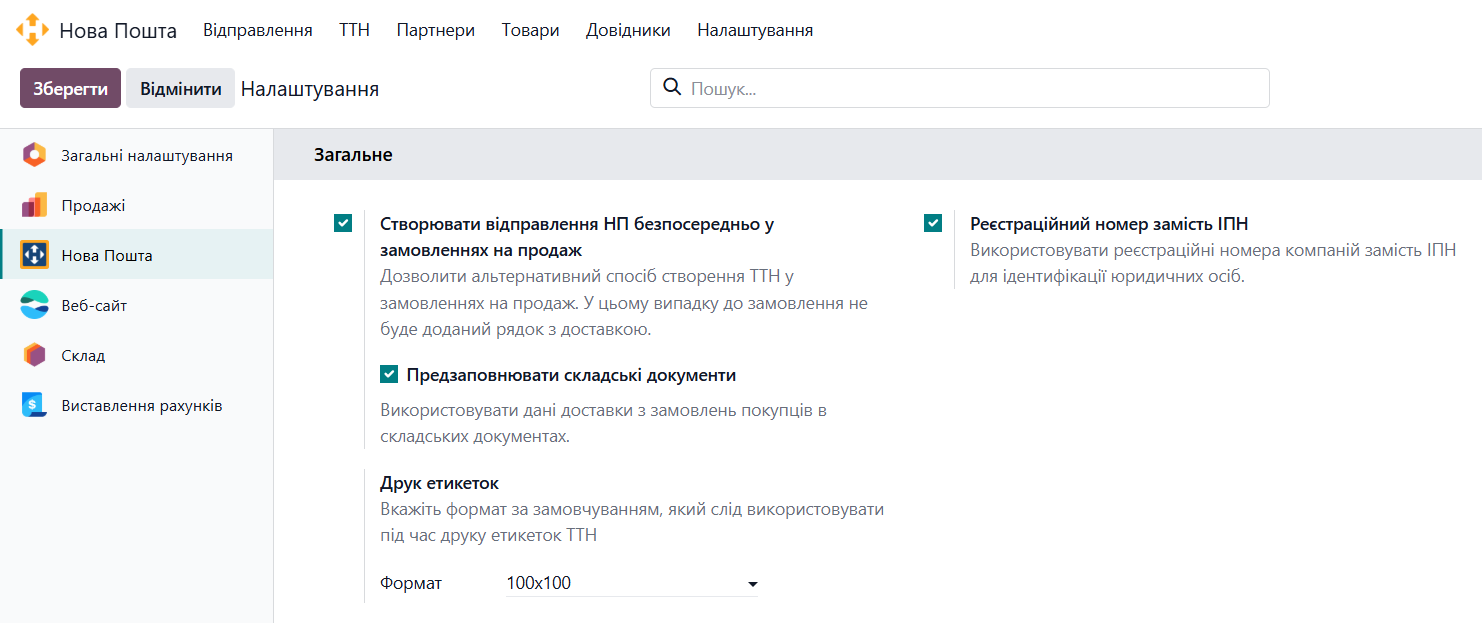
The first option lets you add delivery to a sales order without creating a separate delivery line in the list of products. Enable Create TTN directly in Sales and save the changes. The Create TTN NP button then becomes available on the sales order for this alternative workflow.
The Stock Compatibility option depends on the previous setting. It controls how Nova Poshta fields are populated in inventory documents.
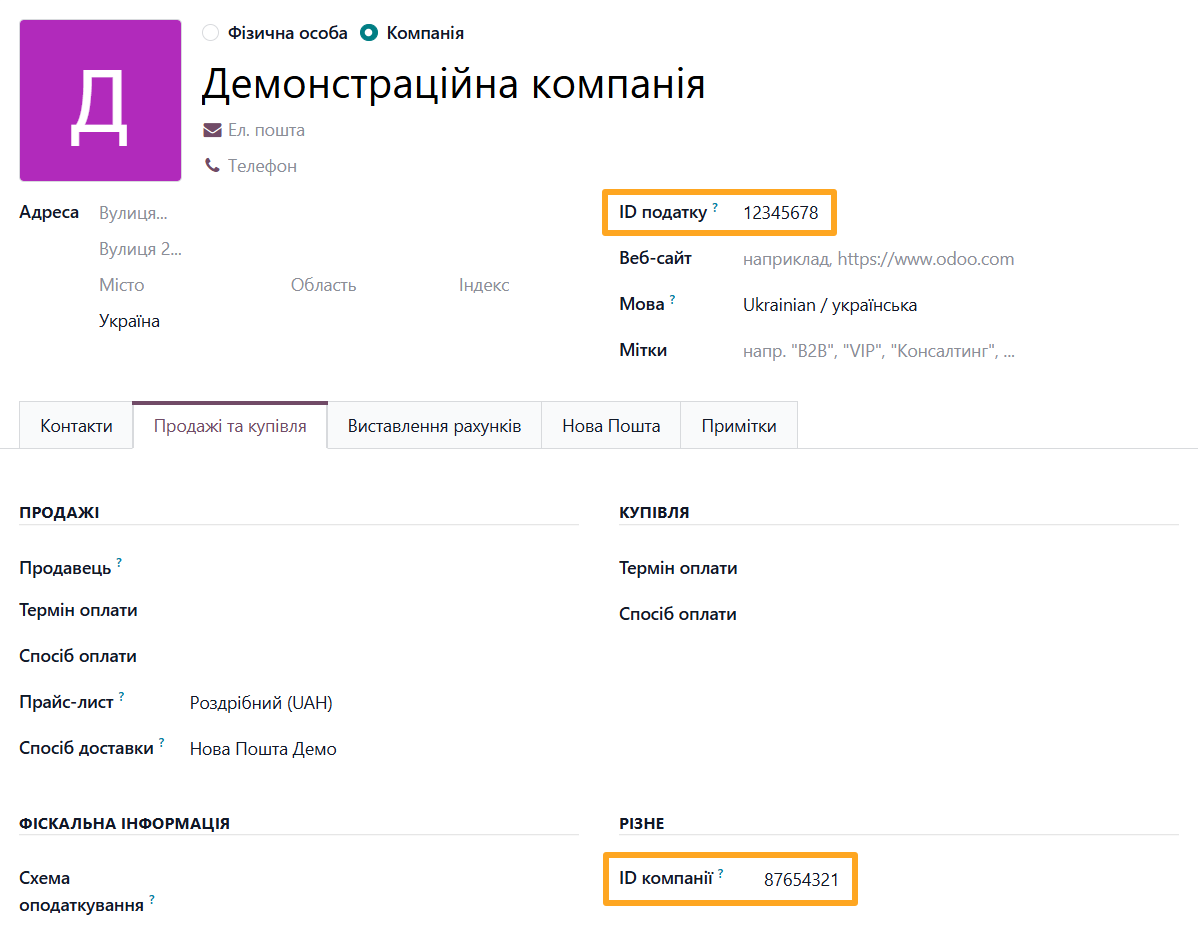
The next option affects shipments where the recipient is a legal entity. When you select the Organization recipient type, the solution automatically takes the company registration number from the Tax ID field on the partner form. If your system uses the standard Company ID field to store the Registration number (EDRPOU code), enable Use Company Registry.
The last option determines the default print format for Nova Poshta Express Waybills. Select the Format that meets your requirements and save the settings.
Summary
The implementation of the specialized Odoo-Nova Poshta integration module is a professional solution for the Ukrainian e-commerce and B2B. It enables organizing ERP shipping processes in minutes. With the full synchronization of the Odoo with Nova Poshta’s logistics services, your business gains a convenient environment for managing and tracking deliveries directly from the Odoo UI.