

Integrate Facebook Pixel to an Odoo website and track customer visits
To track eCommerce events on your Odoo website, such as View Product, Add to Cart, Purchase, and more, consider using the Odoo Facebook Pixel eCommerce Tracking module.
| Availability |
Odoo Online
Odoo.sh
On Premise
|
|---|---|
| Compatibility |
Community
Enterprise
|
| Technical Name | website_facebook_pixel |
| Version | 20.0.1.0.0 |
| License | OPL-1 |
| Category | |
| Support | Free 60 days support and 360 days bug-fixing |
Use Case

Jorem ipsum dolor sit amet, consectetur adipiscing elit. Nunc vulputate libero et velit interdum, ac aliquet odio mattis. Class aptent taciti sociosqu ad litora torquent per conubia nostra, per inceptos himenaeos.
Forem ipsum dolor sit amet, consectetur adipiscing elit. Nunc vulputate libero et velit interdum, ac aliquet odio mattis. Class aptent taciti sociosqu ad litora torquent per conubia nostra, per inceptos himenaeos.
Dorem ipsum dolor sit amet, consectetur adipiscing elit. Nunc vulputate libero et velit interdum, ac aliquet odio mattis.
It is a long established fact that a reader will be distracted by the readable content of a page
Korem ipsum dolor sit amet, consectetur adipiscing elit. Nunc vulputate libero et velit interdum, ac aliquet odio mattis. Class aptent taciti sociosqu ad litora torquent per conubia nostra, per inceptos himenaeos.
Korem ipsum dolor sit amet, consectetur adipiscing elit. Nunc vulputate libero et velit interdum, ac aliquet odio mattis.
Odoo App Installation
Upload modules
Upload modules from the ZIP archive to your Odoo hosting, or a GitHub repository connected there.
Place the unzipped modules in your custom add-on directory and restart the Odoo system service.
Update App List
After restarting, activate the Developer Mode, and go to the Apps menu.

Click on Update Apps List to fetch the new modules in the list.
Activate the App
Install the new module, finding it by name and clicking on the Activate button.
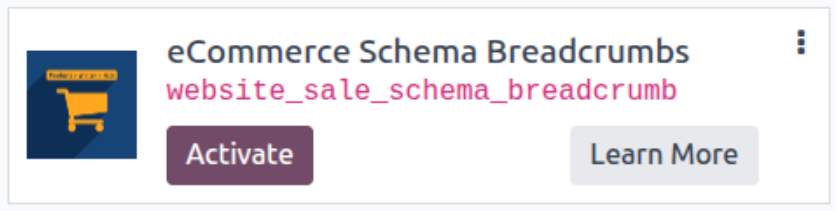
* If you don't see the module, try to remove the default Apps filter from the search bar.
Configuration
Follow the instructions in the module description to complete the installation process and start using the app.
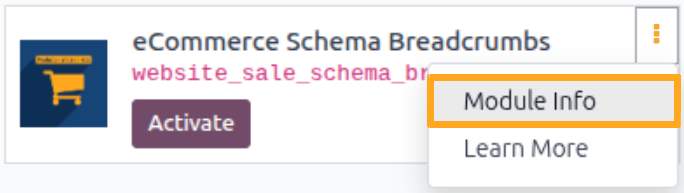

Manual

App Edition Comparison
|
Choose the edition that best fits your business needs |

Odoo Facebook Pixel
|

Odoo Facebook Pixel eCommerce (Meta Pixel)
|

Facebook Conversions API
|
|---|---|---|---|
website_facebook_pixel
|
website_sale_facebook_pixel
|
website_sale_facebook_capi
|
|
|
Adding the Pixel script
|

|
|
|
|
Cookie Consent configuration
|
|
|
|
|
eCommerce event tracking
|

|
|
|
|
Product data transmission
|
|
|
|
|
Advanced user matching
|
|
|
|
|
Sending tracking data when the Pixel script is blocked
|
|
|
|
|
Event Deduplication
|
|
|
|
|
Server-side integration via the Conversions API
|
|
|
|
|
Full Price
|
0.0
€
|
95.0
€
|
245.0
€
|
|
Upgrade Price
|
|
|
150.0
€
|


Getting Pixel ID
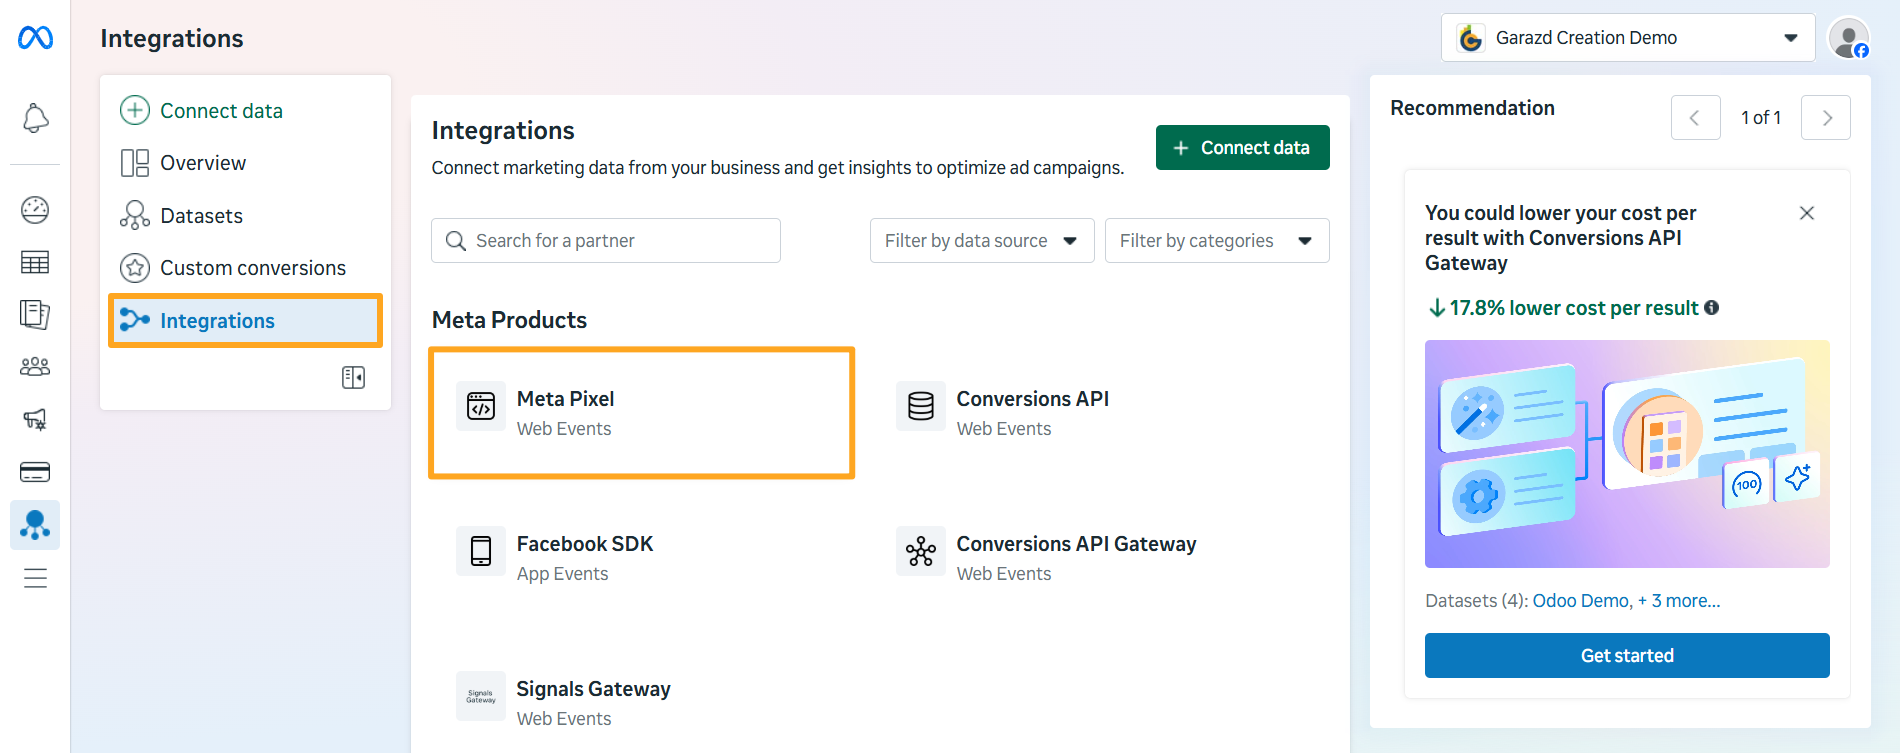
Perform the following steps to obtain a Pixel ID before adding the JS script to the website:
-
01Log in to the Meta Ads Manager account
-
02Navigate to Events Manager — Integrations — Meta Pixel
-
03Select an existing dataset or create a new one in the pop-up window
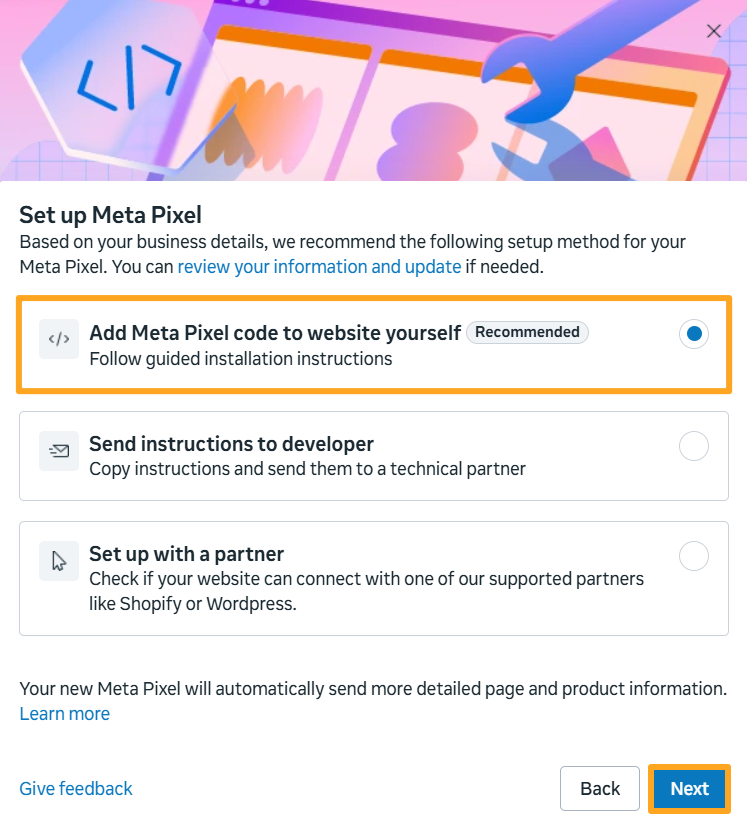
-
04Select the Add Meta Pixel code to website yourself option
-
05Skip the next steps by clicking Next
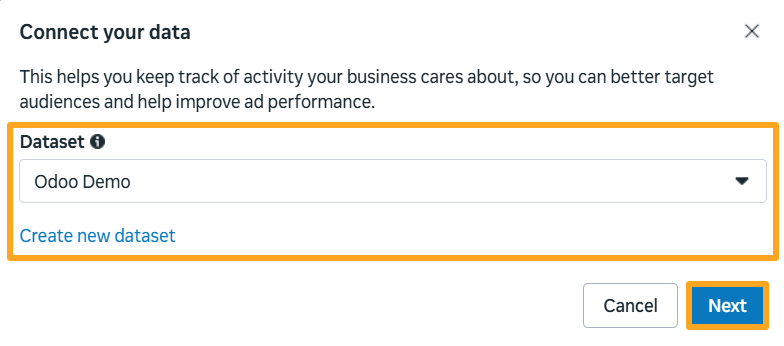
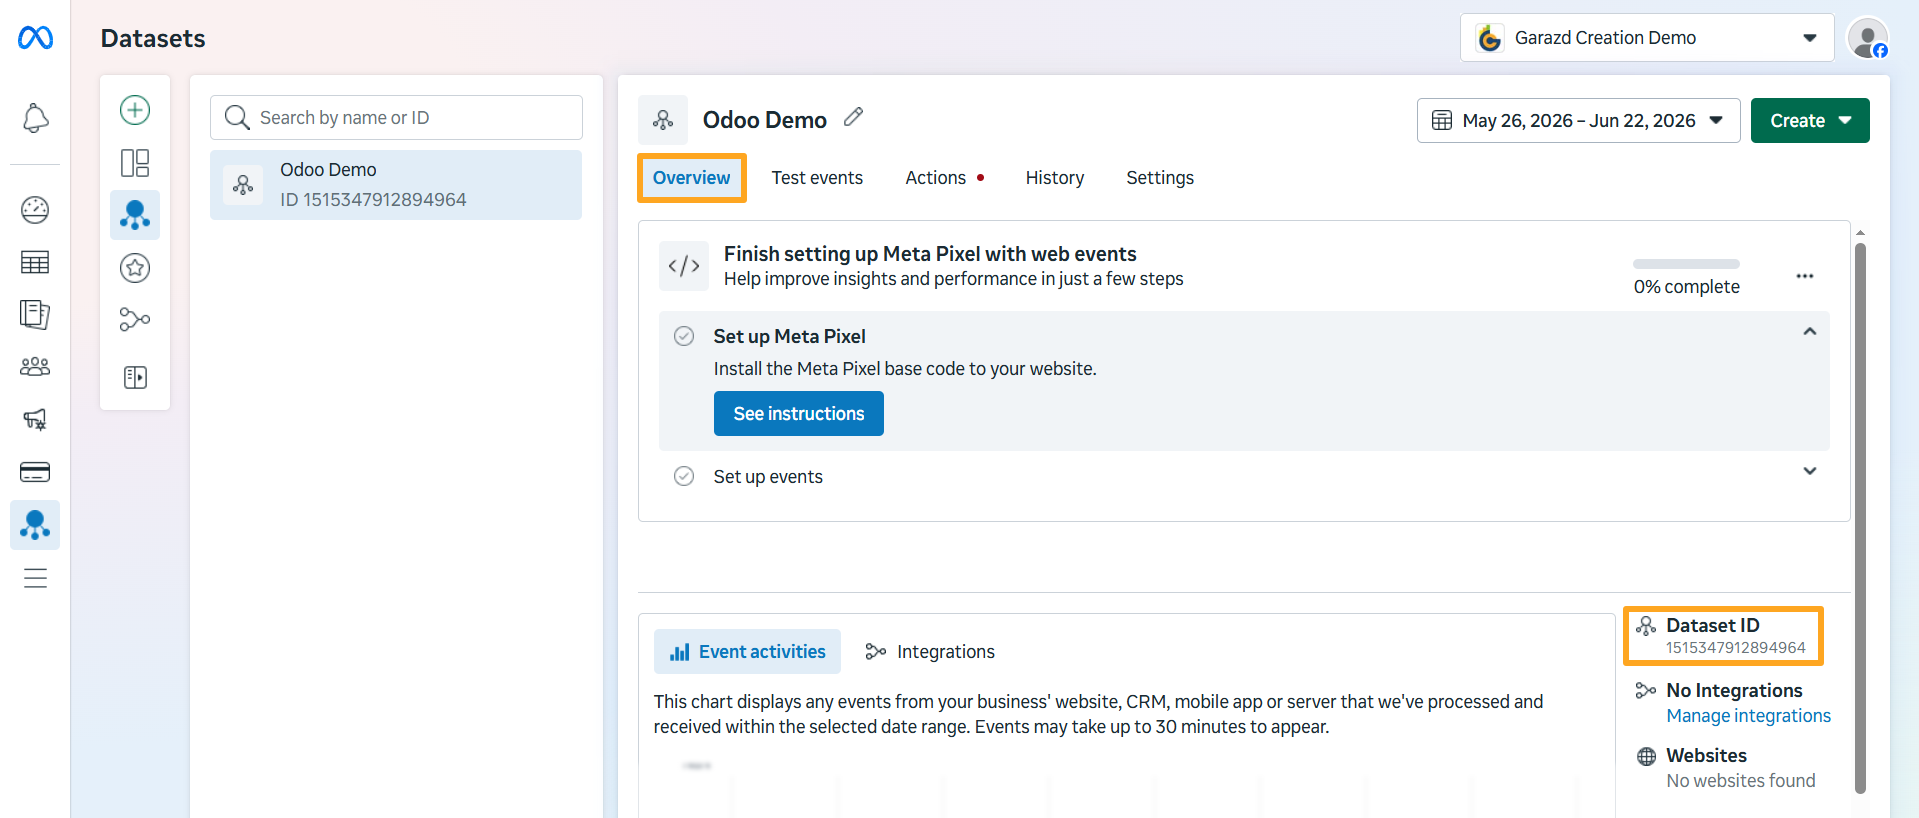
Navigate to the Datasets section and copy the Dataset ID:

Pixel Activation
After installing the module, activate tracking by completing the following steps:
-
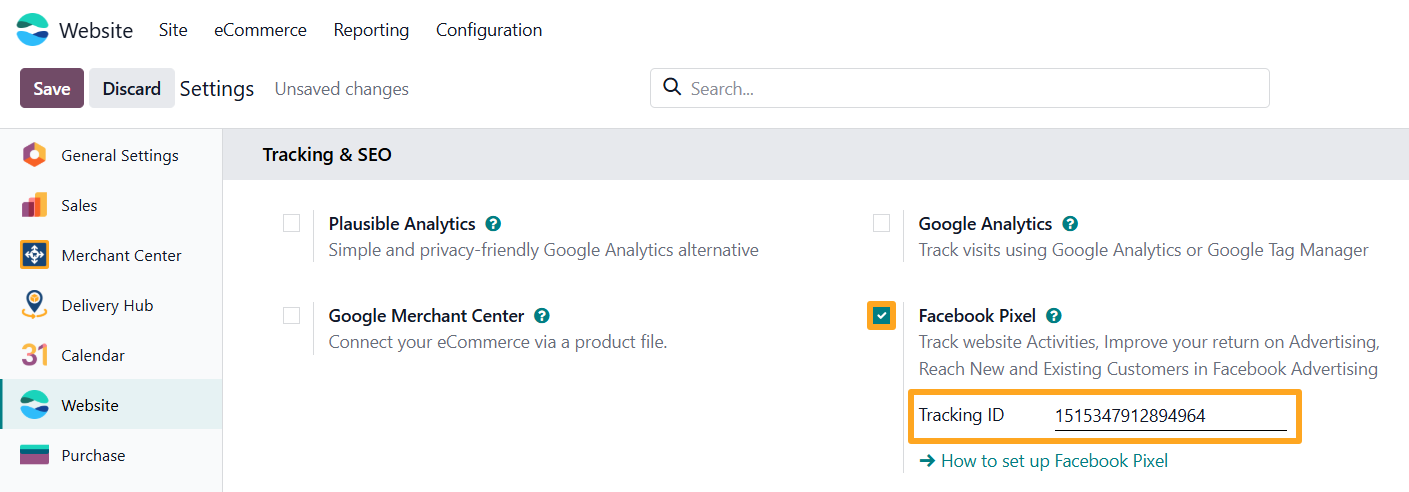
01Open the website settings
-
02Enable the Facebook Pixel option in the Tracking and SEO section
-
03Paste the copied Dataset ID
-
04Save the settings
After that, the module automatically adds the Meta Pixel script to all pages of the Odoo website.

Cookie Consent Settings
The module includes a cookie consent management feature for Meta Pixel, which integrates with the native Odoo cookie bar. To use this feature, enable the Cookies Bar:
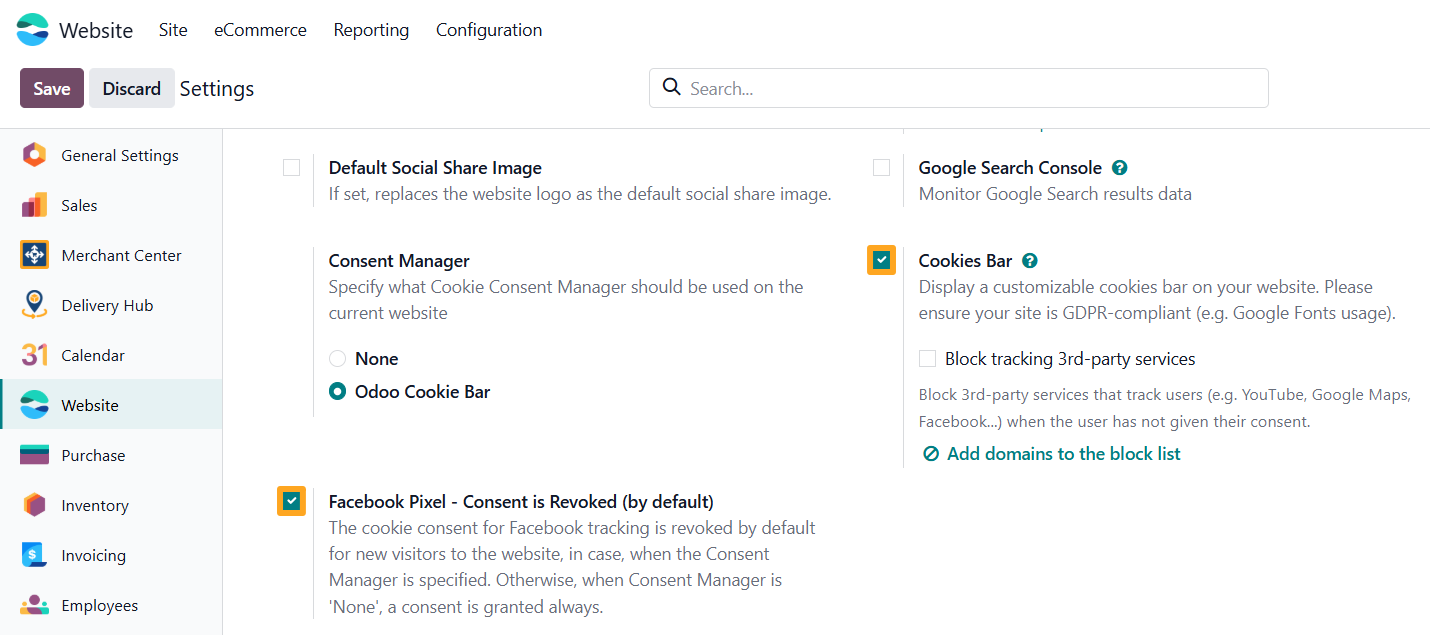
By default, all Meta cookie consents are granted. To change this and revoke default consent for website visitors, enable the Facebook Pixel — Consent is Revoked (by default) option. Once enabled, Meta cookie consent is granted after a visitor clicks I agree and is revoked if the visitor clicks Only essentials.

Testing

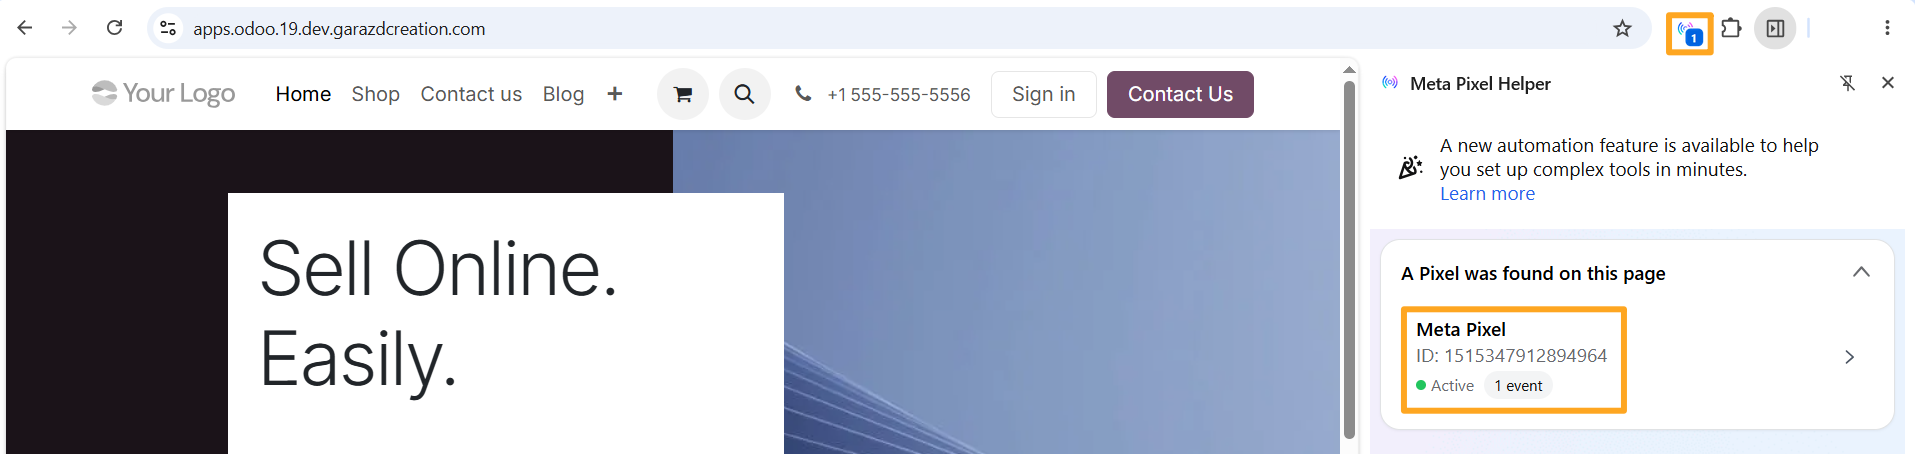
The Meta Pixel Helper browser extension provides the easiest way to verify the Meta Pixel integration. The extension displays tracked events and event parameters sent to Meta:
Changelog
12.0.1.0.2 2021-01-16
- Improve description.
- Price set as free.
12.0.1.0.1 2020-02-19
- Init version.
13.0.1.0.2 2021-01-16
- Price set as free.
13.0.1.0.1 2020-10-19
14.0.2.0.1 2026-09-23
- Change the license to OPL-1.
- Make the app free to download.
14.0.2.0.0 2023-06-17
- Improve the Facebook Pixel script insertion.
14.0.1.0.1 2021-01-16
- Price set as free.
14.0.1.0.0 2020-10-01
- Migration to 14.0
15.0.3.0.0 2024-04-05
- Change the license to the OPL-1.
- Implement a cookie consent management.
- Implement integration with the standard Odoo Cookies Bar.
15.0.2.0.0 2023-07-19
- Improve the insertion of the Facebook Pixel script.
15.0.1.0.0 2021-12-07
- Migration from 14.0
16.0.3.1.0 2024-04-06
- Improve the JS logic to send the Facebook cookie consent update.
16.0.3.0.0 2024-01-25
- Change the license to the OPL-1.
- Implement a cookie consent management.
- Implement integration with the standard Odoo Cookies Bar.
16.0.2.0.0 2023-07-24
- Improve the insertion of the Facebook Pixel script.
16.0.1.0.0 2022-11-01
- Migration from 15.0.
17.0.2.1.2 2026-04-21
- Improve handling user consent.
17.0.2.1.1 2024-11-27
- Add demo data.
17.0.2.1.0 2024-04-09
- Improve the JS logic.
17.0.2.0.0 2024-02-24
- Change the license to the OPL-1.
- Implement a cookie consent management.
- Implement integration with the standard Odoo Cookies Bar.
17.0.1.0.0 2023-11-07
- Migration from 16.0.
18.0.1.0.2 2026-09-29
- Improve handling of user consents.
18.0.1.0.1 2026-04-21
- Improve handling user consent.
18.0.1.0.0 2024-10-10
- Migration from 17.0.
19.0.1.0.2 2026-09-29
- Improve handling of user consents.
19.0.1.0.1 2026-04-21
- Improve handling user consent.
19.0.1.0.0 2025-10-12
- Migration from 18.0.
20.0.1.0.0 2026-09-21
- Migration from 19.0.
Resources



How to create a Facebook Pixel and how to activate it in Odoo


How to integrate Facebook (Meta) Pixel to Odoo website