Boost your Odoo website tracking with LinkedIn Conversions API, Insight Tag, and enhanced conversions
This combination is especially useful for businesses that need more reliable attribution across websites, forms, and purchases. It is designed for teams that want technical control, clean event handling, and a setup that can scale from basic tracking to enhanced conversions.
| Availability |
Odoo Online
Odoo.sh
On Premise
|
|---|---|
| Compatibility |
Community
Enterprise
|
| Technical Name | website_sale_linkedin_capi |
| Version | 20.0.1.0.0 |
| License | OPL-1 |
| Category | |
| Support | Free 60 days support and 360 days bug-fixing |
Use Case

Jorem ipsum dolor sit amet, consectetur adipiscing elit. Nunc vulputate libero et velit interdum, ac aliquet odio mattis. Class aptent taciti sociosqu ad litora torquent per conubia nostra, per inceptos himenaeos.
Forem ipsum dolor sit amet, consectetur adipiscing elit. Nunc vulputate libero et velit interdum, ac aliquet odio mattis. Class aptent taciti sociosqu ad litora torquent per conubia nostra, per inceptos himenaeos.
Dorem ipsum dolor sit amet, consectetur adipiscing elit. Nunc vulputate libero et velit interdum, ac aliquet odio mattis.
It is a long established fact that a reader will be distracted by the readable content of a page
Korem ipsum dolor sit amet, consectetur adipiscing elit. Nunc vulputate libero et velit interdum, ac aliquet odio mattis. Class aptent taciti sociosqu ad litora torquent per conubia nostra, per inceptos himenaeos.
Korem ipsum dolor sit amet, consectetur adipiscing elit. Nunc vulputate libero et velit interdum, ac aliquet odio mattis.
Odoo App Installation
Upload modules
Upload modules from the ZIP archive to your Odoo hosting, or a GitHub repository connected there.
Place the unzipped modules in your custom add-on directory and restart the Odoo system service.
Update App List
After restarting, activate the Developer Mode, and go to the Apps menu.

Click on Update Apps List to fetch the new modules in the list.
Activate the App
Install the new module, finding it by name and clicking on the Activate button.
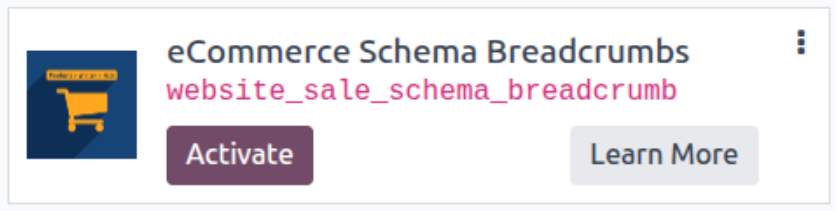
* If you don't see the module, try to remove the default Apps filter from the search bar.
Configuration
Follow the instructions in the module description to complete the installation process and start using the app.
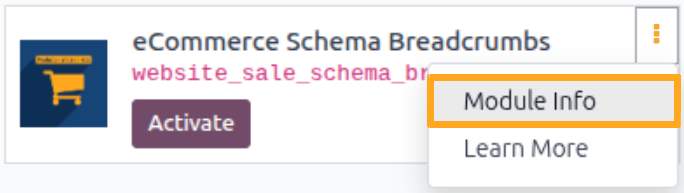

Manual

Obtaining the Identifier
Before adding the JS script to your website, obtain the Partner ID. Complete the following steps:
-
01Sign in to your LinkedIn Ads | Campaign Manager account
-
02Open the Measure — Signals Manager menu
-
03Select the Insight Tag in the Sources catalog section
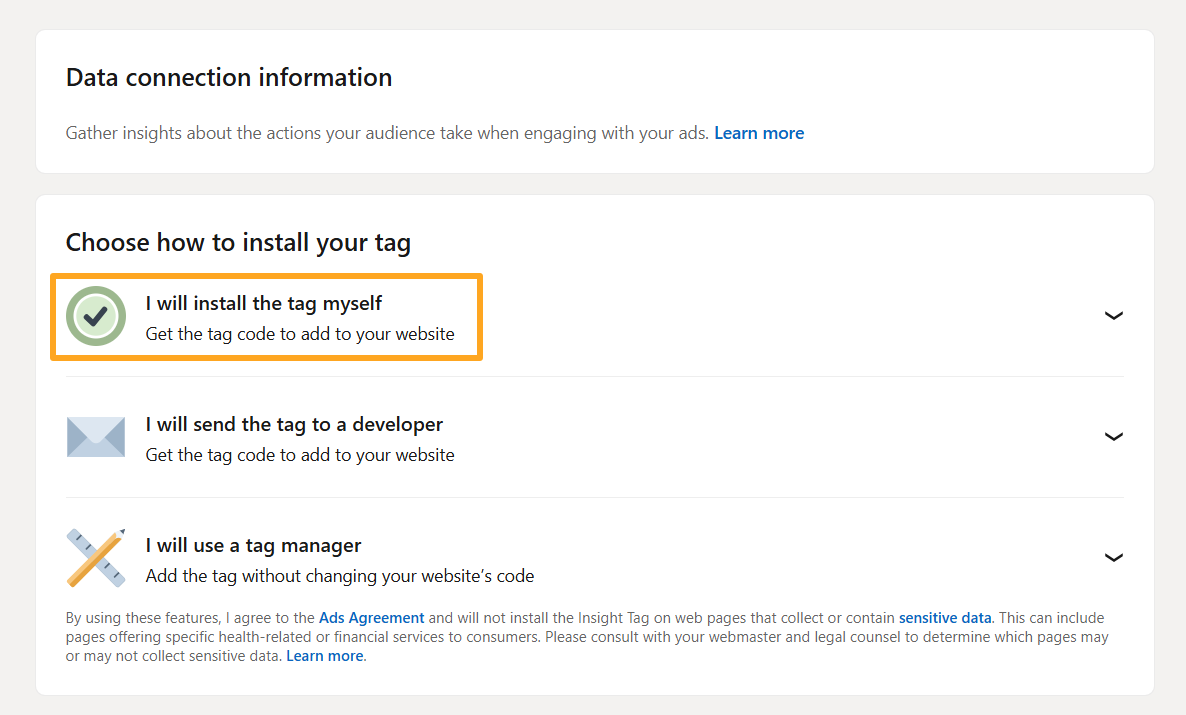
Next, click I will install the tag myself.
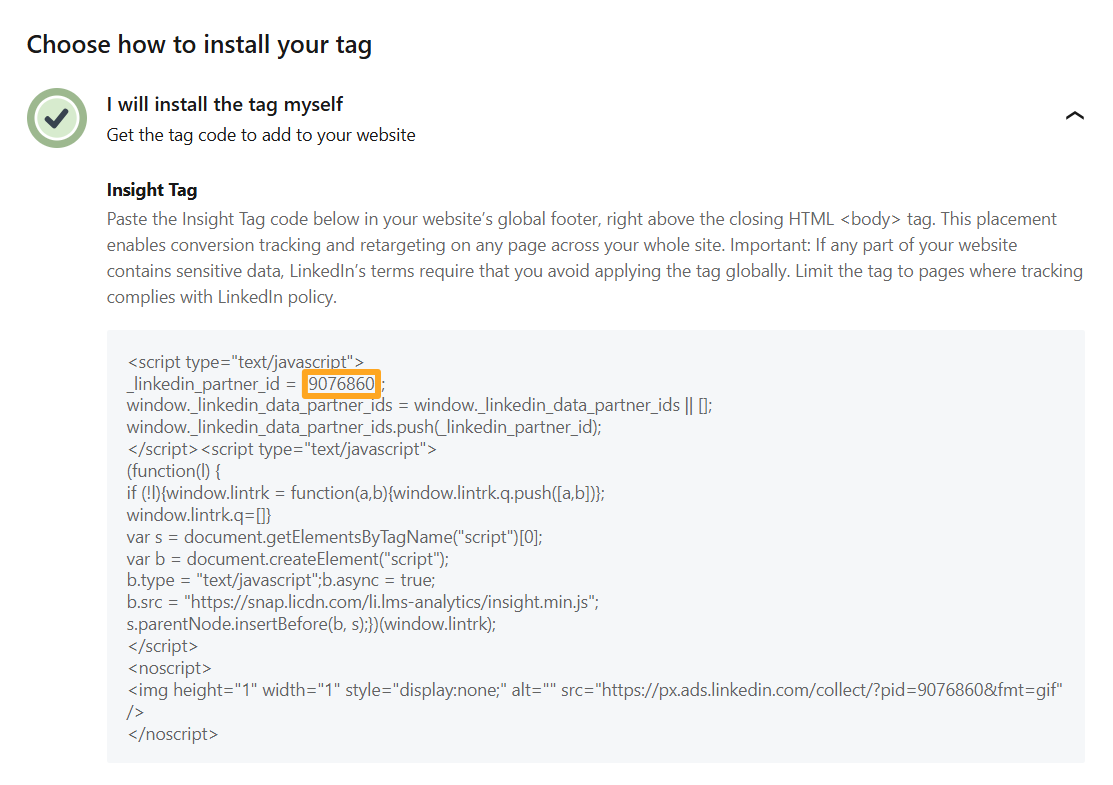
Copy the value of the _likedin_partner_id field.

Activation
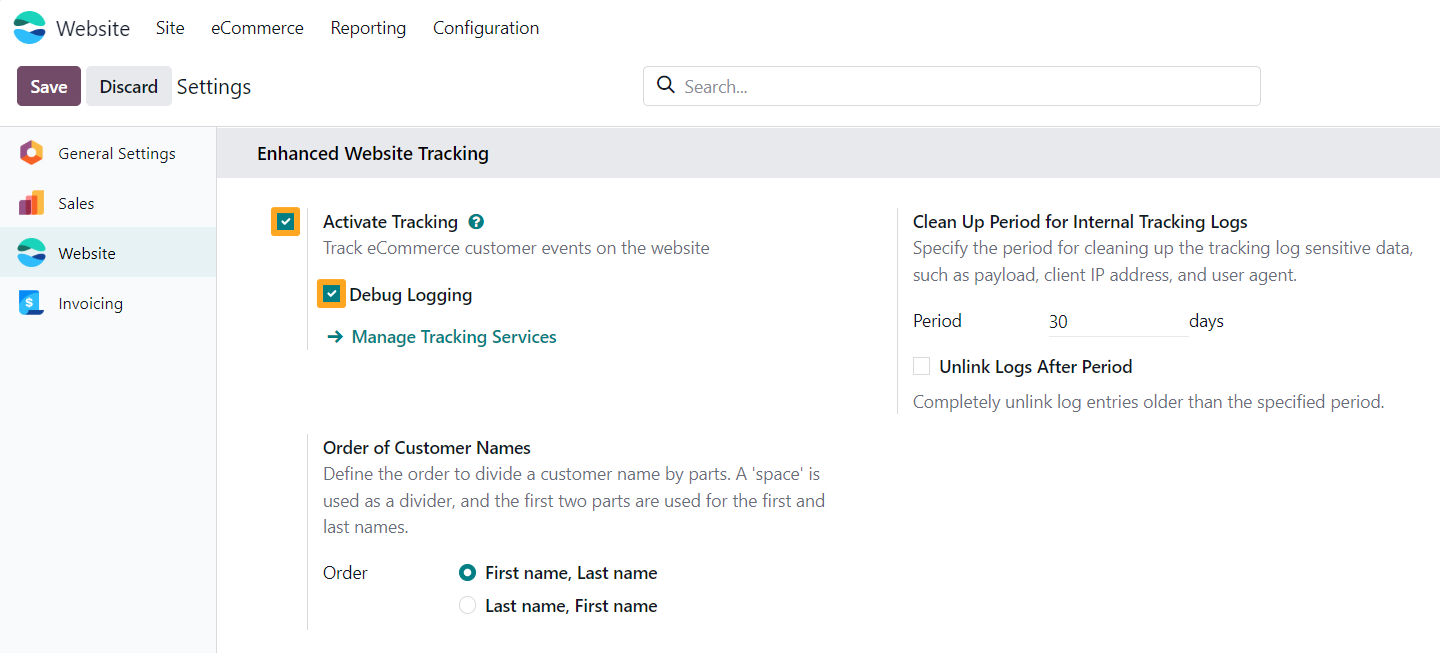
After installing the module, go to the website settings and enable the Activate Tracking option in the Enhanced Website Tracking section. To test your website tracking and view tracking events in the browser console, temporarily enable the Debug Logging feature.

Configuration
The module enables you to track e-commerce events on your website and send them to LinkedIn Ads alongside product details and user-provided data. You can transmit this data via the Insight Tag or the Conversions API. These features operate at the tracking service level. Add and configure a tracking service for your Odoo website.

Adding a Tracking Service
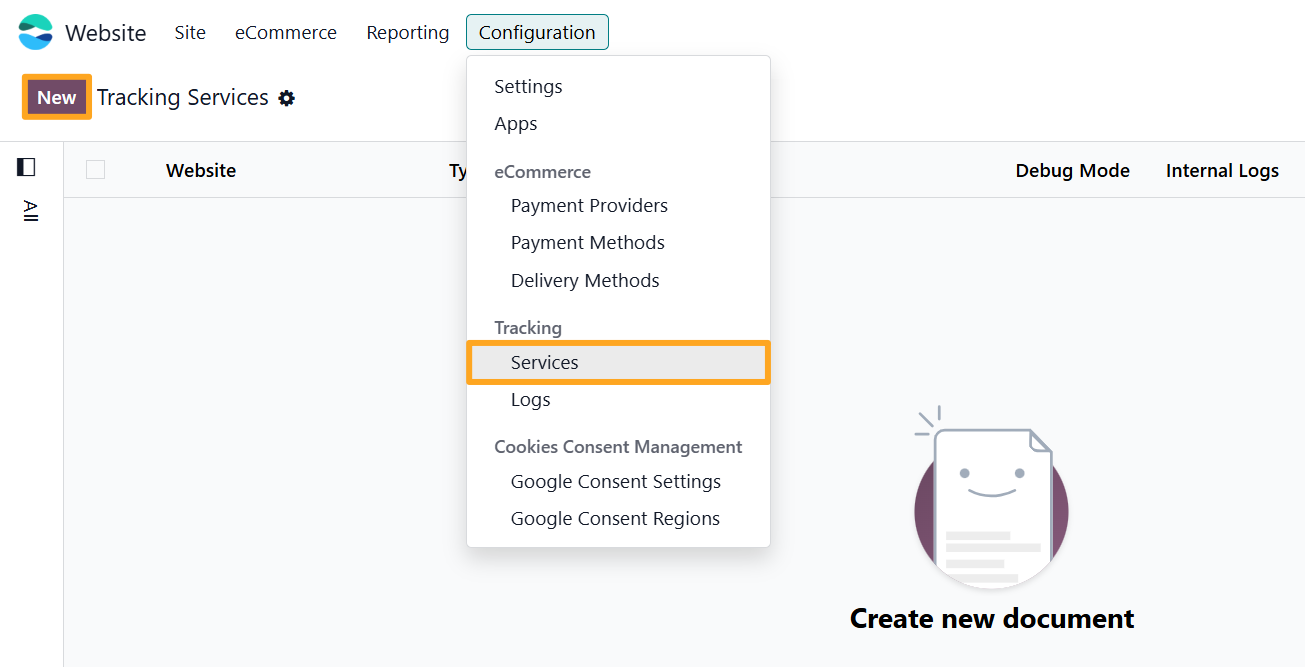
Go to Website — Configuration — Tracking — Services and click New to add a new event tracking service for your Odoo website.
First, fill in the following fields:
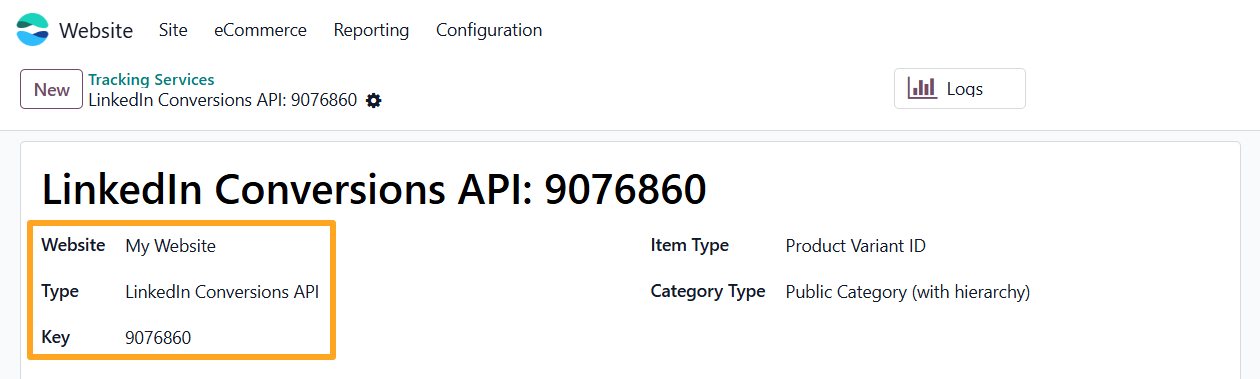
- Select a Website (if using multiple websites)
- Choose LinkedIn Conversions API as the service Type
- Paste your copied Partner ID into the Key field
Then, specify the type of product identifier and product category sent to LinkedIn Ads.
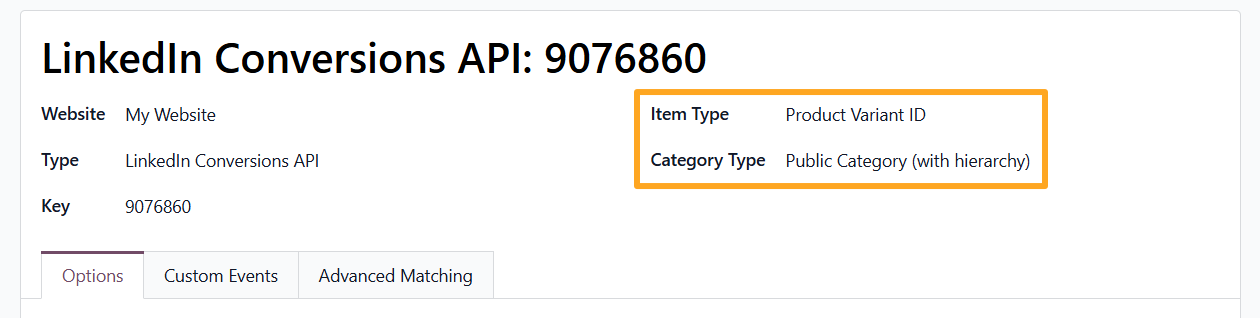
If products have attributes and variants, choose Product Variant ID in the Item Type field; otherwise, select Product Template ID.
Select the desired Category Type: an eCommerce Public Category or an internal Product Category.
The next setting is the Lead Value on the Options tab. Assign a monetary value to lead generation based on your estimates.

Activating the Conversions API
The module logs visitor activity on your Odoo website in an internal event tracking log and uses these records to send data via the Conversions API.
To start logging tracking events in Odoo, enable the Internal Logs option.


Next, activate the API mode by turning on the Activate option in the API section.
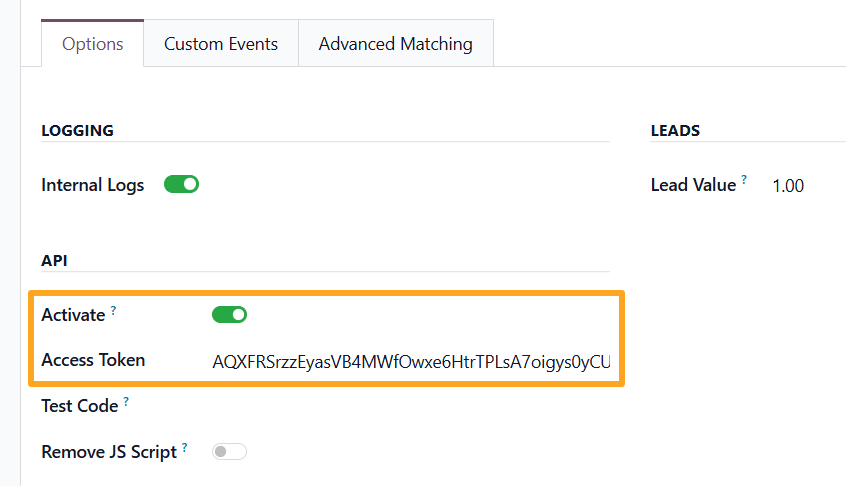
Generate an access token in your LinkedIn Ads account and paste it into the Access Token field.
Obtaining an Access Token for the Conversions API
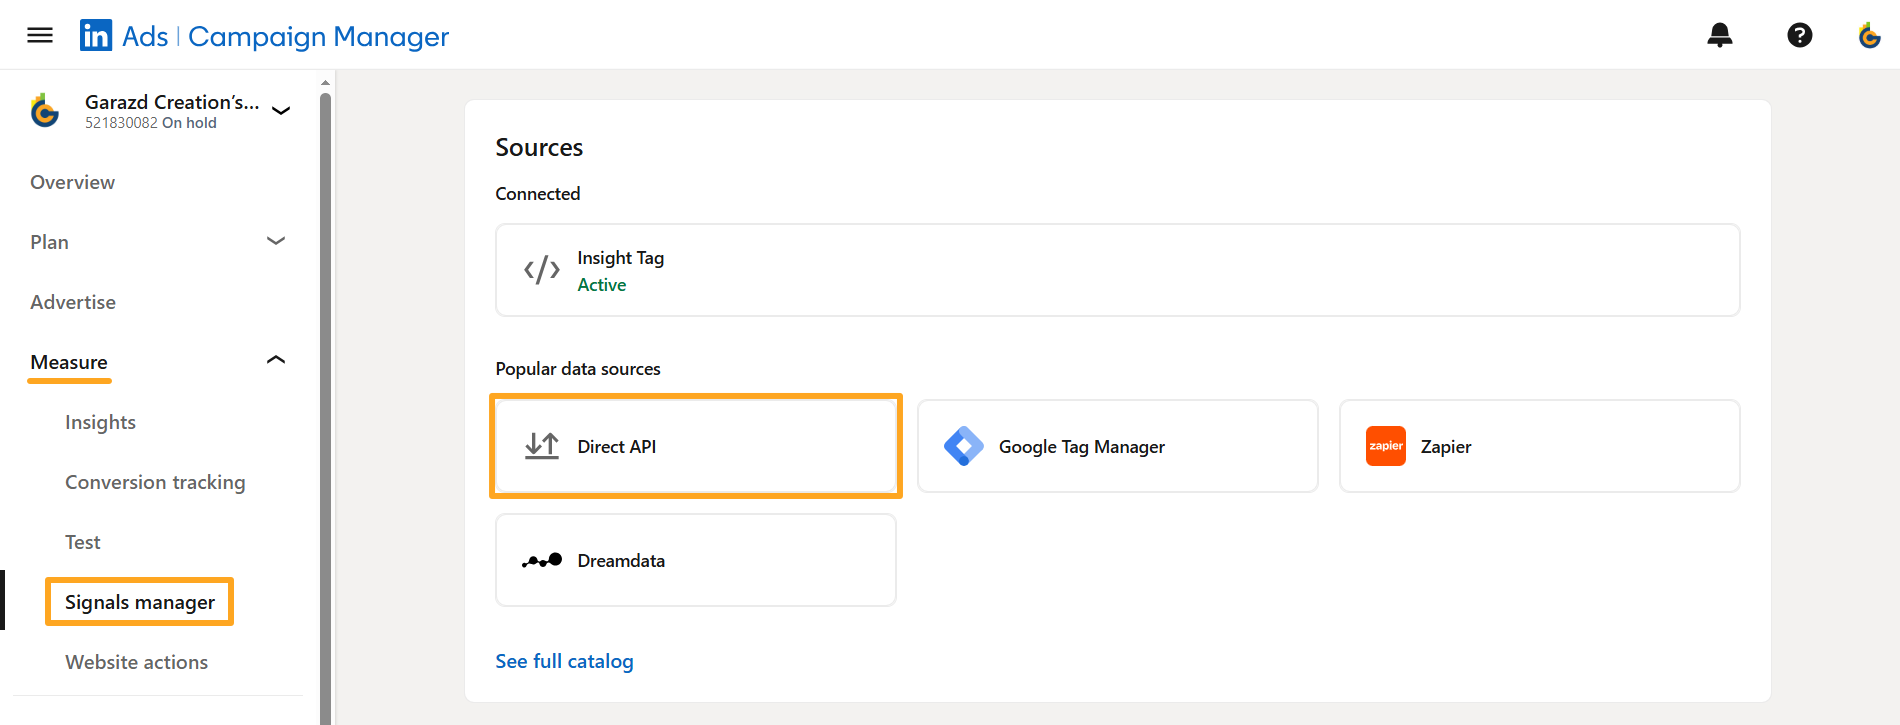
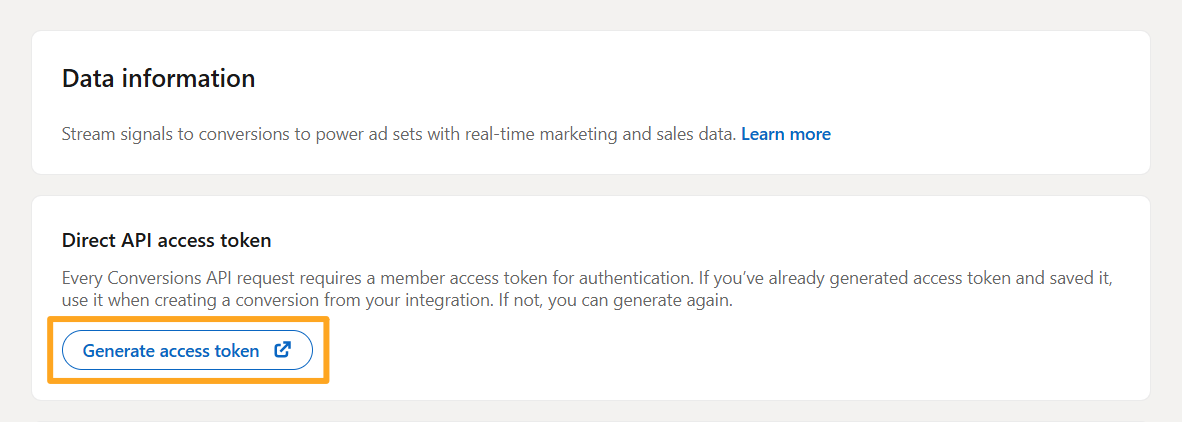
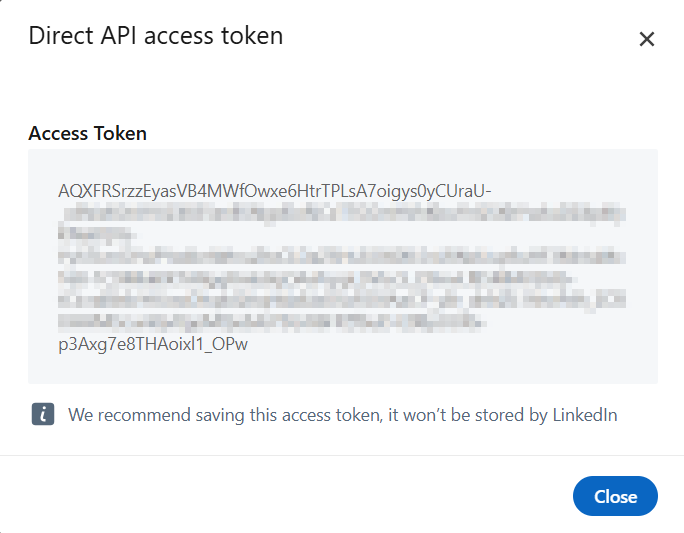
To generate an access token in LinkedIn Ads, follow these steps.
-
01Go to Measure — Signals Manager — Direct API
-
02Click Generate Access Token
-
03Copy the token from the pop-up window

Conversion Setup
To analyze conversions for your LinkedIn ad campaigns, set up tracking data delivery from Odoo via the API. Create a conversion, retrieve its ID in LinkedIn Ads, and link the conversion to a custom event in Odoo.
Creating a Conversion in LinkedIn Ads
To create a conversion:
-
01Log in to your LinkedIn Ads account
-
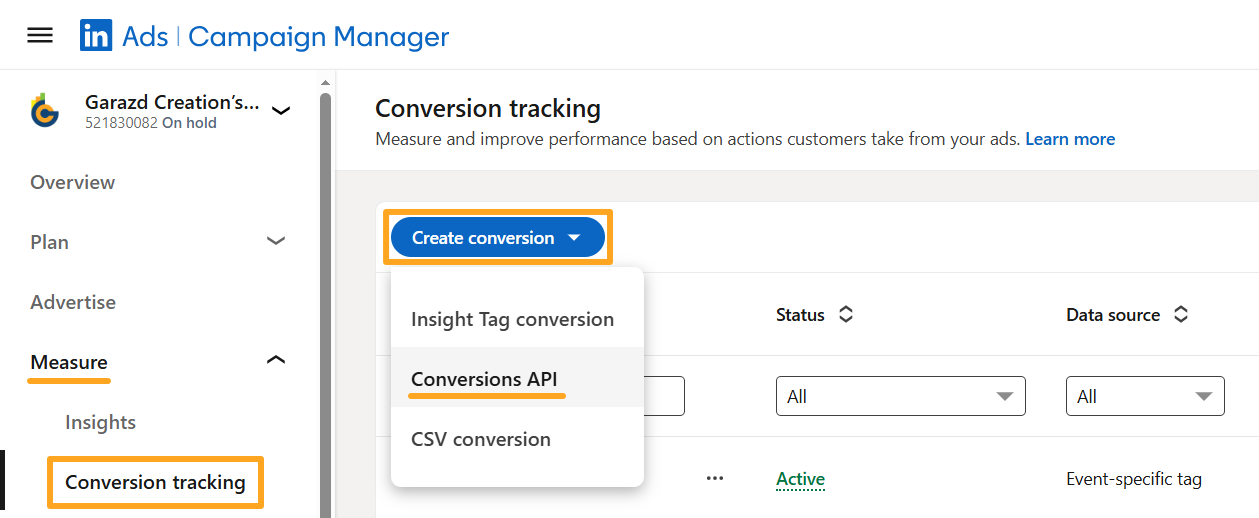
02Go to Measure — Conversion Tracking
-
03Click Create Conversion — Conversions API
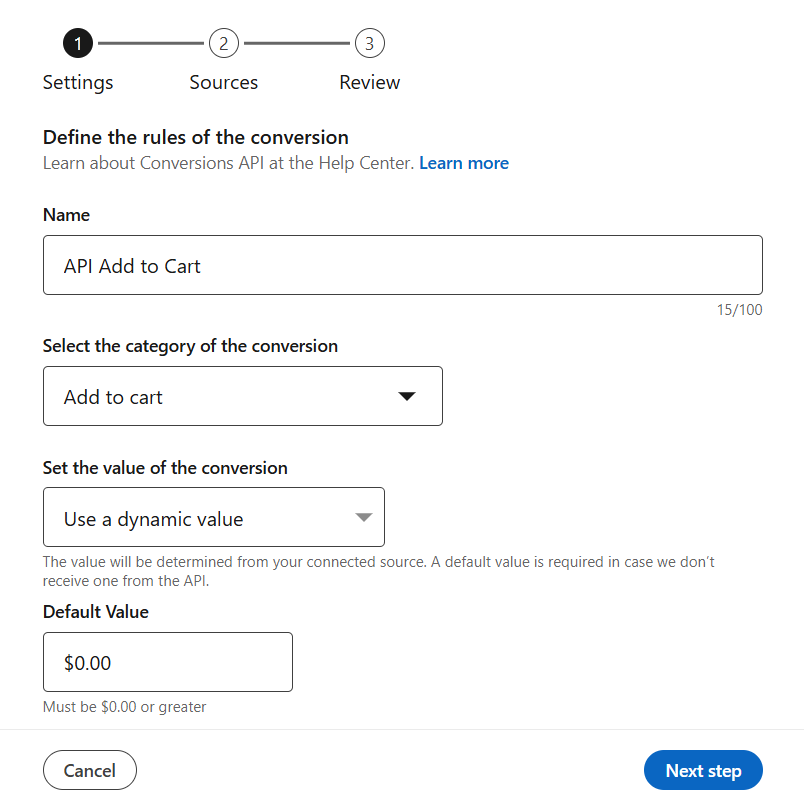
Fill in the form:
- Enter a Name for the conversion
- Select a conversion Category
- Configure the conversion Value
- Adjust other settings according to your requirements
In the next step, select Direct API integration.
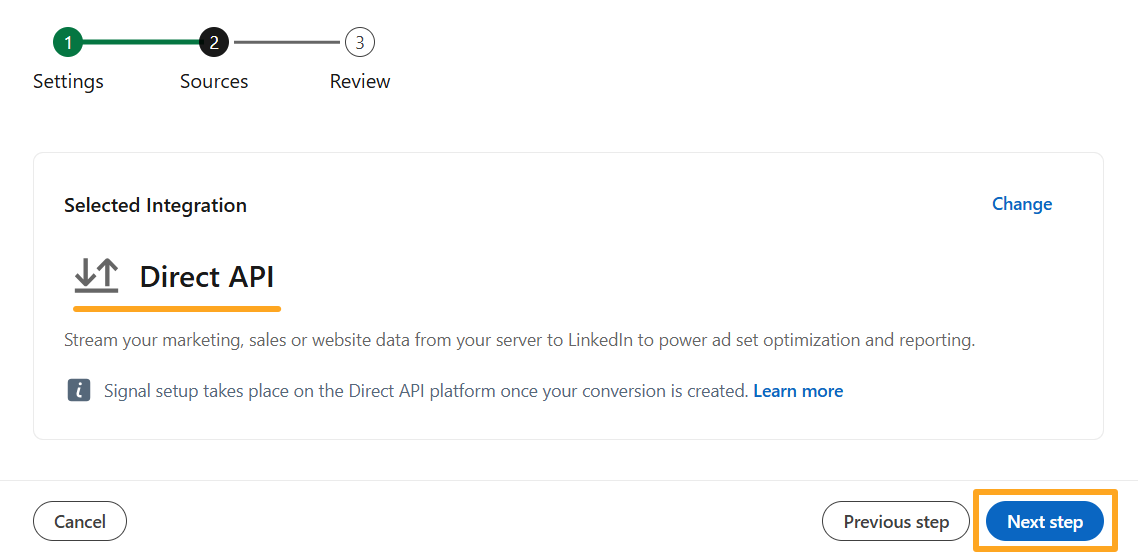
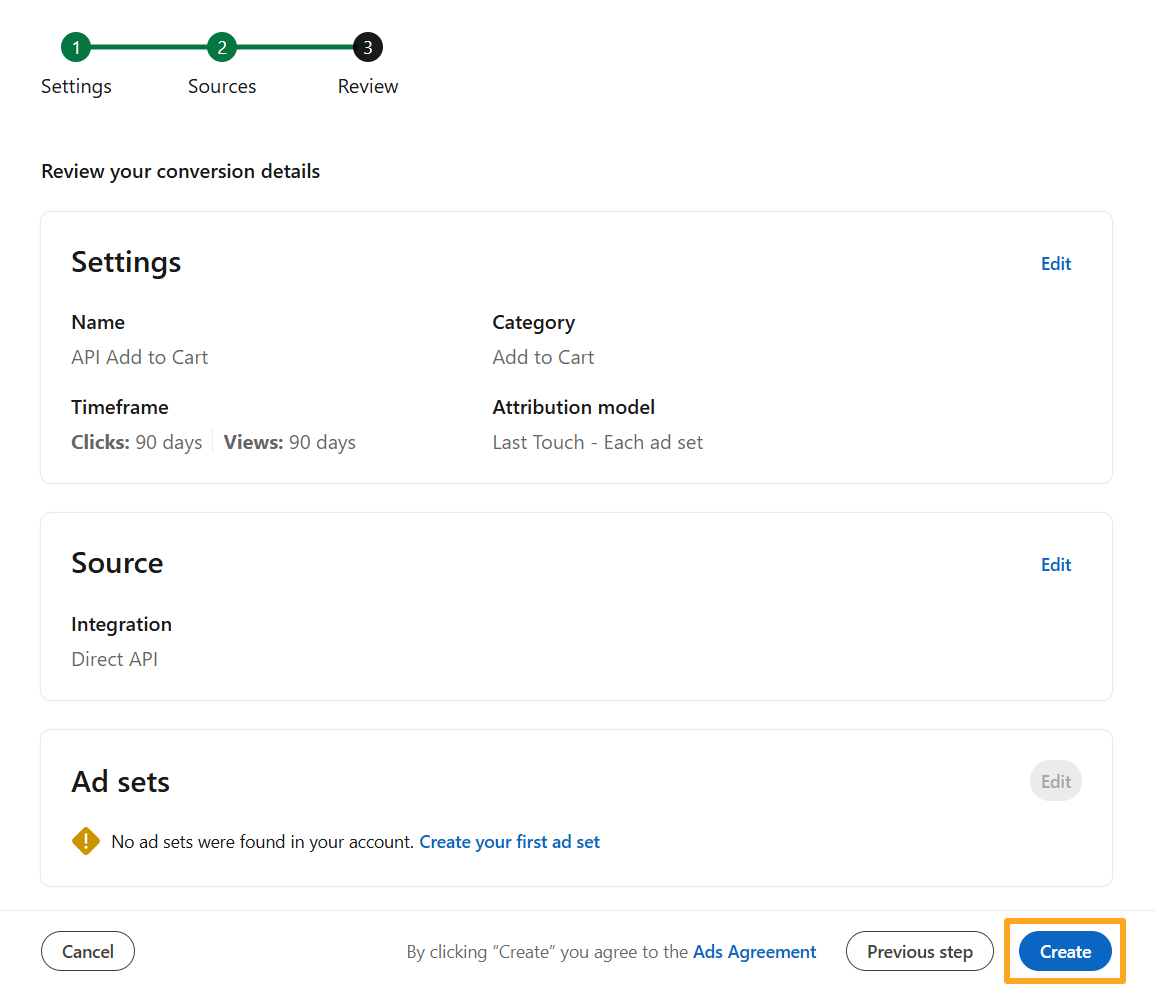
Click Create on the last step.
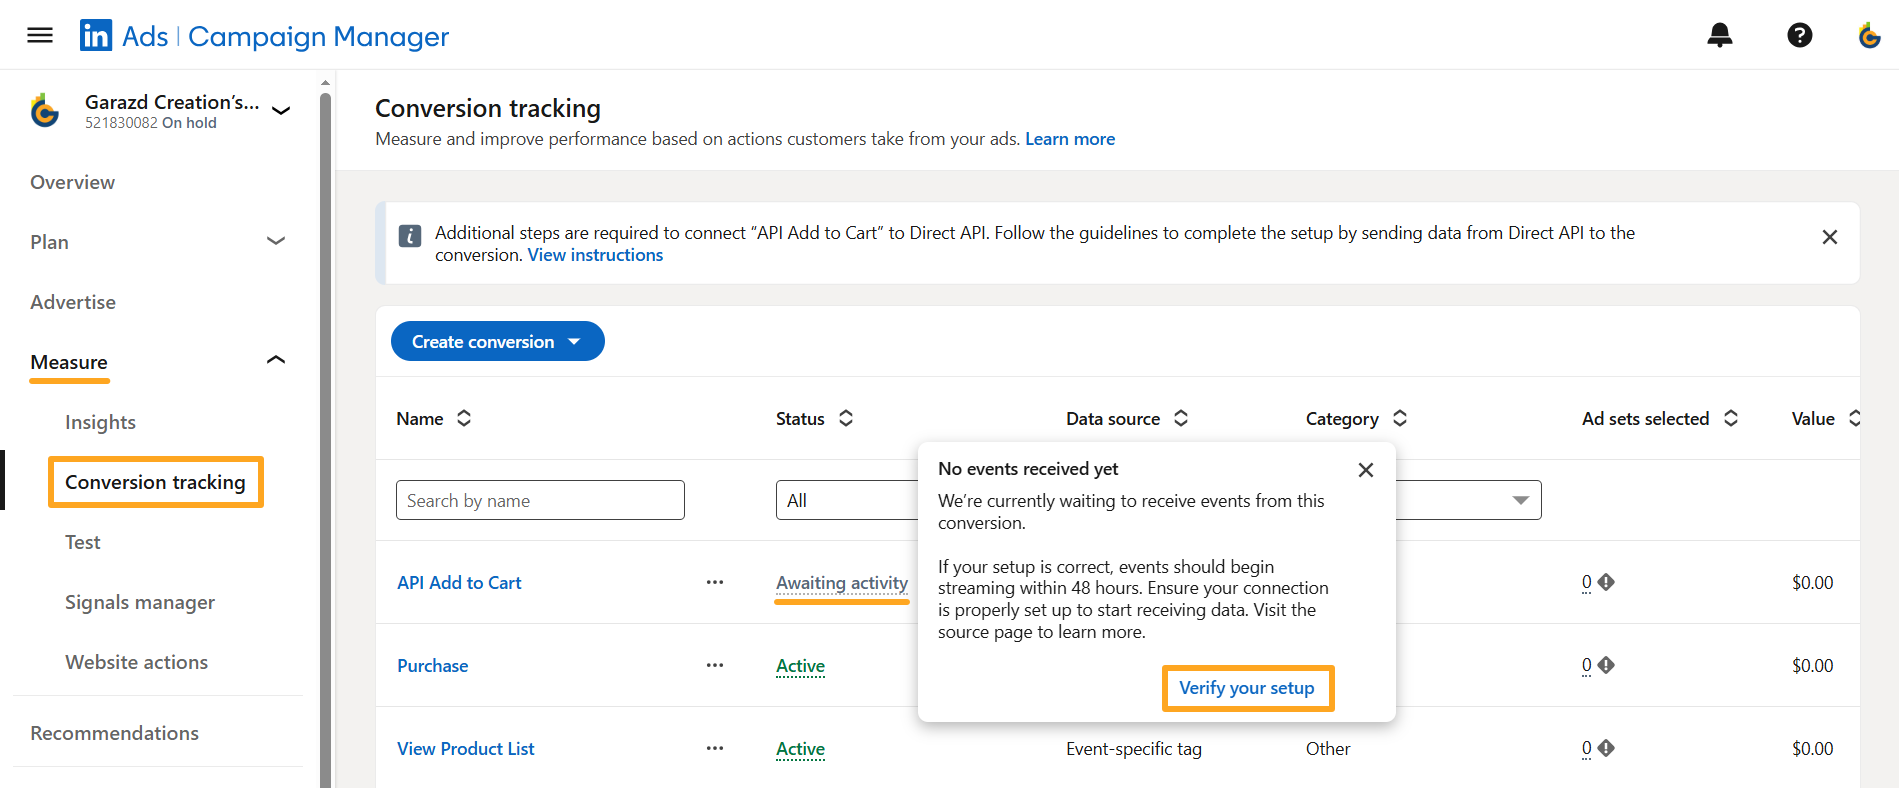
Click the status of the newly created conversion, and click Verify your setup.
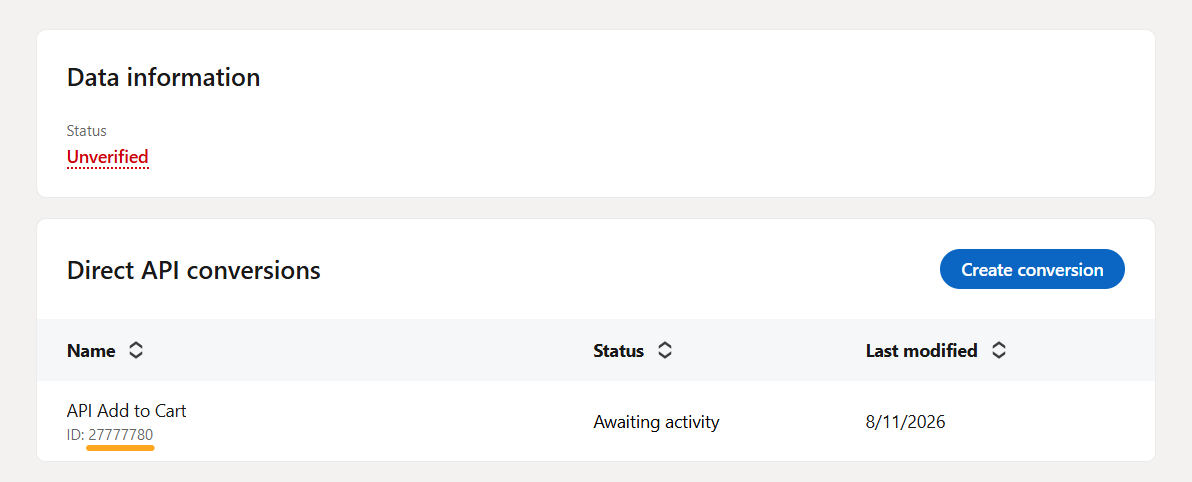
Copy the conversion ID.
Creating a Custom Event in Odoo
To create a custom event in Odoo and link it to a LinkedIn conversion:

-
01Open the LinkedIn Conversions API tracking service on the Custom Events tab
-
02Click Add a Line
-
03Select the tracking event Type
-
04Enter a Name for the custom event
-
05Paste the copied conversion ID from LinkedIn Ads

Sending Tracking Data
Internal logs record visitor actions on your Odoo website. The LinkedIn Conversions API sends only Odoo custom events that are mapped to configured conversions in LinkedIn Ads. The module transmits tracking data using Odoo scheduled actions.
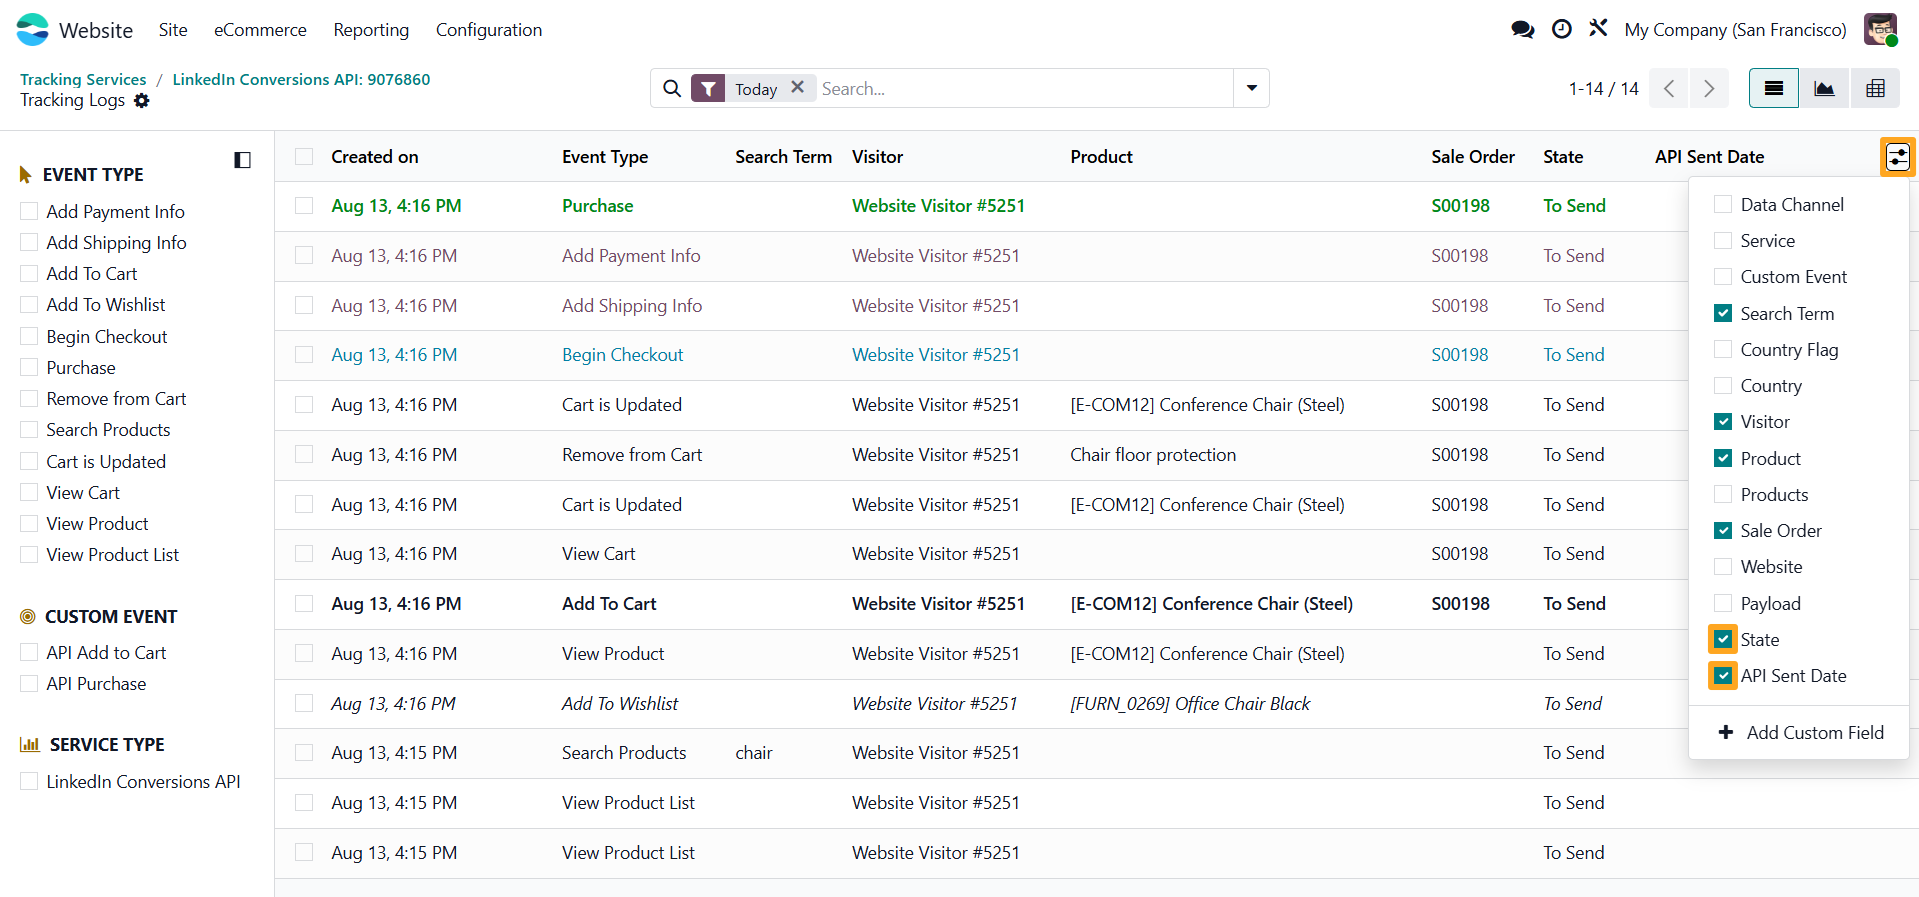
To view the service log, click the Logs button at the top of the form.

Enable the State and API Sent Date columns to display a status and the date of event sending to LinkedIn Ads through the Conversions API.
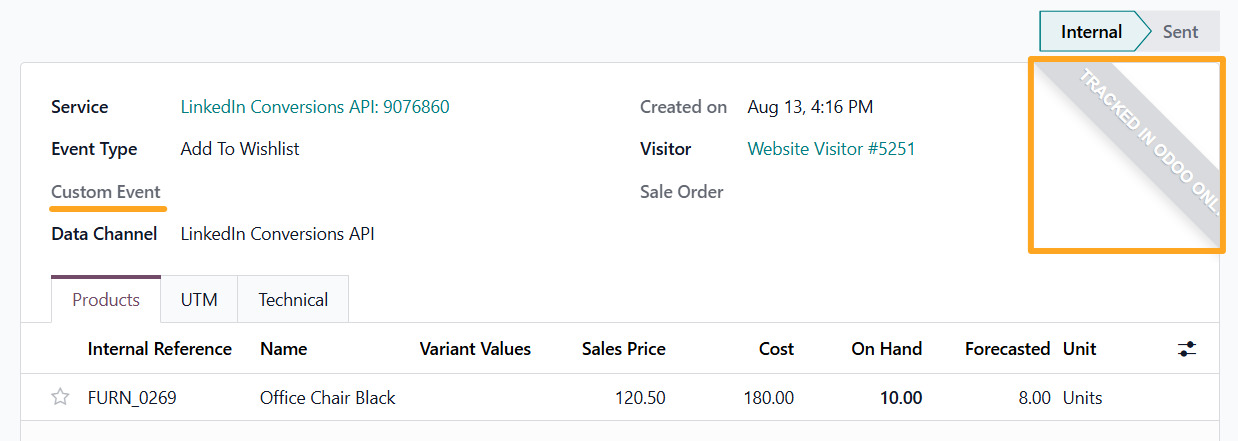
Events that are not configured as custom events are not sent via the API and are labeled Tracked in Odoo Only.
Scheduled Actions
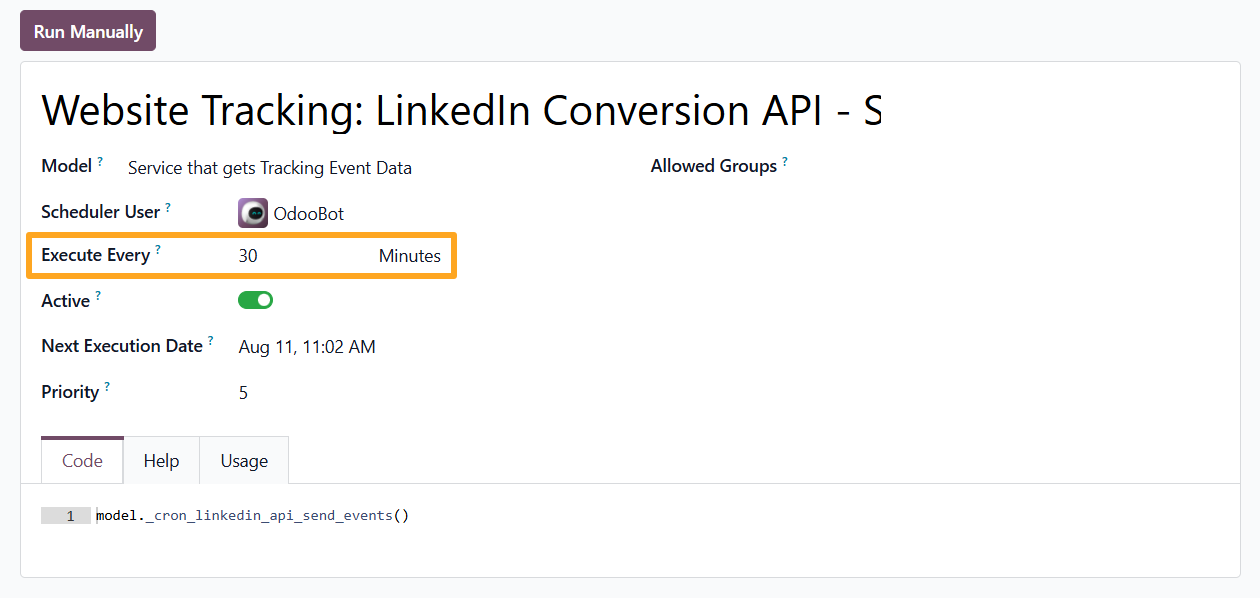
Odoo scheduled actions send tracking events at a set interval (every 30 minutes by default). You can adjust this interval based on your workflow.
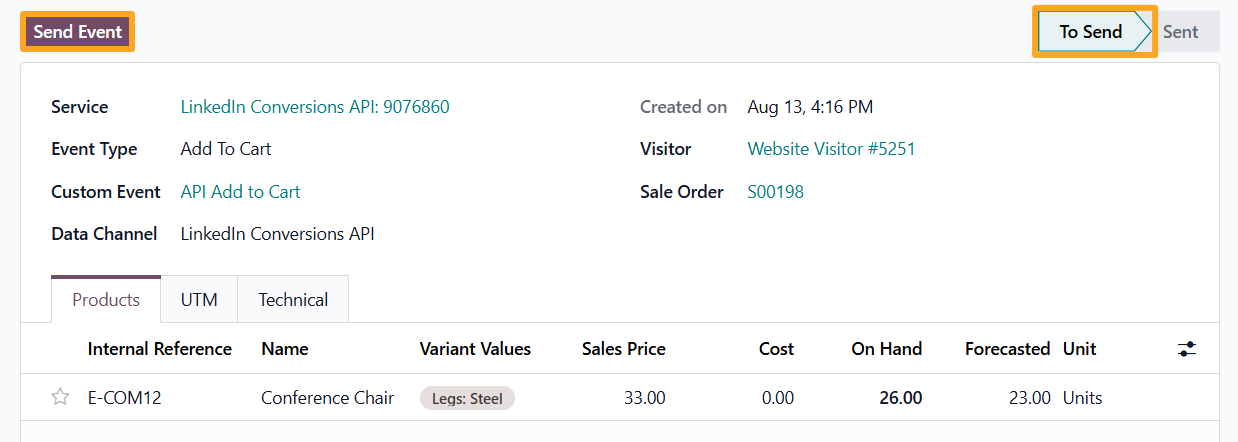
To send tracking data manually, select event log records from the list or open an individual record and click Send Event.
Cleaning Sensitive Data
Because tracking logs contain sensitive data (such as IP addresses), configure a cleanup schedule. Go to the website settings and set the cleaning period. The default period is 30 days.
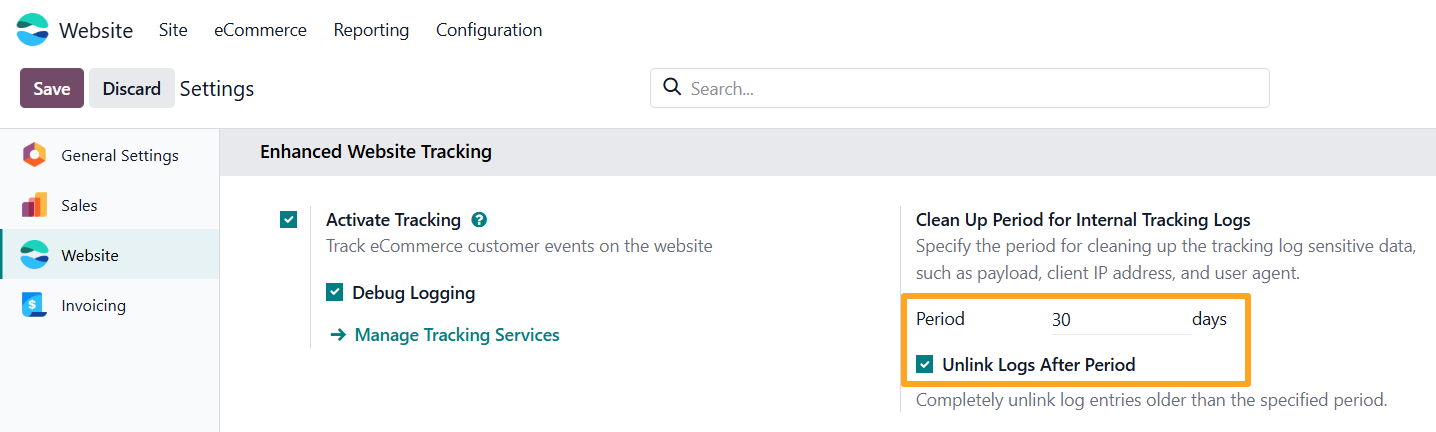
Enable the Unlink Logs After Period option to completely remove tracking logs older than the specified period.

Enhanced Conversions
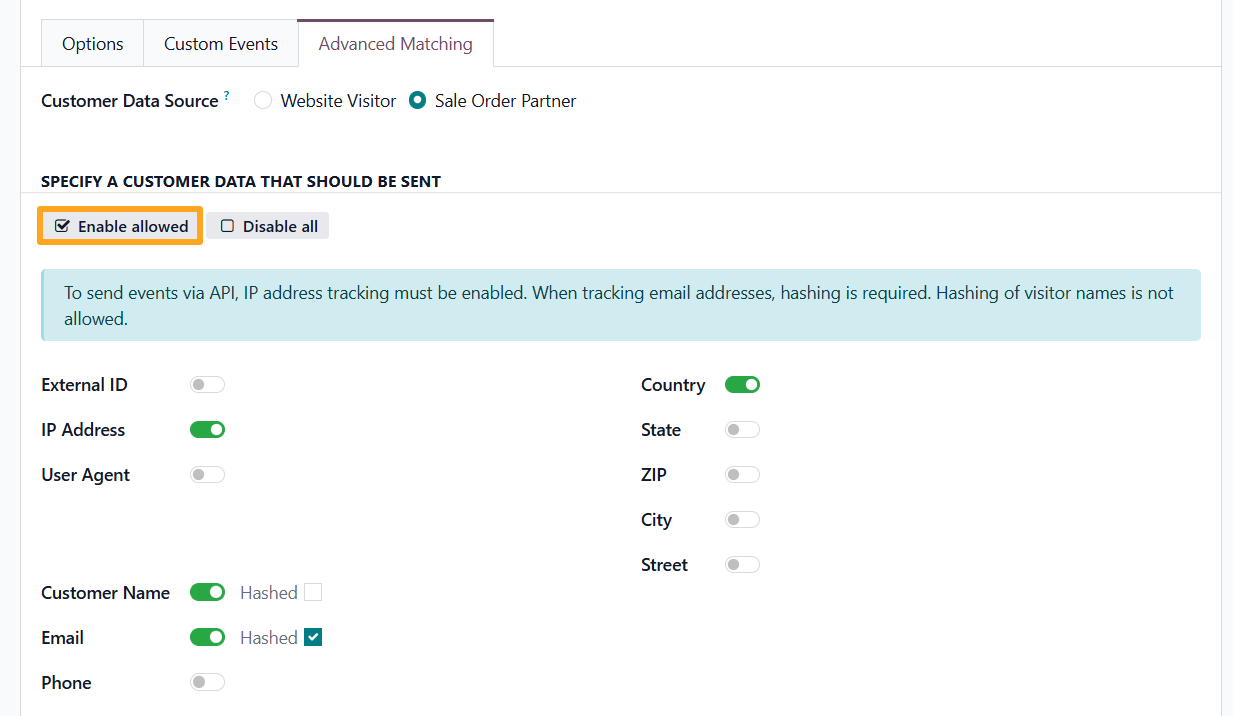
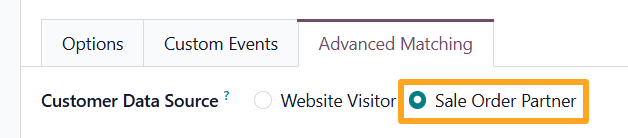
Enhanced conversion tracking optimizes your ad performance by providing LinkedIn Ads with user data. Open the LinkedIn Conversions API tracking service on the Advanced Matching tab and click Enable Allowed to activate all available options for this service.

Advanced Settings
The module includes additional settings available in Developer Mode.
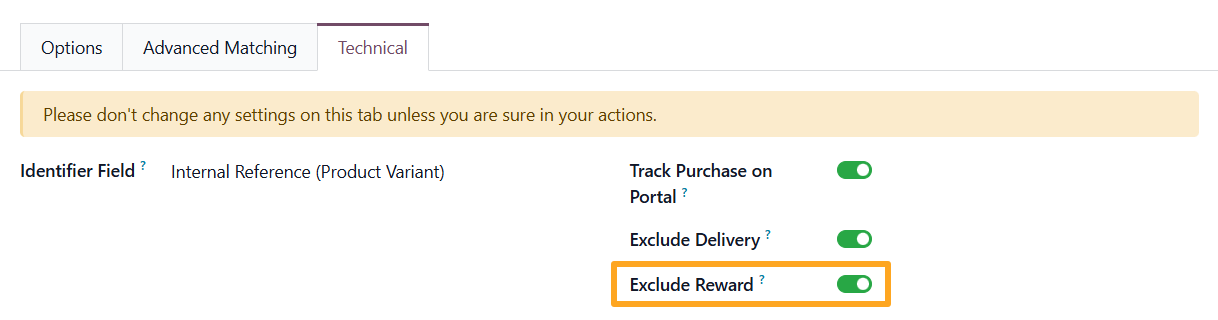
Product Identifier
The module uses the Product ID field as a unique product identifier. To use a different value, specify another product field containing the desired identifier on the Technical tab:


Purchase on Portal
To track portal purchases, enable the Track Purchase on Portal option:

Exclude Delivery
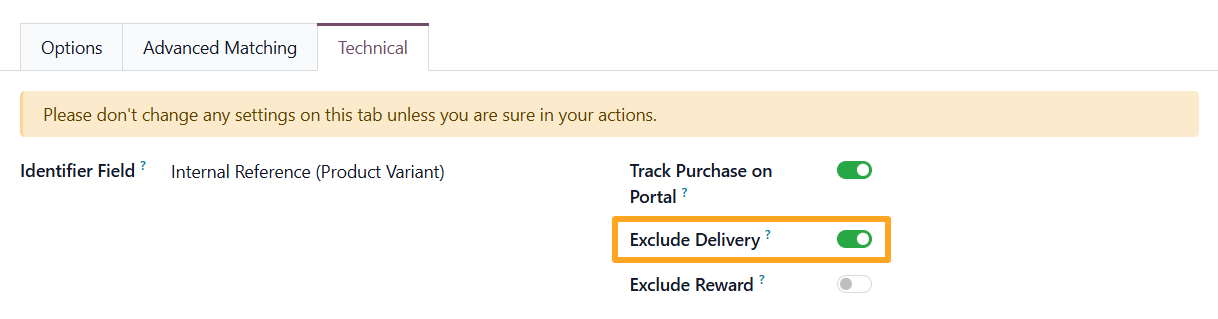
The next available setting for tracking services is Exclude Delivery. When enabled, the service excludes delivery lines from sales orders in tracking data transmissions:
Exclude Rewards
To exclude reward order lines from tracking data, enable the Exclude Reward option:
Add to Cart
By default, the module tracks the actual addition of a product to the cart. To track the event upon clicking the button without waiting for the actual addition to the cart, perform the following steps:
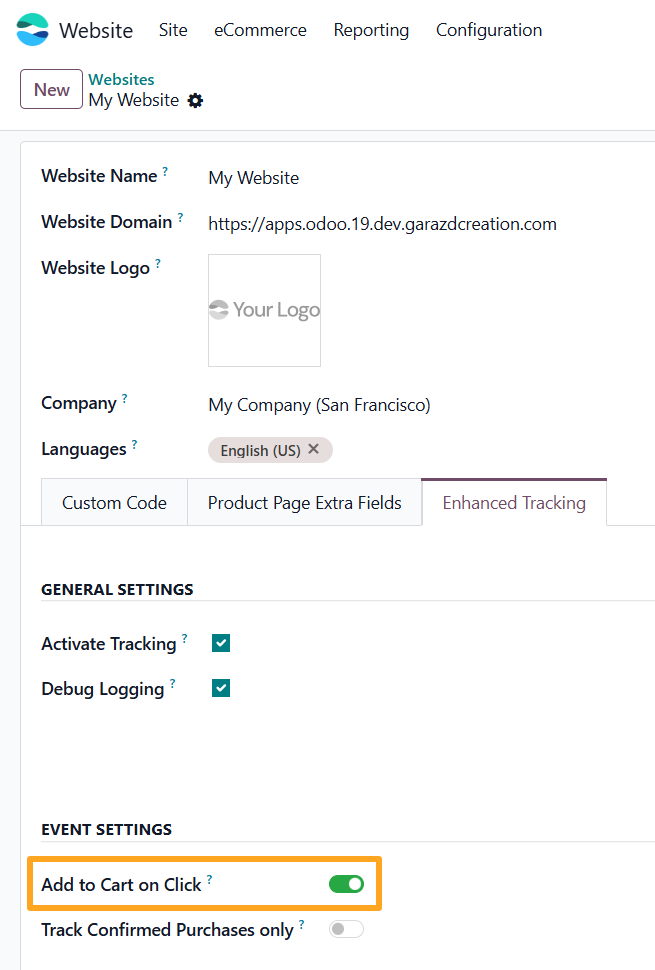
- Navigate to Website — Configuration — Websites
- Open the website on the Enhanced Tracking tab
- Enable the Add to Cart on Click option

Purchase
To track purchases only after a successful payment transaction, enable the Track Confirmed Purchases only option:
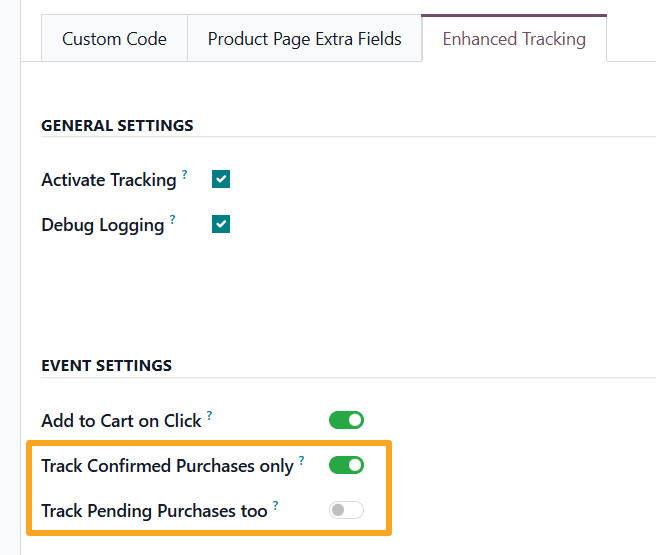

If business logic considers an order with a Pending payment status as a purchase, enable the Track Pending Purchases too option as well.

Testing
Test the LinkedIn Conversions API integration by waiting for automated scheduled transmission or by manually sending events and verifying the conversion status in LinkedIn Ads.
To test tracking, perform an e-commerce action on your website as a visitor or portal user. Open the event log in the LinkedIn Conversions API tracking service and click Send Event manually.
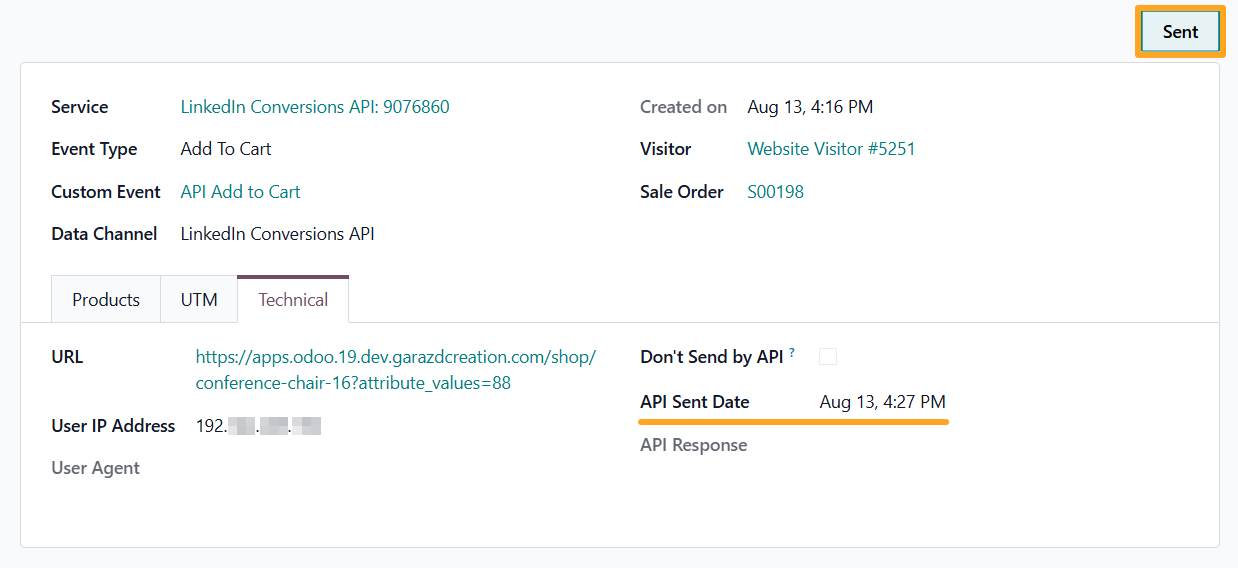
If the status changes to Warning or Error, open the event log on the Technical tab and check the API Response field for details.
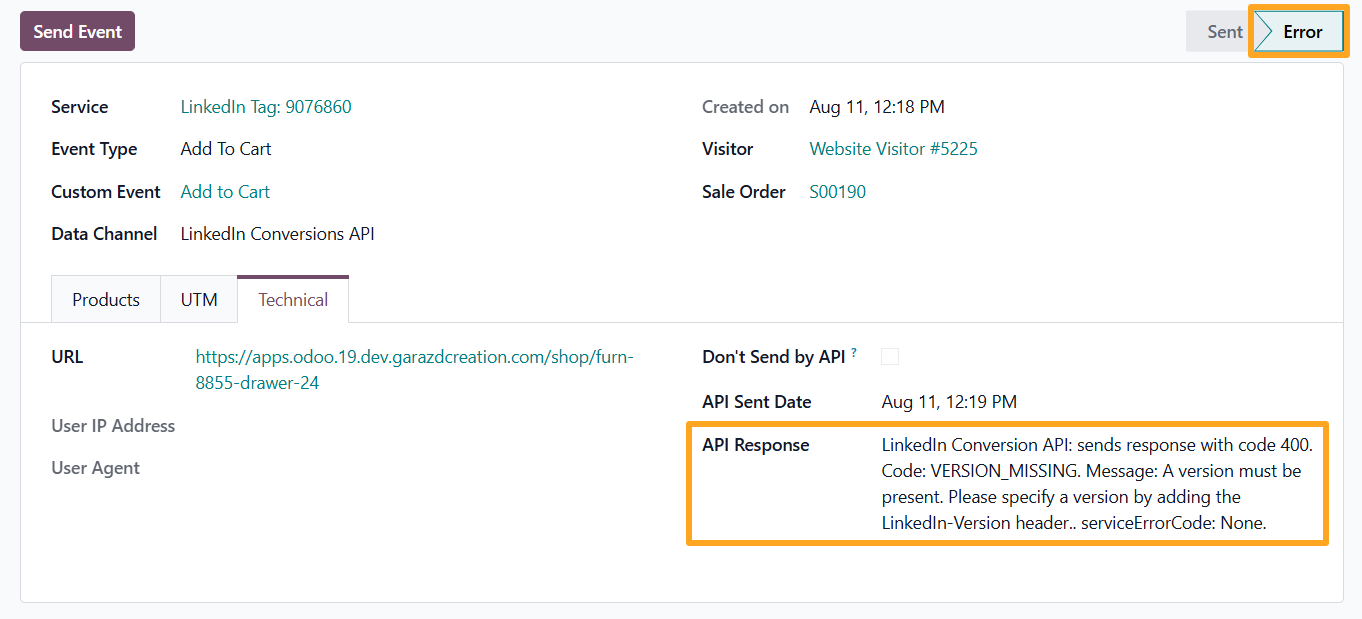
A Sent status confirms that the event was successfully sent via the Conversions API.
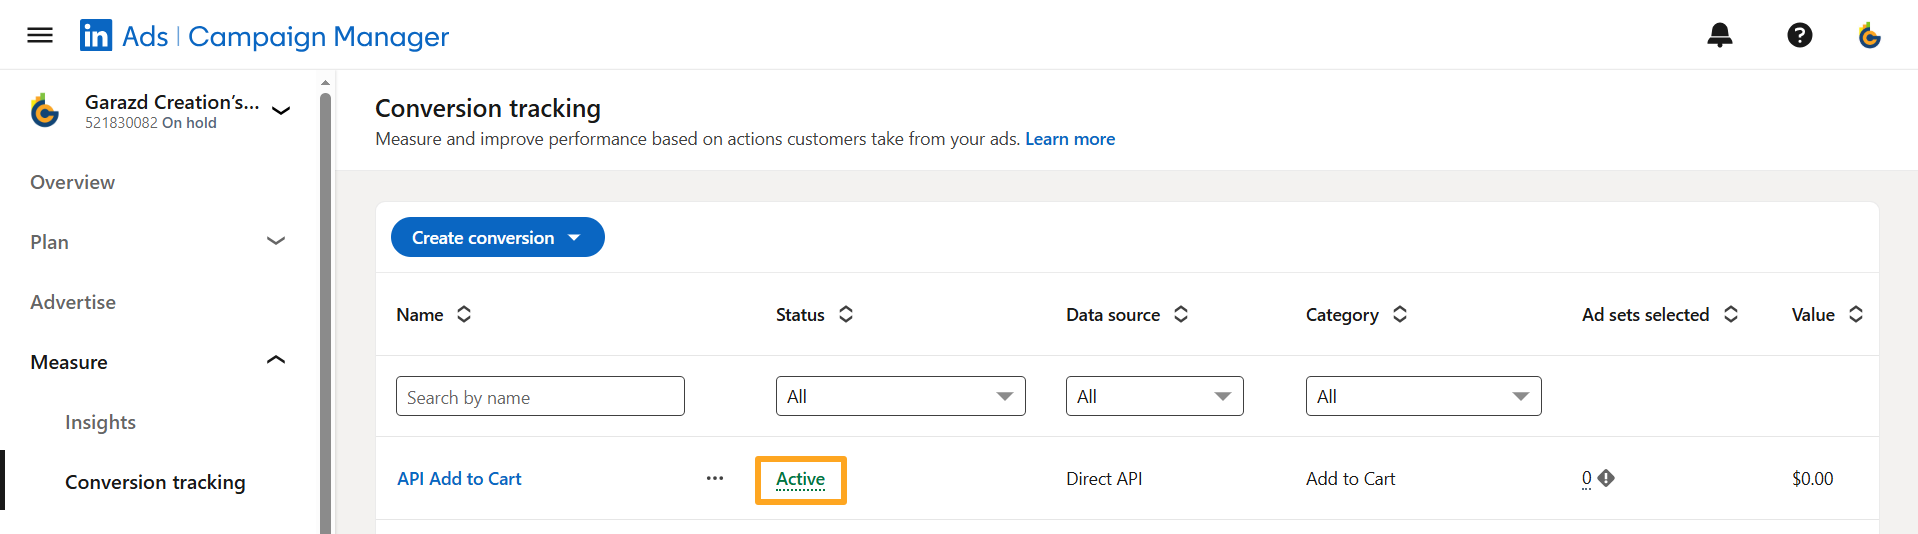
In your LinkedIn Ads account, go to Measure — Conversion Tracking and verify that the conversion status displays as Active.
Changelog
19.0.1.0.0 2026-05-15
- Init version.
20.0.1.0.0 2026-09-28
- Migration from 19.0.